Recipes

Biscuits and Gravy Casserole

(All posts may contain affiliate links or sponsored content. Please see my disclosure policy)

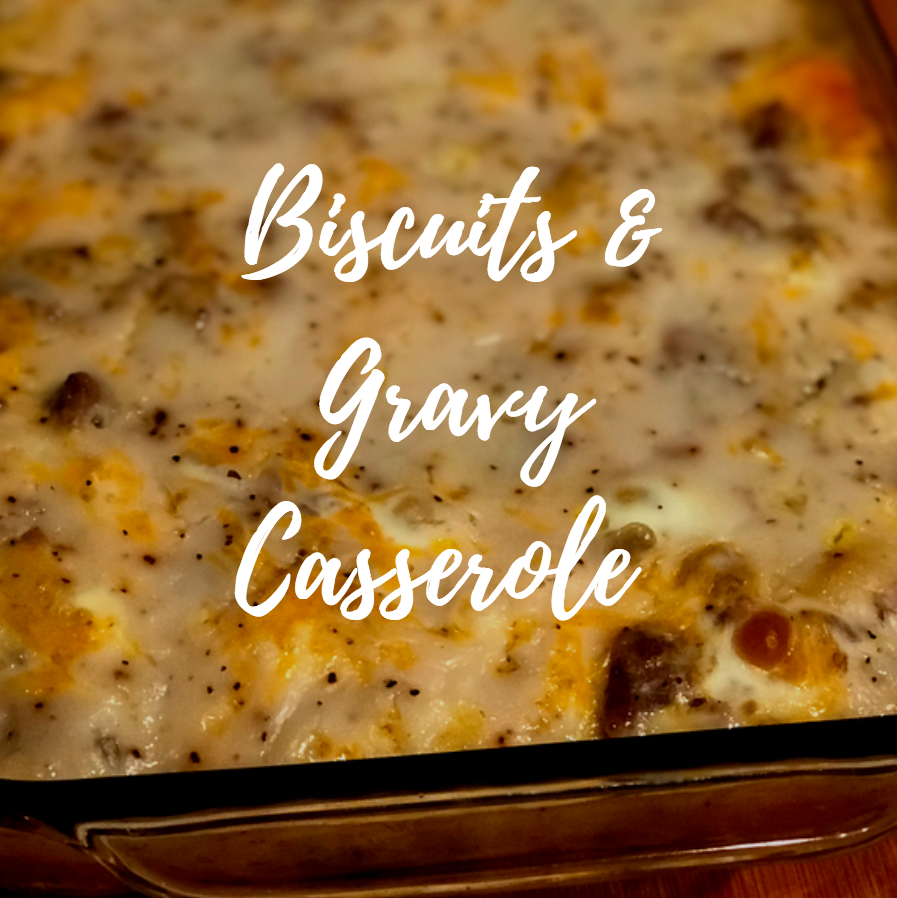
There’s nothing more comforting to me than a big plate of biscuits and gravy. YUM! There are even some nights that I will make this for dinner with a big bowl of scrambled eggs and we are all happy campers in this household! I recently came across this recipe for Biscuits and Gravy Casserole and I am sold! It is so delicious and super easy. Once I made it , I knew that I had to share with you all here on the blog. This would also be great to make for a church potluck or even Christmas morning!

Biscuits and Gravy Casserole (recipe adapted from Miss Information)

Ingredients

1 16oz. package of breakfast sausage

1 16oz. can Pillsbury Grands biscuits

1 packet of Country Gravy mix

1 1/2 cups Cheddar Cheese

6 eggs

1/2 cup milk

salt/pepper to taste

Directions

Preheat oven to 350 degrees.

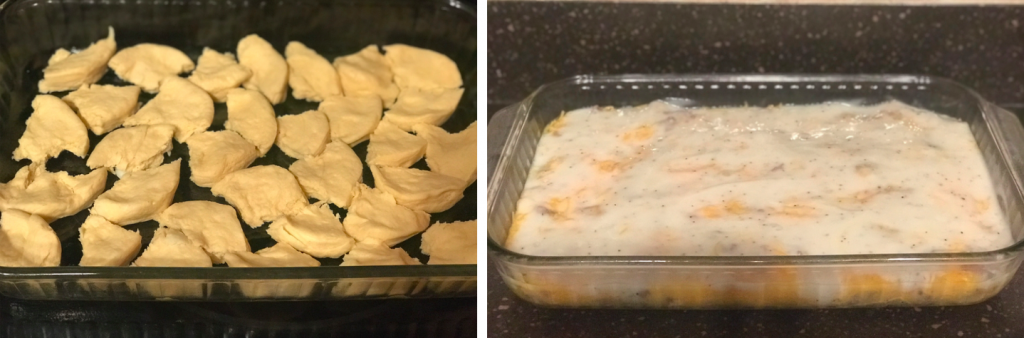
Spray 9×13 baking dish and set aside.

Cook sausage. While sausage is cooking, take the biscuits and cut each one into 5-6 pieces and place into the greased baking dish. Place the cooked sausage on top of the biscuit pieces.

Sprinkle with the cheddar cheese.

Whisk the 6 eggs and milk together and season with salt/pepper. Pour over the biscuits and cheese.

Prepare the gravy mix according to the packet and drizzle on top of the casserole.

Bake at 350 degrees for 30-45 minutes.

Enjoy!

Easy Garlic Bread Pizzas

(All posts may contain affiliate links or sponsored content. Please see my disclosure policy) 

If you are looking for a fun and easy lunch or dinner or even after school snack to make with your kiddos, Garlic Bread Pizzas are the way to go!  Just grab your favorite boxed garlic bread from the grocery store, top with your favorite regular pizza toppings, place in a 350 degree oven and voila! The possibilities are endless! My boys love pepperoni and cheese, but you could do whatever toppings that your family loves. I want to try olives and bacon the next time. What will you try on your garlic bread pizzas?

Peaches and Cream Pretzel Dessert

 (All posts may contain affiliate links or sponsored content. Please see my disclosure policy)

Do you remember that delicious Strawberry Salad Dessert that used to be so popular back in the day? To this day I love that dish so much! I decided to take my own spin on it and create something using Peaches instead. I am in love with peaches during the Summertime and this Peaches & Cream Pretzel Dessert did not disappoint! I also used Gluten Free pretzels to make the dish Gluten Free. The real beauty of this dessert is the fact that it is so versatile and you can change up the fruit to use whatever sounds good! I am going to try Blackberries next as that would be delicious too!

*If you love this recipe don’t forget to Pin it HERE.

Ingredients:

2 cups crushed pretzels (I used Gluten Free but you can use regular as well)

3/4 cup butter, melted

3 tablespoons white sugar

1 (8 ounce) package cream cheese, softened

1 cup white sugar

1 (8 ounce) tub of Cool Whip

2 (3-ounce boxes) of Peach flavored JELL-O

2 cups of boiling water

2 (10 ounce) bags of frozen peaches

Directions:

Mix together the melted butter, crushed pretzels and 3 tablespoons of sugar.

Press the mixture into the bottom of a 9×13 pan.

Bake for 8-10 minutes just until browned and set aside to cool.

In the meantime, beat together the cream cheese and sugar. Fold in the Cool Whip.

Spread the mixture out across the cooled Pretzel crust.

Dissolve Gelatin in the Boiling water. Stir in the Frozen Peaches and let them set very briefly. Continue to stir until mixture is about the consistency of egg whites. Take mixture and spoon over the top of the cream cheese layer. Place in refrigerator to let set. I would give it at least 3-4 hours to set up.

Enjoy! You could even add more Cool Whip on the top if you desire. Think about taking this to your next picnic or potluck! I guarantee that there will be none left!

(recipe inspired from AllRecipes.com)

Sausage and Cheese Stuffed Zucchini Boats #LowCarb #Keto

 (All posts may contain affiliate links or sponsored content. Please see my disclosure policy)

I don’t have to tell you that Keto and low-carb diets are all the fad these days. I have been trying to do the Keto thing and watch my carb intake for the past few weeks. In doing so, I have been finding that eating this way really is not that complicated. I made Sausage and Cheese Stuffed Zucchini Boats for dinner earlier this week and they are delicious! I made enough to have leftovers for lunch the next day- so easy yet so delicious and filling!

Ingredients:

4-6 zucchini washed and halved

1 jar marinara or pasta sauce

8oz. shredded mozarella cheese

1lb. cooked sausage

salt/pepper for taste

1/2 tsp. onion powder


Directions:

Preheat over to 350 degrees.

Scoop out the center of each of the halved zucchinis to make a “boat”.

Place in a greased baking pan.

Pour spaghetti sauce over each “boat”.

Spread cooked sausage and cheese evenly over each zucchini.

Sprinkle onion powder, salt and pepper over the entire dish.

Bake at 350 degrees for 15-20 minutes or until zucchini are tender and the cheese is bubbly.

Serve and enjoy! My entire family loved these!

Easy Chicken Pot Pie Recipe

(All posts may contain affiliate links and/or sponsored content. Please see my disclosure policy)

My mom has been making this homemade chicken pot pie for years, and now I make it for my guys! It is a go-to recipe that family asks for all of the time. Not only is it super easy and delicious, but you can also make it ahead of time and freeze it. I also whip up this recipe to take to friends who are sick or just because! I always get asked for the recipe and am happy to share my momma’s easy and delicious chicken pot pie!

Easy Chicken Pot Pie

Ingredients:

1 box of 2-count pre-made pie refrigerated pie crusts

2 cans of mixed vegetables

1 can of cream of chicken

2 cooked, seasoned chicken breasts, shredded (to save on time, I love to buy the rotisserie chickens and shred them)

salt/pepper for taste

onion powder for taste

Directions:

Preheat oven to 350 degrees.

Mix all the veggies, cream of chicken, shredded chicken salt and pepper and onion powder in a large bowl.

In a pie pan place one of the refrigerated pie crusts. Top the chicken mixture over the pie crust. Place the remaining pie crust on top of the veggie mixture. With a fork or knife, make sure to vent some areas in the top of the pie crust so that the steam can escape.

Bake for around 40 minutes or until pie crust starts to become brown and the chicken mixture is bubbly.

This yields one chicken pot pie. If you are going to use an entire rotisserie chicken, I would double the recipe and you could freeze one of the pies for later.

Serve and enjoy! We love to have this with a salad or fruit.

Prego® Cooking Sauces-Your Family’s New Favorite Pasta Optional Meal!

This is a sponsored conversation written by me on behalf of Prego®. The opinions and text are all mine.

We all lead super busy lives these days. We have demanding jobs, the kids are involved in sports and extracurricular activities, and the list goes on and on. The last thing that many of us have on our minds each morning is what we will be making for dinner that night. You are sure to put a big smile on your family’s face when you bring home a new family favorite with Prego® Cooking Sauces!

There’s no reason to wait for pasta night to bring everyone around a delicious Prego® family meal. All you need is chicken, 20 minutes, and Prego Cooking Sauce to create your family’s new favorite meal. The best part about Prego Cooking Sauces? They are pasta optional! We can enjoy “pasta night” more often without having to serve pasta – “just add chicken”.

Prego Cooking Sauces are available in three delicious va

online pharmacy buy bactrim online with best prices today in the USA

rieties at your local Publix. Choose from Creamy Lemon Parmesan, Creamy Marsala, and Tomato & Fresh Ricotta. You are sure to be the hero of the dinner table when you stock up your pantry with these delectable Prego Cooking Sauces with the BOGO sale now through 8/3/2018. Head on over to Publix.com where you can check out all of the details!

My family and I enjoy lemon and Parmesan, so we were excited to try the Creamy Lemon Parmesan Prego Cooking Sauce that I picked up at my local Publix. Every bite was packed full of cream, Parmesan cheese, garlic and lemon. So delicious!

Using the Prego Cooking Sauce couldn’t

online pharmacy buy bupropion online with best prices today in the USA

be easier and did I mention that it is ready in just 20 minutes? I browned 1lb. chicken with 1tbs. of olive oil in a non-stick skillet until it was browned on both sides then added the 15oz. jar of Creamy Lemon Parmesan Prego Cooking Sauce. I simmered for 20 minutes, and voilà, dinner was ready! While the chicken was simmering, I roasted some asparagus with lemon zest and shallots in the oven at 375 degrees for 15-17 minutes. Asparagus makes the perfect compliment to lemon and Parmesan and it was definitely a hit with my guys paired with the Creamy Lemon Parmesan Prego Cooking Sauce!

No matter which variety of Prego Cooking Sauce that you choose, you are sure to have a new family favorite pasta optional meal!

Chocolate Raspberry Brownie Cheesecake Trifles with Miss Jones Baking Co.

Disclosure: As a brand ambassador, I received products to facilitate this post. All thoughts and opinions are my own. Please see my disclosure policy)

I was recently given the wonderful opportunity to become a Baker Babe Brand Ambassador with Miss Jones Baking Co. This awesome company based in San Francisco, California offers homemade-tasting organic cake, brownie and cookie mixes and frostings. Everything that they make features simple, non-GMO ingredients, no hydrogenated oils or trans fats, no artificial flavors or colors. 

As a brand ambassador, I was sent several products so that I could create some amazing goodies and share them with you all! I wanted to think out of the box with these delicious products and thought that a trifle would be a great dessert for summertime! For my Chocolate Raspberry Brownie Cheesecake Trifles, I used Miss Jones Baking Co. Fudgy Brownie Baking Mix and the Miss Jones Chocolate Frosting Made with Coconut Oil. With a few extra additions, I ended up with the most delicious and decadent dessert that you could ever sink your teeth into!

Ingredients:

1 box Miss Jones Baking Co. Fudgy Brownie Baking Mix

1 tub Miss Jones Chocolate Frosting Made with Coconut Oil

2 eggs

2T. water

1/2 cup vegetable oil

1 8oz. brick softened cream cheese

1 pint of raspberries

Mason Jars trifles

Directions:

Preheat oven to 350 degrees. In a large mixing bowl, mix together the brownie mix, eggs, oil and water. Grease a 8×8 baking pan and pour batter in pan. Bake for 33-37 minutes or until center is set with a toothpick. Take out of oven and set aside to cool.

While brownies are cooling, take the tub of Miss Jones Chocolate Frosting and place inside a large mixing bowl with the brick of softened cream cheese. Beat on low with a mixer until nice and fluffy. Set aside.

Now that brownies are cooled, cut them into small squares to fit into the mason jars. Take a spoonful of chocolate cream cheese mixture and place in a mason jar. Top with a brownie square and add raspberries on top. Keep alternating back and forth. Make sure that you end with chocolate cream cheese mixture and raspberries on top. You can even shave some chocolate on the top for a nice touch.

Enjoy! I hope that you love Miss Jones Baking Co. products as much as I do!

Stay tuned as I will be sharing more of their delicious products with you in the next months! In the meantime, be sure to follow Miss Jones Baking Co. on Instagram, Facebook, Twitter and Pinterest. Don’t forget to check out their website HERE for a delicious lineup of products and location finder.

Lemon and Shallot Roasted Asparagus

(All posts may contain affiliate links or sponsored content. Please see

online pharmacy buy abilify with best prices today in the USA

my disclosure policy)  

One of my favorite veggies of recent has been asparagus. There is something about it that

online pharmacy buy xenical with best prices today in the USA

screams summertime and fresh. I wasn’t sure that my boys would enjoy it, but when I roast it in the oven, they seem to gobble it up! One of favorite ways to roast asparagus is with fresh lemon peel, shallots and olive oil. Yum!

Lemon and Shallot Roasted Asparagus

Ingredients:

1 bunch of fresh asparagus with the ends cut off

1 lemon zested

1 small shallot sliced finely

salt/pepper to taste

olive oil

Directions:

Preheat oven to 375. Place the asparagus on a baking sheet with the lemon zest and shallots. Drizzle with olive oil just enough to coat. Sprinkle with salt and pepper. Roast in the oven for around 15-17 minutes or until the asparagus is tender. Serve and enjoy! I could eat this every day!

Homemade Pimento Cheese Spread #KetoFriendly

(All posts may contain affiliate links or sponsored content. Please see my disclosure policy)  

I don’t know about you, but I think that there is something comforting and delicious about a yummy dish of homemade pimento cheese spread. I mean, every good southern girl has at least one Pimento Cheese recipe in her repertoire, right? Here is recipe that I have been making for awhile now that is not only delicious, but is also great for those on Keto and low-carb diets.

Homemade Pimento Cheese Spread

(recipe adapted from Big Bear’s Wife)

Ingredients:

1 8oz. package of softened cream cheese

2 cups shredded cheddar cheese

1/2 cup mayonnaise

1/2 tsp. garlic powder

1/2 tsp. onion powder

1/2 tsp. dried mustard

4oz. diced drained pimentos

1 teaspoon Worcestershire sauce

Directions:

In a large bowl, mix the cream cheese and shredded cheddar cheese together with an electric mixture. Add in the mayonnaise and mix together. Add in the dry spices and the Worcestershire sauce and stir everything together. Fold in the pimentos. Refrigerate for at least one hour until serving. I love to serve with Whisps for a low carb or keto-friendly snack. This is so delicious and you will not be able to eat just one helping!


Swerve Sweetener Review + Lemon Butter Cakes Recipe

Disclosure: I was provided with products to facilitate this review. All thoughts and opinions are my own. Please see my disclosure policy)

As someone who strives to live a healthy lifestyle, I am always on the lookout for products to incorporate in my recipes that will not only make them taste great, but that are also a great substitute for other products that may be sugar-laden, higher in fat, calories, etc…. I feel that I hit it out of the ball park with Swerve Sweetener! These products are also perfect for Low Carb, Ketogenic diets! Have you tried Swerve before? I would love to hear your thoughts!

Swerve Sweetener is zero-calorie, non-glycemic and measures cup-for-cup like sugar. It’s sweet, safe and natural. Out of all the sweeteners that I have ever used before, Swerve is by far by the best-tasting sugar replacement product that I have found. So many of the other Stevia products on the market leave an aftertaste in your mouth. Not Swerve! It tastes just like sugar and bakes likes likes sugar so baking is a breeze! 

How does Swerve get its sweetness? Swerve is made from ingredients found in select fruits and starchy root vegetables, and contains no artificial ingredients, preservatives or flavors. It’s zero-calorie, non-glycemic and safe for those living with diabetes, since it has no effect on blood glucose or insulin levels.

Swerve has many products in their lineup, but my 2 favorites that I use all of the time are the Swerve Sweetener Granular and the Swerve Sweetener Confectioners. These 2 products have revolutionized my life and have replaced all of the other sugars in my pantry! I love that Swerve also has a confectioners product so that I can make homemade frostings and

online pharmacy order strattera online with best prices today in the USA

glazes for my cupcakes and muffins!

Swerve was so gracious to send me several bags of granular and confectioner’s sugar and I was excited to try one of the recipes from their website. There is something about this time of the year that has me loving all things lemon so I made the Lemon Butter Cakes. These cakes were so moist and sweet. You definitely would have no idea that there is no sugar in them if I had not told you! Everyone who tasted them told me how delicious that they were. They were a hit with everyone in my house so that was a win in my book!

Lemon Butter Cakes

Ingredients:

  • 1 1/2 cups almond flour
  • ¼ cup coconut flour
  • 1 tsp xanthan gum
  • 1 TBSP baking powder
  • ½ tsp salt
  • ½ cup butter, softened
  • 1 cup Swerve, Granular
  • 4 large eggs, room temperature
  • 1 tsp vanilla extract
  • 1 cup unsweetened almond milk or milk
  • 2 TBSP lemon zest (1 lemon)
  • 2 TBSP lemon juice (4 large lemons) or 2 tsp lemon extract
  • 6 drops of yellow food coloring to help give the cakes a stronger yellow coloring

Glaze:

  • ¼ cup of Swerve, Confectioners
  • 2 TBS of fresh lemon juice
  • ½ -1 teaspoon lemon zest

Directions:

  1. Preheat the oven to 350°F. Place cupcake liners in cupcake pan or excessively butter the entire cupcake pan.
  2. In a medium bowl, whisk together the almond flour, coconut flour, baking powder, xanthan gum and salt. Set aside.
  3. In a large bowl on medium high to high speed, beat butter with Swerve until light and fluffy, about 5 minutes. Beat in eggs, food coloring, and vanilla extract until blended. On low speed, beat in half of the almond flour mixture. Beat in milk, and then the remaining almond flour mixture until combined. With a spatula, mix in lemon juice and lemon zest.
  4. Divide the batter evenly among the muffin pan, and shake the pan gently to ensure batter is evenly spread in each cup.
  5. Bake for 20-24 minutes until edges are browned, and toothpick insert
    online pharmacy order professional cialis online with best prices today in the USA

    ed comes out clean. Remove from oven, and let cool for 10 minutes before gently removing each cake from pan.

  6. In small bowl, combine lemon juice, Swerve Confectioners, and lemon zest. Mix together until well combined. Drizzle onto each cake.

These cakes are absolutely delicious! I added fresh blueberries when serving for even more freshness, but you could also serve with strawberries or even raspberries. Yum!

To check out all of the delicious recipes that can be made with Swerve, check them out HERE.

Stay up to date on all of the latest Swerve news and product offerings by following them on Facebook, Twitter and Instagram and Pinterest.