Posts tagged with "Food"

beylikdüzü escort

Caramelized Vidalia Onion & Sausage Galette

 (All posts may contain affiliate links or sponsored content. Please see my disclosure policy)

It’s my favorite time of the year……..Vidalia Onion season! Do you know what makes Vidalia Onions so sweet? The low amount of sulfur in the soil of which they are grown, combined with growing conditions and weather! And, fun fact, Vidalia Onions are grown in 20 South Georgia counties! Shuman Farms RealSweet Onions have been bringing onions to us for over 35 years.

Whenever you see the RealSweet® bag at your local grocery store, rest assured in knowing that you are receiving only the highest quality of onions. Each bag is checked by hand for quality and weight accuracy before shipping. Once packaged, these sweet onions are loaded onto trucks and shipped to your local grocer. The Vidalia growing region may only be in Southeast GA, but Vidalias are available all over the country! Be on the lookout for these onions on your next trip to the grocery store, and taste the RealSweet difference! 

I was so excited to create a new recipe with these gorgeous Shuman Farms RealSweet Onions. This Caramelized Vidalia Onion & Sausage Galette is packed full of sweet onion flavor in every bite. The sausage helps to give it a savory note and the Dijon mustard gives it that yummy flavor that keeps you coming back for just one more bite. This galette is not only delicious, but super easy to prepare. Serve as a main dish with a salad, or it would also make a wonderful appetizer!

Caramelized Vidalia Onion & Sausage Galette

Ingredients: 

8 oz. breakfast sausage

1 pre-made pie crust

6-8 ounces Gruyère cheese

5 medium Vidalia onions, thinly sliced

2 teaspoons Dijon Mustard

2 tablespoons butter

5 sprigs fresh thyme

Salt/Pepper to taste

Egg White to brush on crust


Instructions: 

In a large skillet, brown the sausage. Take out of pan and set aside.

In the same skillet that you used to cook the sausage, add butter. Then, add in the onions, salt/pepper and thyme. Cook stirring frequently. You want the onions to be caramelized and a golden brown. It will take around 15-20 minutes.

While onions are caramelizing, grate the Gruyère cheese.

After onions have cooked down, add cooked sausage back in.

Add in Dijon mustard, and mix together.

Roll out premade pie crust on a non-stick baking sheet or pizza pan.

Place the sausage and onion mixture into the center of the pie crust.

Gently fold the edges of the dough over the filling. Make sure to pleat the dough about every 2 inches.

Sprinkle the grated Gruyère cheese over the top of the filling.

Use an egg white wash to brush over the crust. This will result in a golden brown crust.

Place on baking sheet and bake at 400 degrees until crust is golden brown, around 25-30 minutes.

Serve and enjoy! You can sprinkle extra thyme on top if you desire.


Toasted Cheeseburger Sliders

(All posts may contain affiliate links or sponsored content. Please see my disclosure policy)

Is there anything better than a cheeseburger? These Toasted Cheeseburger Sliders are the perfect size, and who can eat just one? They are super easy to prepare, and would be the perfect addition to your summer barbecues!

Toasted Cheeseburger Sliders

Ingredients:

  • 8oz Ground Beef (cooked & crumbled)
  • 8 Slices Cheddar Cheese 
  • 1 Tbs Melted Butter
  • 1 Teaspoon Salt
  • 1 Teaspoon Pepper
  • 1 Teaspoon Sesame Seeds 
  • Sweet Hawaiian Dinner Rolls

Instructions:

  1. Slice the sweet Hawaiian rolls in half.
  2. Lay the bottom half of the rolls into an 8×8 baking dish. 
  3. Place 4 slices of cheddar cheese on top of the sliders. 
  4. Top with the ground beef.
  5. Sprinkle with salt & pepper.
  6. Place 4 slices of cheddar cheese on top. 
  7. Place the top half of the dinner rolls on top.
  8. Coat with melted butter.
  9. Sprinkle with sesame seeds.
  10. Place in the toaster oven (or conventional oven) for 6-8 minutes.

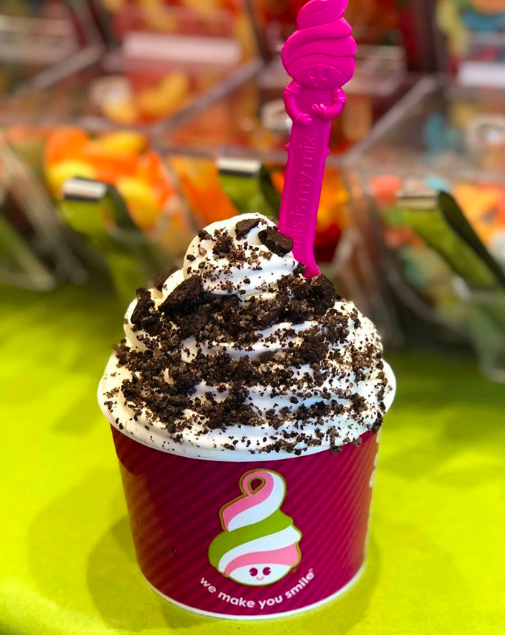
Menchie’s Frozen Yogurt: Free $5 Menchie’s Money Reward with App Download!

(All posts may contain affiliate links or sponsored content. Please see my disclosure policy)

Are you a frozen yogurt lover? Download the new Menchie’s Frozen Yogurt App and you will be rewarded with $5 in Menchie’s Money to your account! It may take up to 12 hours for credit to appear, but mine showed up right away. This $5 reward should be enough to score a yummy FREEbie!

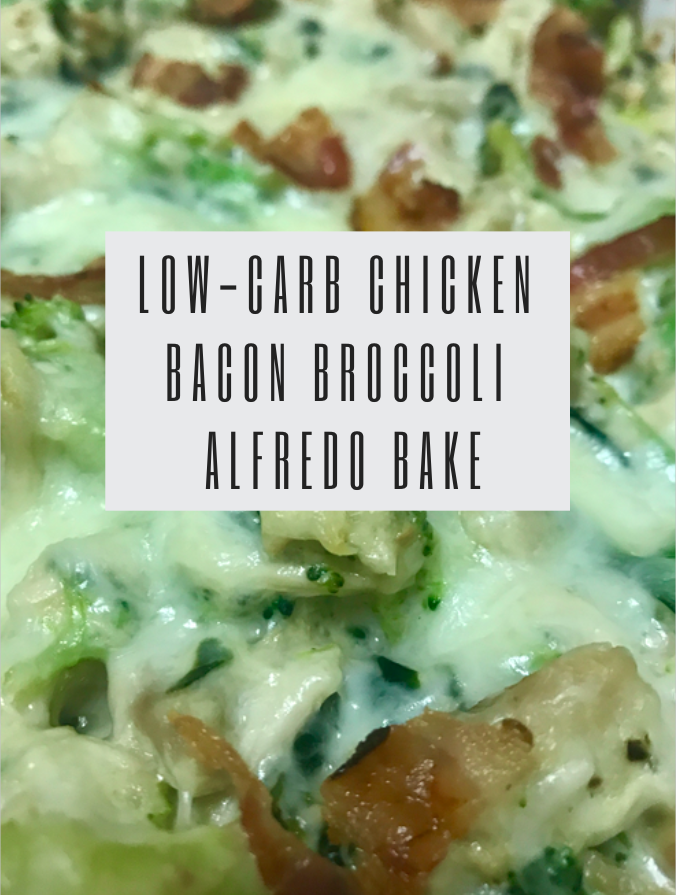
Low Carb Chicken Bacon Broccoli Alfredo Bake #LowCarb #Keto

(All posts may contain affiliate links or sponsored content. Please see my disclosure policy)

I recently made this Low Carb Chicken Bacon Broccoli Alfredo Bake for my family and it was quite the hit! If you are eating a low carb or keto-friendly diet, then this dish would be a great dinner idea to add into your menu rotation. It is so easy to prepare and great to make if you need a quick meal for those busy weeknights!

Low Carb Chicken Bacon Broccoli Alfredo Bake

Ingredients:

Cube Chicken into bite size pieces from a Rotisserie Chicken

1 bag of Steam Fresh Broccoli Florets

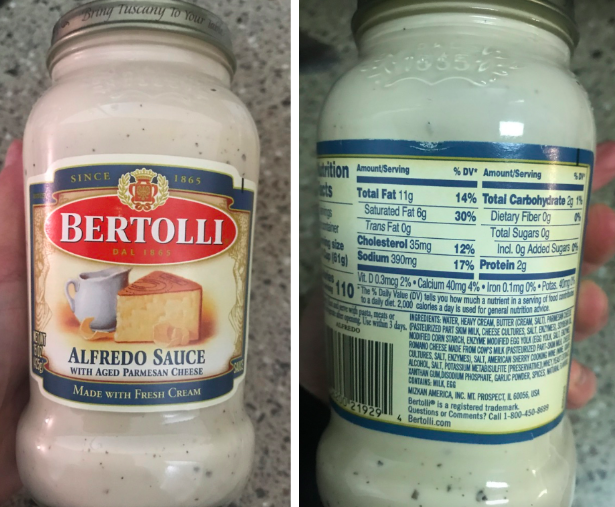
1 15oz. Jar of Bertolli Alfredo Sauce (you could make your own, but I have found that this brand only has 2 net carbs per serving)

4-5 slices of pre-cooked bacon, chopped into bite-sized pieces

Grated Parmesan Cheese

Salt/Pepper to taste

1/4 tsp. Garlic Powder

Instructions:

Preheat oven to 350 degrees.

Cook the Broccoli according to microwave directions. I like to cook under by just a couple of minutes since this will be going in the oven.

On the stovetop, in a large skillet over medium high, add the chicken, broccoli and bacon pieces. Mix in the jar of Alfredo sauce and combine together just until warmed through. Add in salt/pepper to taste and the garlic powder.

Add into a baking dish and top with Grated Parmesan Cheese. (add as much or as little as you prefer) Bake at 350 degrees for around 30 or until golden brown and bubbly.

Serve with salad or another vegetable and enjoy!

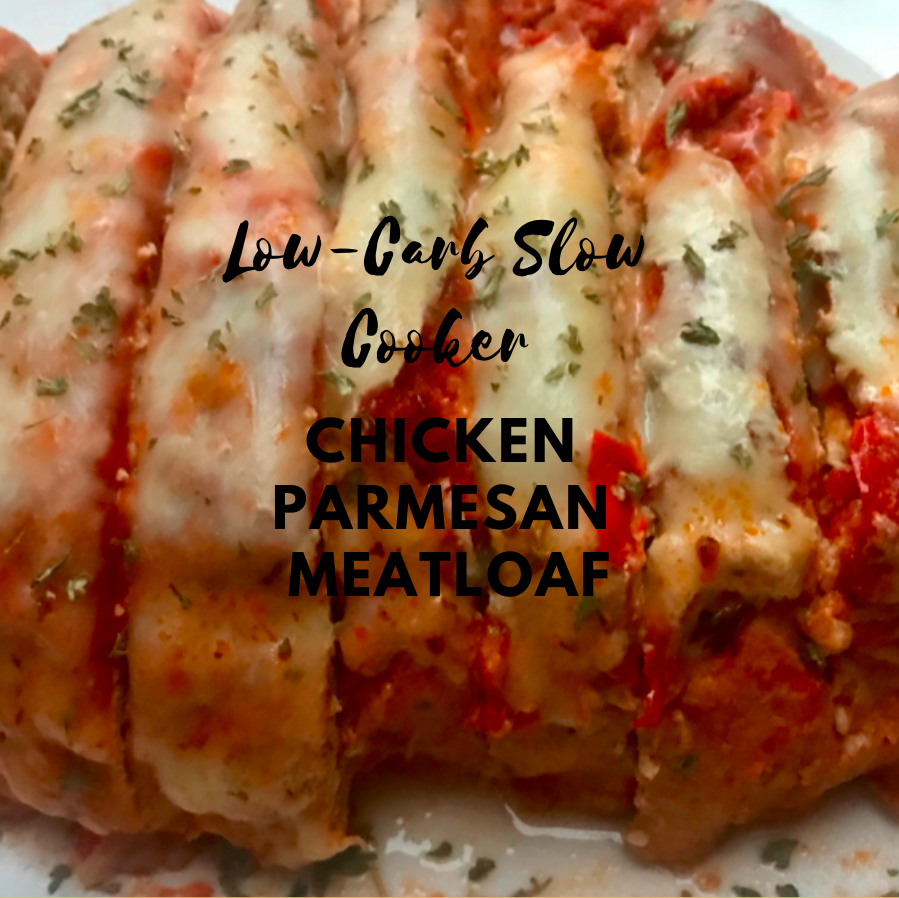
Low Carb Slow Cooker Chicken Parmesan Meatloaf

(All posts may contain affiliate links or sponsored content. Please see my disclosure policy)

If you are trying to watch your carb intake and eat healthier this new year, I have a delicious new twist on meatloaf for you! This recipe actually began as an accident. I asked my hubby Keith to get Ground Turkey when he went to BJ’s, but instead, he came home with Ground Chicken. That mistake, actually turned out to be a delicious recipe that I couldn’t wait to share with you! I came up with this Low Carb Slow Cooker Chicken Parmesan Meatloaf and my entire family loved it!

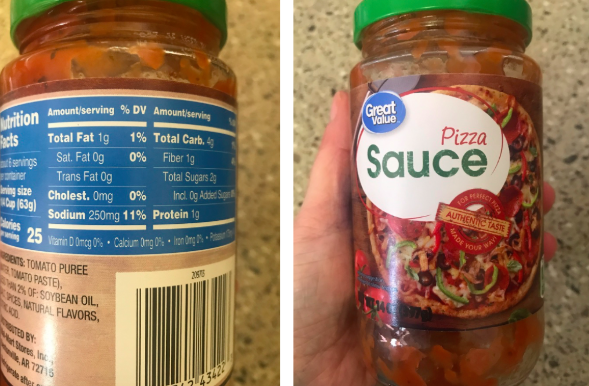
One of my tips for helping to keep this low carb was to use jarred pizza sauce instead of a traditional spaghetti sauce which can be higher in carbs. I have found that the Walmart brand of pizza sauce has 3 net carbs for 1/4 cup. I like to use this for my meatloaves and stuffed peppers since you are not needing much sauce anyway. It is also very delicious over zoodles (zucchini noodles, and much less in carbs than a traditional jarred spaghetti sauce!)

As far as carbs per serving, I am not certain of that; however, it can’t be much, because I used the low carb sauce, the ground chicken and cheese are not much and the veggies are not much if any. I was able to get 8 very large pieces out of this meatloaf as you can see from the photo above. I was only able to eat one piece as it was very filling, and we had leftovers.


Ingredients:

2 lbs. ground chicken

2 cloves minced garlic

1 red pepper (you could use whichever color that you choose. That is what I had on hand)

1/3 onion

salt/pepper to taste

1/2 cup grated parmesan cheese

1/2 tsp. Italian seasoning

1 jar of Walmart Pizza Sauce

Shredded mozzarella cheese for melting

Instructions:

Sauté the onion, pepper and garlic in butter over low heat just until softened.

In a medium bowl add the onion, pepper and garlic mixture with the ground chicken. Add in the grated parmesan cheese, salt and pepper and Italian seasoning. Stir together just until everything is combined.

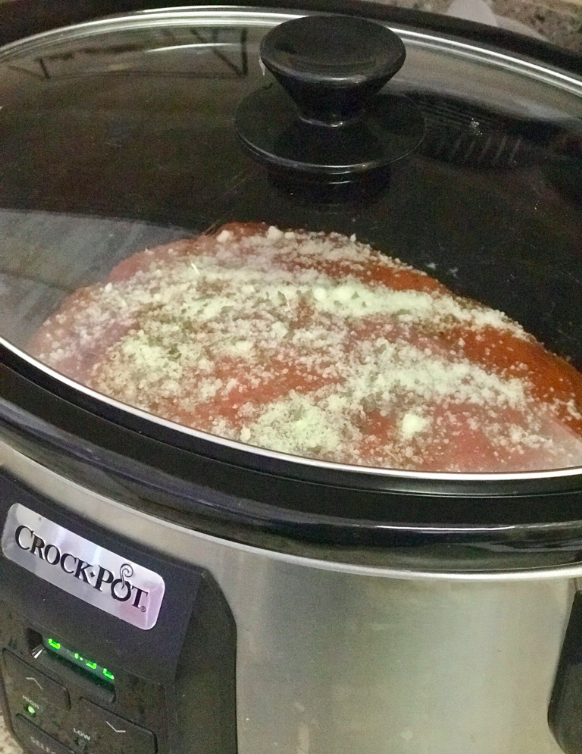
Take the mixture and place in slow cooker to form a loaf. Pour the jar of pizza sauce over your meatloaf and cook on low for 4-6 hours. I like to sprinkle some grated parmesan cheese on top while it is cooking as well.

Test to check for doneness as it is cooking. Everyone’s slow cooker will vary. In the last 10 minutes of cooking time, sprinkle 1-1/1/2 of shredded mozzarella cheese on top to melt. You can also sprinkle extra Italian seasoning. Fresh Basil would also be delicious! Serve with your favorite salad or vegetable!

I hope that you enjoy this as much as we did! You will not believe how moist that this is!

Low Carb Protein Coffee Drink

(All posts may contain affiliate links or sponsored content. Please see my disclosure policy)

If you are following a low carb or keto diet, I am sure that you are looking for new ways to incorporate more protein into your diet. I have seen this low carb protein coffee drink floating around Instagram for quite some time now and decided to give it a try this week. I am hooked! It is great for those mornings or afternoons that you are in a hurry. Just keep a protein shake in your purse and head through the drive thru at Starbucks! And, believe it or not, this is very budget-friendly!

Here is how to get your delicious and filling Low Carb Protein Coffee Drink:

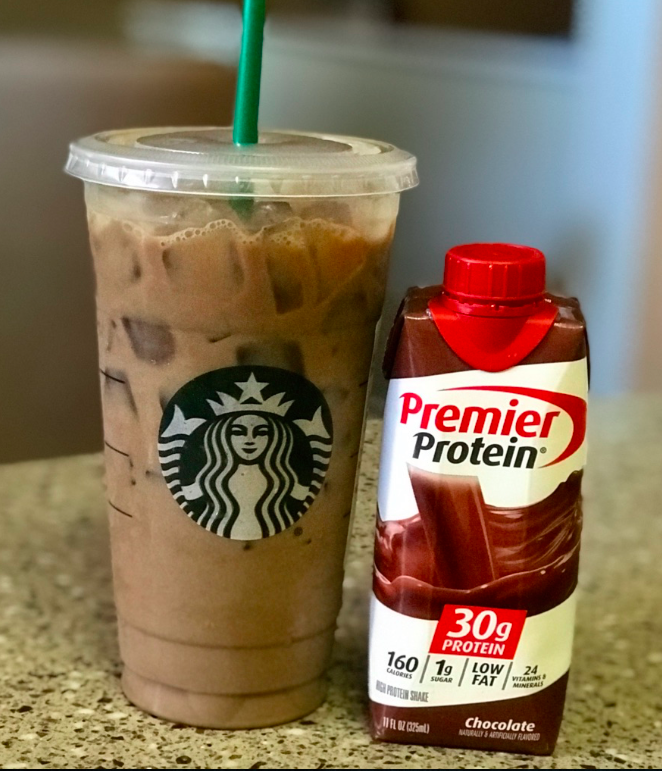
☕️ At Starbucks ask for a double shot of espresso over ice in a Venti cup. (at my store this is only $2.45)

☕️ Add in a Premier Protein Shake and stir until the Espresso is mixed in. I have only tried the Chocolate variety, but I think the Caramel would be SO yummy as well!

☕️ Drink and enjoy! It is very filling! In fact, this keeps me full until my next meal!

You can find the Premier Protein Shakes at places like Amazon, Sam’s Club or Costco. The best deal is a warehouse club as you get more bang for your buck. For example, Sam’s sells the 12 pack for $16.66 which is a fantastic deal!

Let me know if you try this and what you think! You could also add coffee if don’t like Espresso.

Orange Chicken With Asian Bean Salad “Stir Fry” #PaisleyFarm #PaisleyFarmFresh #Kroger

Disclosure: Thank you to Paisley Farm for providing products to help me create my recipe. Please see my disclosure policy)

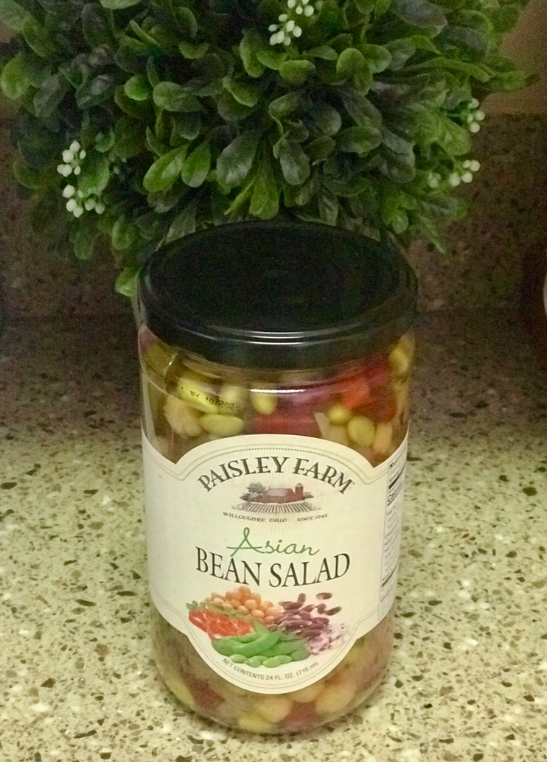
One of our favorite cuisines as a family is definitely anything with Asian flare. In fact, any time that we ask our boys where they would like to eat out, it is usually somewhere that has Asian food. When Paisley Farm sent me several of their delicious products to create a recipe for a blogger challenge, I knew right away that I wanted to use the Asian Bean Salad!

First of all, I want to let you know about the Paisley Farm brand and the delicious products that they offer. You can find them at stores likes Kroger, Walmart, Ralph’s, Fred Meyer, Smith’s and more. You can also find them online at PaisleyFarmFoods.com. I would also suggest that you follow them on FacebookInstagram and Twitter as they often share delicious recipes, news, promotional offers and more! Paisley Farm makes their products out of the freshest ingredients, delivered with the most exciting and flavorful taste combinations imaginable. From Asian Bean Salad to Sweet Cauliflower and Dilled Brussel Sprouts, they have something for everyone! You can see the entire Paisley Farm product list HERE

Now on to my delicious recipe! Orange Chicken With Asian Bean Salad “Stir Fry” is sure to please anyone! It is packed full of flavor with every bite! I love how the sweet Asian Bean Salad pairs perfectly with the Gingery Orange Chicken! I have been experimenting with a lot of recipes and this is what I came up with. My family loved it!

Ingredients:

3 tablespoons orange juice

3 tablespoon lemon juice

2 tablespoons soy sauce (you can also use coconut aminos if you prefer)

1 1/2 cups water

1/4 cup rice wine vinegar

1 cup brown sugar

2 teaspoons fresh minced ginger

2 teaspoons fresh minced garlic

2 tablespoons minced green onion

1 tablespoon of fresh grated orange zest

1 1/2 lbs. of boneless skinless chicken thighs cut into 1/2 inch cubes

salt and pepper for taste

3 tablespoons of cornstarch

2 tablespoons of water

1 cup of flour

sesame seeds for garnish

1 jar of drained Paisley Farm Asian Bean Salad

2 cups hot cooked rice

Instructions:

  1. Cut the chicken up into 1/2 inch cubes.
  2. In a small pan, mix together the orange juice, lemon juice, rice wine vinegar, water and soy sauce over low to medium high heat. Stir in the orange zest, green onion, ginger, garlic and brown sugar and bring to a boil. Set aside and let cool for 10 minutes
  3. In the meantime, place the chicken pieces in a plastic storage bag.
  4. In another storage bag, place the flour and salt/pepper.
  5. After the Orange Sauce mixture has cooled, place 1 1/2 cups in the plastic storage bag with the chicken and place in the refrigerator for at least 1 hour. (longer if possible. I think that the longer you can marinate the better with this dish) Reserve the remaining sauce.
  6. Now that your chicken has marinated, you will add it to the bag that has the flour mixture to get dredged.
  7. In a large wok, add 3-4 tablespoons of olive oil. Cook the chicken in batches and set aside. (Do not overcrowd or it will not cook evenly)
  8. Wipe out the wok and place the reserved orange sauce mixture. You will want to make sure that this is set to medium high heat. While this is heating up, take 3 tablespoons of cornstarch and 2 tablespoons of cold water to make a paste. (Make sure that the water is cold or it will not form correctly) Add to the sauce mixture until it thickens. Bring to a boil. I like to grate in fresh orange zest in the sauce to give it even more orange taste.
  9. When the sauce is finished, add the chicken back into the dish so that it can absorb those yummy flavors. This is also where I add in the jar of drained Paisley Farm Asian Bean Salad for the “stir fry” part of the dish. You want to add this in at the very end so the vegetables don’t get overly mushy. You want them to soak up that delicious orange and ginger flavor though that the rest of the dish has. I can’t begin to tell you how delicious that the Asian Bean Salad is paired with the ginger and citrus. So delish!
  10. Serve over hot cooked rice in bowls and garnish with more orange zest and sesame seeds.
  11. Enjoy!

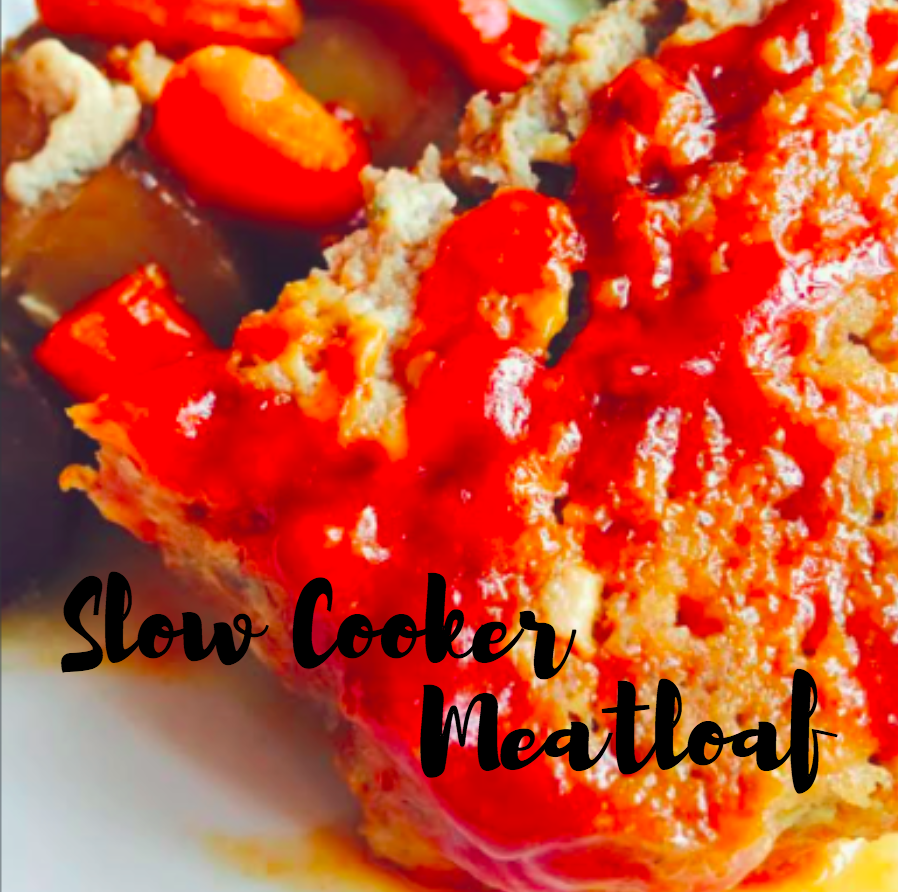
Slow Cooker Meat Loaf

(All posts may contain affiliate links or sponsored content. Please see my disclosure policy)

It’s been awhile since I have shared this delicious and easy recipe here on the blog, so I thought it was time to repost. This is a wonderful recipe to have on hand for those days when you know that life is going to be crazy! Slow Cooker Meat Loaf is sure to be your new family’s new favorite way to enjoy meat loaf! Yep, you read that right meat loaf in the slow cooker! Now I know that you may be skeptical of cooking meat Loaf in a slow cooker. I know that I was at first. But let me tell you, it is the Best meat loaf that I have ever had and it is so moist! My guys must think so too because they devoured the entire thing! I really think that you will love it and that it will be a staple in your menu rotation!

INGREDIENTS:

1 1/2-2 lbs. Ground Turkey (you could use ground beef as well, but I like how moist the ground turkey is for this recipe)

2/3 Cup Bread Crumbs

2 Eggs

1 Tsp Salt

1 Tsp Ground Onion

1 Tsp Garlic Powder

1/2 Tsp Pepper

1 Lb. Tri-Color Baby Potatoes Cut Into Quarters

1 Lb. Baby Carrots Cut into Halves

DIRECTIONS:

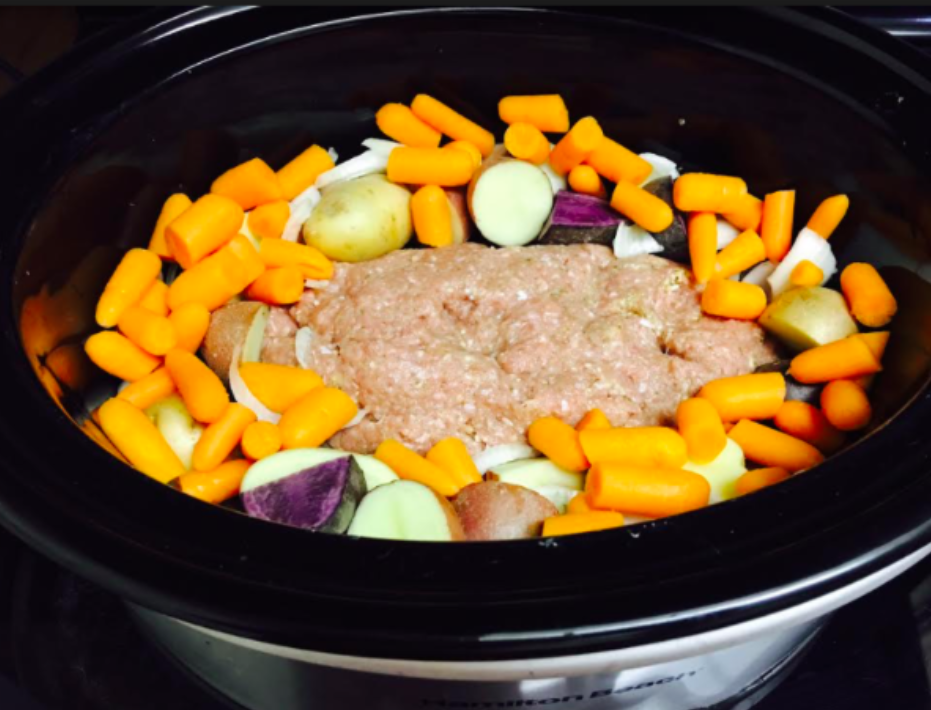
Take the first 7 ingredients and gently mix together. Form into a loaf and place in the middle of the slow cooker. Take the Quartered Potatoes and Baby Carrots and place around the outside edge of the meatloaf. Cook on low for around 5-6 hours.

About 30 minutes before taking off heat, mix together the glaze for the top of the meatloaf. Mix 1/4 cup ketchup, 3 Tbsp. brown sugar, and a dash of mustard. Mix together and place on top of the meatloaf. Cook for an additional 30 minutes just until the glaze is nice and set.

Serve and enjoy! I doubt that there will be any leftovers!

Easy Garlic Bread Pizzas

(All posts may contain affiliate links or sponsored content. Please see my disclosure policy) 

If you are looking for a fun and easy lunch or dinner or even after school snack to make with your kiddos, Garlic Bread Pizzas are the way to go!  Just grab your favorite boxed garlic bread from the grocery store, top with your favorite regular pizza toppings, place in a 350 degree oven and voila! The possibilities are endless! My boys love pepperoni and cheese, but you could do whatever toppings that your family loves. I want to try olives and bacon the next time. What will you try on your garlic bread pizzas?

Peaches and Cream Pretzel Dessert

 (All posts may contain affiliate links or sponsored content. Please see my disclosure policy)

Do you remember that delicious Strawberry Salad Dessert that used to be so popular back in the day? To this day I love that dish so much! I decided to take my own spin on it and create something using Peaches instead. I am in love with peaches during the Summertime and this Peaches & Cream Pretzel Dessert did not disappoint! I also used Gluten Free pretzels to make the dish Gluten Free. The real beauty of this dessert is the fact that it is so versatile and you can change up the fruit to use whatever sounds good! I am going to try Blackberries next as that would be delicious too!

*If you love this recipe don’t forget to Pin it HERE.

Ingredients:

2 cups crushed pretzels (I used Gluten Free but you can use regular as well)

3/4 cup butter, melted

3 tablespoons white sugar

1 (8 ounce) package cream cheese, softened

1 cup white sugar

1 (8 ounce) tub of Cool Whip

2 (3-ounce boxes) of Peach flavored JELL-O

2 cups of boiling water

2 (10 ounce) bags of frozen peaches

Directions:

Mix together the melted butter, crushed pretzels and 3 tablespoons of sugar.

Press the mixture into the bottom of a 9×13 pan.

Bake for 8-10 minutes just until browned and set aside to cool.

In the meantime, beat together the cream cheese and sugar. Fold in the Cool Whip.

Spread the mixture out across the cooled Pretzel crust.

Dissolve Gelatin in the Boiling water. Stir in the Frozen Peaches and let them set very briefly. Continue to stir until mixture is about the consistency of egg whites. Take mixture and spoon over the top of the cream cheese layer. Place in refrigerator to let set. I would give it at least 3-4 hours to set up.

Enjoy! You could even add more Cool Whip on the top if you desire. Think about taking this to your next picnic or potluck! I guarantee that there will be none left!
(recipe inspired from AllRecipes.com)