Entrees

Orange Chicken With Asian Bean Salad “Stir Fry” #PaisleyFarm #PaisleyFarmFresh #Kroger

Disclosure: Thank you to Paisley Farm for providing products to help me create my recipe. Please see my disclosure policy)

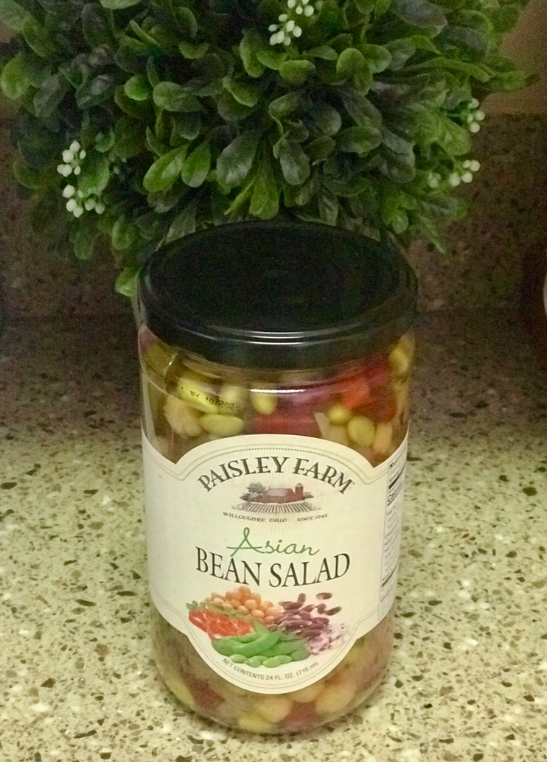
One of our favorite cuisines as a family is definitely anything with Asian flare. In fact, any time that we ask our boys where they would like to eat out, it is usually somewhere that has Asian food. When Paisley Farm sent me several of their delicious products to create a recipe for a blogger challenge, I knew right away that I wanted to use the Asian Bean Salad!

First of all, I want to let you know about the Paisley Farm brand and the delicious products that they offer. You can find them at stores likes Kroger, Walmart, Ralph’s, Fred Meyer, Smith’s and more. You can also find them online at PaisleyFarmFoods.com. I would also suggest that you follow them on FacebookInstagram and Twitter as they often share delicious recipes, news, promotional offers and more! Paisley Farm makes their products out of the freshest ingredients, delivered with the most exciting and flavorful taste combinations imaginable. From Asian Bean Salad to Sweet Cauliflower and Dilled Brussel Sprouts, they have something for everyone! You can see the entire Paisley Farm product list HERE

Now on to my delicious recipe! Orange Chicken With Asian Bean Salad “Stir Fry” is sure to please anyone! It is packed full of flavor with every bite! I love how the sweet Asian Bean Salad pairs perfectly with the Gingery Orange Chicken! I have been experimenting with a lot of recipes and this is what I came up with. My family loved it!

Ingredients:

3 tablespoons orange juice

3 tablespoon lemon juice

2 tablespoons soy sauce (you can also use coconut aminos if you prefer)

1 1/2 cups water

1/4 cup rice wine vinegar

1 cup brown sugar

2 teaspoons fresh minced ginger

2 teaspoons fresh minced garlic

2 tablespoons minced green onion

1 tablespoon of fresh grated orange zest

1 1/2 lbs. of boneless skinless chicken thighs cut into 1/2 inch cubes

salt and pepper for taste

3 tablespoons of cornstarch

2 tablespoons of water

1 cup of flour

sesame seeds for garnish

1 jar of drained Paisley Farm Asian Bean Salad

2 cups hot cooked rice

Instructions:

  1. Cut the chicken up into 1/2 inch cubes.
  2. In a small pan, mix together the orange juice, lemon juice, rice wine vinegar, water and soy sauce over low to medium high heat. Stir in the orange zest, green onion, ginger, garlic and brown sugar and bring to a boil. Set aside and let cool for 10 minutes
  3. In the meantime, place the chicken pieces in a plastic storage bag.
  4. In another storage bag, place the flour and salt/pepper.
  5. After the Orange Sauce mixture has cooled, place 1 1/2 cups in the plastic storage bag with the chicken and place in the refrigerator for at least 1 hour. (longer if possible. I think that the longer you can marinate the better with this dish) Reserve the remaining sauce.
  6. Now that your chicken has marinated, you will add it to the bag that has the flour mixture to get dredged.
  7. In a large wok, add 3-4 tablespoons of olive oil. Cook the chicken in batches and set aside. (Do not overcrowd or it will not cook evenly)
  8. Wipe out the wok and place the reserved orange sauce mixture. You will want to make sure that this is set to medium high heat. While this is heating up, take 3 tablespoons of cornstarch and 2 tablespoons of cold water to make a paste. (Make sure that the water is cold or it will not form correctly) Add to the sauce mixture until it thickens. Bring to a boil. I like to grate in fresh orange zest in the sauce to give it even more orange taste.
  9. When the sauce is finished, add the chicken back into the dish so that it can absorb those yummy flavors. This is also where I add in the jar of drained Paisley Farm Asian Bean Salad for the “stir fry” part of the dish. You want to add this in at the very end so the vegetables don’t get overly mushy. You want them to soak up that delicious orange and ginger flavor though that the rest of the dish has. I can’t begin to tell you how delicious that the Asian Bean Salad is paired with the ginger and citrus. So delish!
  10. Serve over hot cooked rice in bowls and garnish with more orange zest and sesame seeds.
  11. Enjoy!

Autumn Squash Soup

(All posts may contain affiliate links or sponsored content. Please see my disclosure policy)

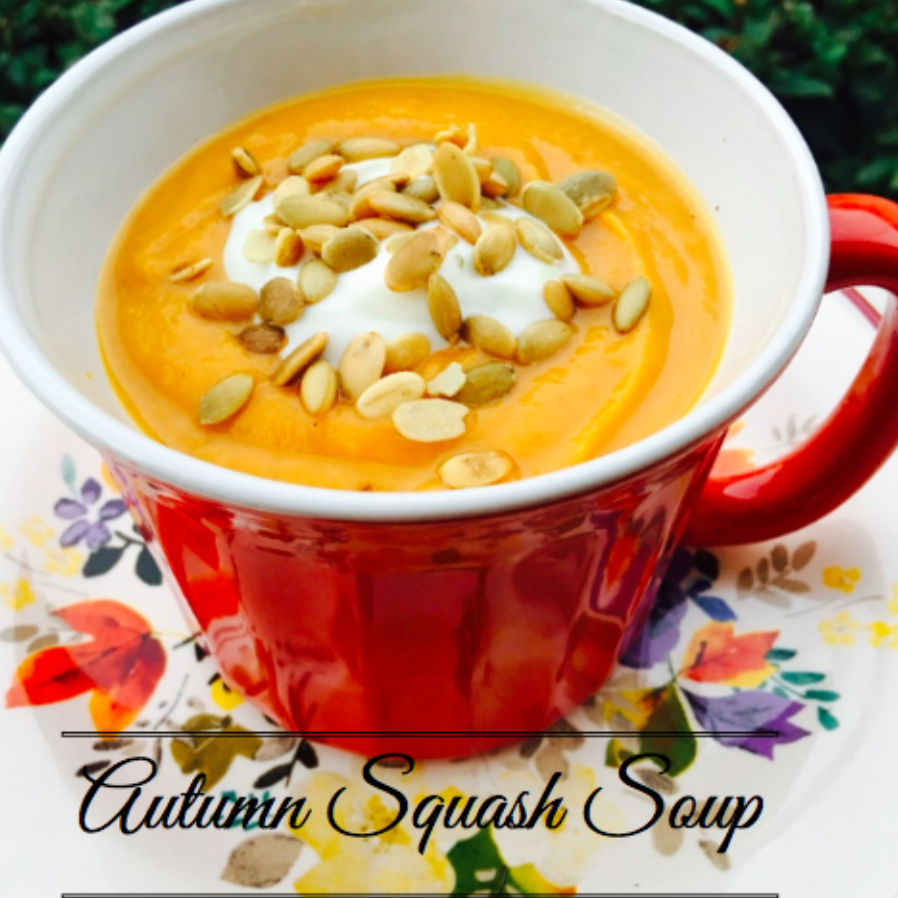
Even though it may not feel like it yet, autumn has arrived! That means we are looking forward to hearty and comforting meals. I especially love a delicious bowl of soup. What are you favorite soups to comfort you and your family during those chilly fall days and nights of fall? 

The soup is one of my absolute favorites that I get every. single. time. at Panera during the fall months…. Autumn Squash Soup. If you are not familiar with this soup, you must try it. It is so amazing! It is also Gluten Free which I love! This particular recipe is compiled of several different recipes that I created to make my own. It tastes just like the one at Panera! If you love this recipe don’t forget to pin it HERE.

Autumn Squash Soup

INGREDIENTS: 

1 large butternut squash (mine was about 3 pounds)

1 15oz. can pumpkin puree

2 Tbsp. olive oil

3 Tbsp. brown sugar

1/2 tsp cinnamon

1/4 tsp. nutmeg

1 1/2 tsp. sea salt

1/4 tsp. pepper

1/4 tsp. curry

1 cup apple juice

2 cups vegetable stock

1 1/2 cups half half

Roasted pumpkin seeds,  sour cream or bacon bits for garnish

DIRECTIONS:

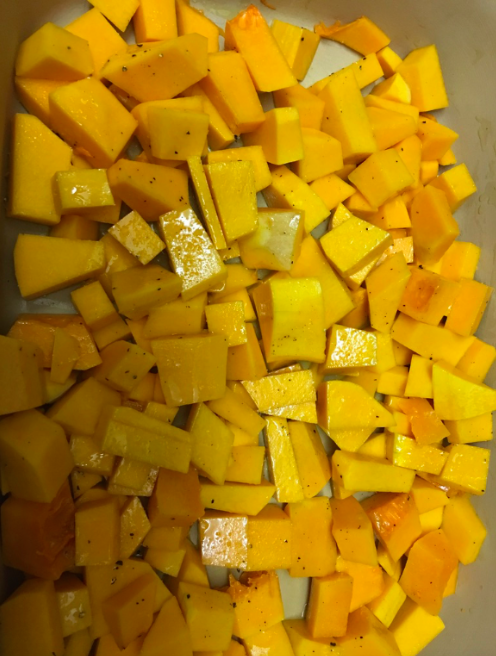
Peel the Butternut Squash, Remove seeds and Dice into Cubes. Place into a Baking Dish. Drizzle with Olive Oil, Sprinkle with Salt and Pepper and massage into the squash.

Bake in 400 oven for about 35 minutes or until Squash is fork tender.

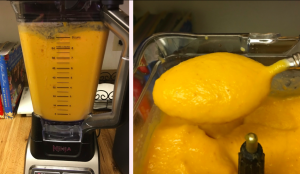
Mash the Squash with a Potato masher or whatever tool you have on hand and place in a Ninja Blender (Or, you can place the Mash directly in the Stock Pot and use an Immersion Blender)

Add the canned Pumpkin Puree, Vegetable Stock, Apple Juice, Half and Half.

Place the Blender on High and Puree Until Silky Smooth.

Add the brown sugar, curry, cinnamon, nutmeg, salt and pepper and place on medium heat until heated through.

Garnish with pumpkin seeds, sour cream and even bacon bits if you prefer.

Serve and enjoy! Your family will love this delicious soup and you will want to make it during the entire fall season!

Biscuits and Gravy Casserole

(All posts may contain affiliate links or sponsored content. Please see my disclosure policy)

There’s nothing more comforting to me than a big plate of biscuits and gravy. YUM! There are even some nights that I will make this for dinner with a big bowl of scrambled eggs and we are all happy campers in this household! I recently came across this recipe for Biscuits and Gravy Casserole and I am sold! It is so delicious and super easy. Once I made it , I knew that I had to share with you all here on the blog. This would also be great to make for a church potluck or even Christmas morning!

Biscuits and Gravy Casserole (recipe adapted from Miss Information)

Ingredients

1 16oz. package of breakfast sausage

1 16oz. can Pillsbury Grands biscuits

1 packet of Country Gravy mix

1 1/2 cups Cheddar Cheese

6 eggs

1/2 cup milk

salt/pepper to taste

Directions

Preheat oven to 350 degrees.

Spray 9×13 baking dish and set aside.

Cook sausage. While sausage is cooking, take the biscuits and cut each one into 5-6 pieces and place into the greased baking dish. Place the cooked sausage on top of the biscuit pieces.

Sprinkle with the cheddar cheese.

Whisk the 6 eggs and milk together and season with salt/pepper. Pour over the biscuits and cheese.

Prepare the gravy mix according to the packet and drizzle on top of the casserole.

Bake at 350 degrees for 30-45 minutes.

Enjoy!

Easy Garlic Bread Pizzas

(All posts may contain affiliate links or sponsored content. Please see my disclosure policy) 

If you are looking for a fun and easy lunch or dinner or even after school snack to make with your kiddos, Garlic Bread Pizzas are the way to go!  Just grab your favorite boxed garlic bread from the grocery store, top with your favorite regular pizza toppings, place in a 350 degree oven and voila! The possibilities are endless! My boys love pepperoni and cheese, but you could do whatever toppings that your family loves. I want to try olives and bacon the next time. What will you try on your garlic bread pizzas?

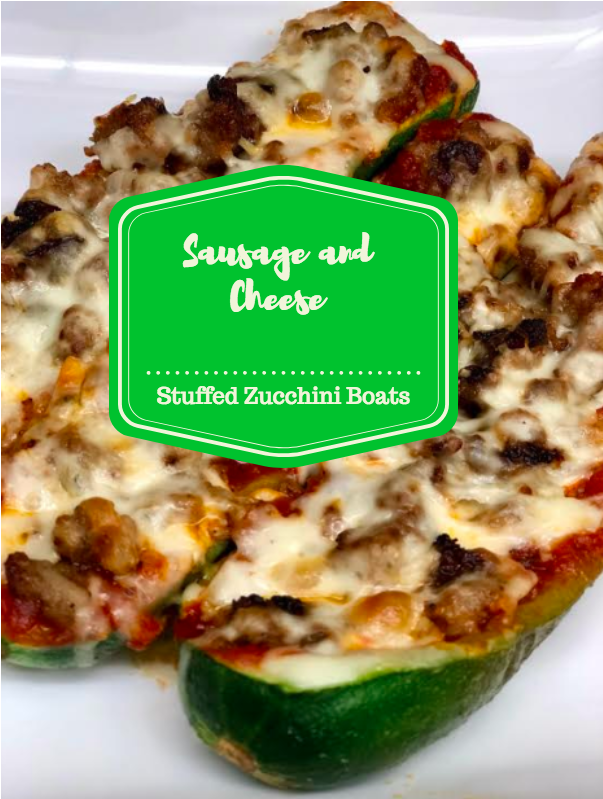
Sausage and Cheese Stuffed Zucchini Boats #LowCarb #Keto

 (All posts may contain affiliate links or sponsored content. Please see my disclosure policy)

I don’t have to tell you that Keto and low-carb diets are all the fad these days. I have been trying to do the Keto thing and watch my carb intake for the past few weeks. In doing so, I have been finding that eating this way really is not that complicated. I made Sausage and Cheese Stuffed Zucchini Boats for dinner earlier this week and they are delicious! I made enough to have leftovers for lunch the next day- so easy yet so delicious and filling!

Ingredients:

4-6 zucchini washed and halved

1 jar marinara or pasta sauce

8oz. shredded mozarella cheese

1lb. cooked sausage

salt/pepper for taste

1/2 tsp. onion powder


Directions:

Preheat over to 350 degrees.

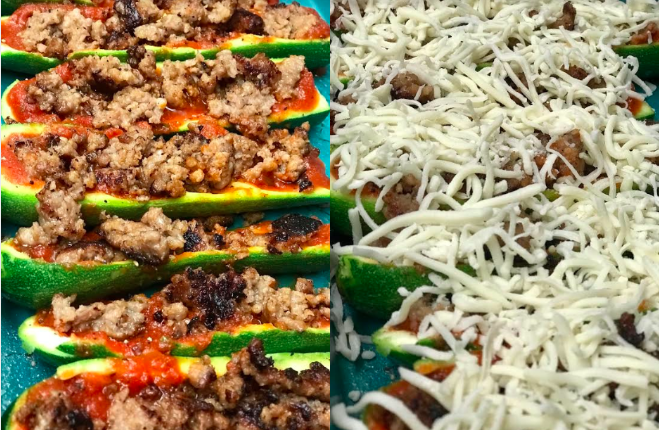
Scoop out the center of each of the halved zucchinis to make a “boat”.

Place in a greased baking pan.

Pour spaghetti sauce over each “boat”.

Spread cooked sausage and cheese evenly over each zucchini.

Sprinkle onion powder, salt and pepper over the entire dish.

Bake at 350 degrees for 15-20 minutes or until zucchini are tender and the cheese is bubbly.

Serve and enjoy! My entire family loved these!

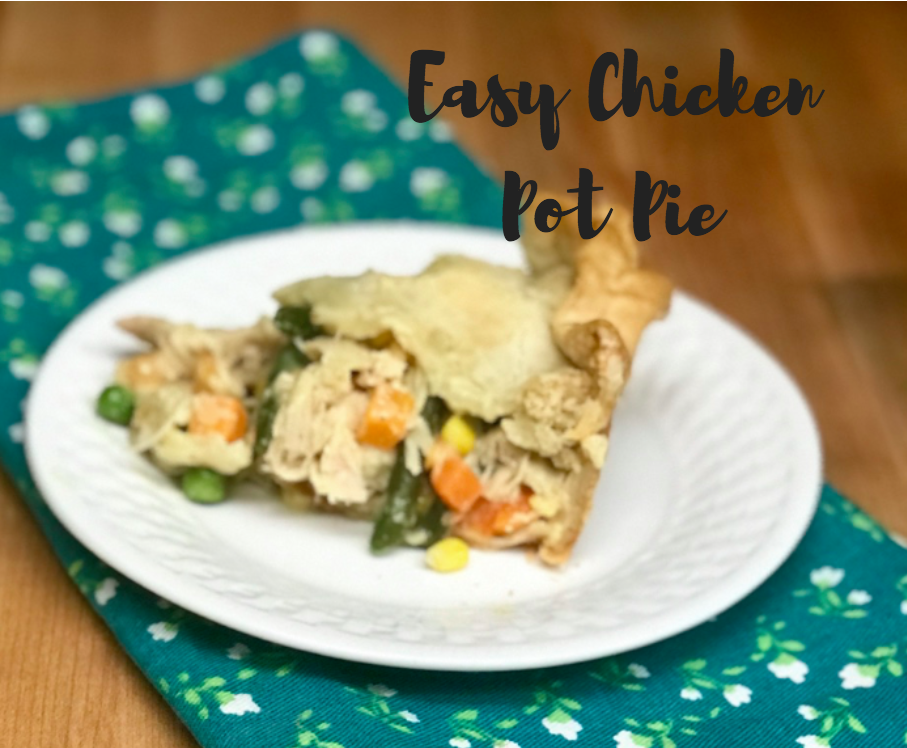
Easy Chicken Pot Pie Recipe

(All posts may contain affiliate links and/or sponsored content. Please see my disclosure policy)

My mom has been making this homemade chicken pot pie for years, and now I make it for my guys! It is a go-to recipe that family asks for all of the time. Not only is it super easy and delicious, but you can also make it ahead of time and freeze it. I also whip up this recipe to take to friends who are sick or just because! I always get asked for the recipe and am happy to share my momma’s easy and delicious chicken pot pie!

Easy Chicken Pot Pie

Ingredients:

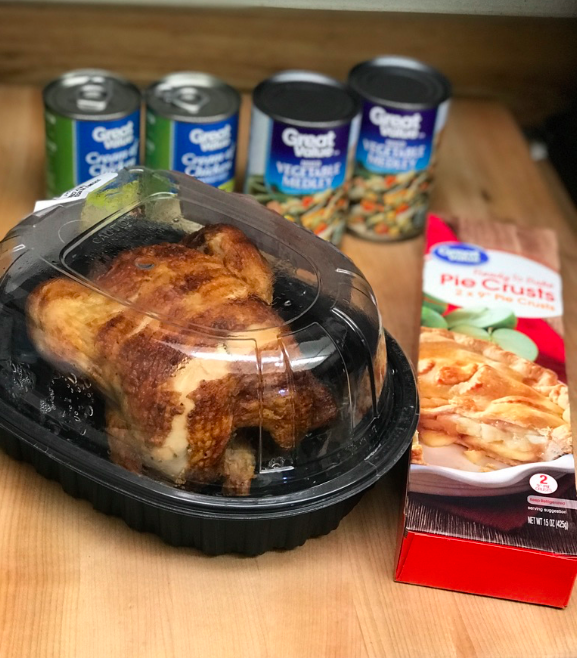
1 box of 2-count pre-made pie refrigerated pie crusts

2 cans of mixed vegetables

1 can of cream of chicken

2 cooked, seasoned chicken breasts, shredded (to save on time, I love to buy the rotisserie chickens and shred them)

salt/pepper for taste

onion powder for taste

Directions:

Preheat oven to 350 degrees.

Mix all the veggies, cream of chicken, shredded chicken salt and pepper and onion powder in a large bowl.

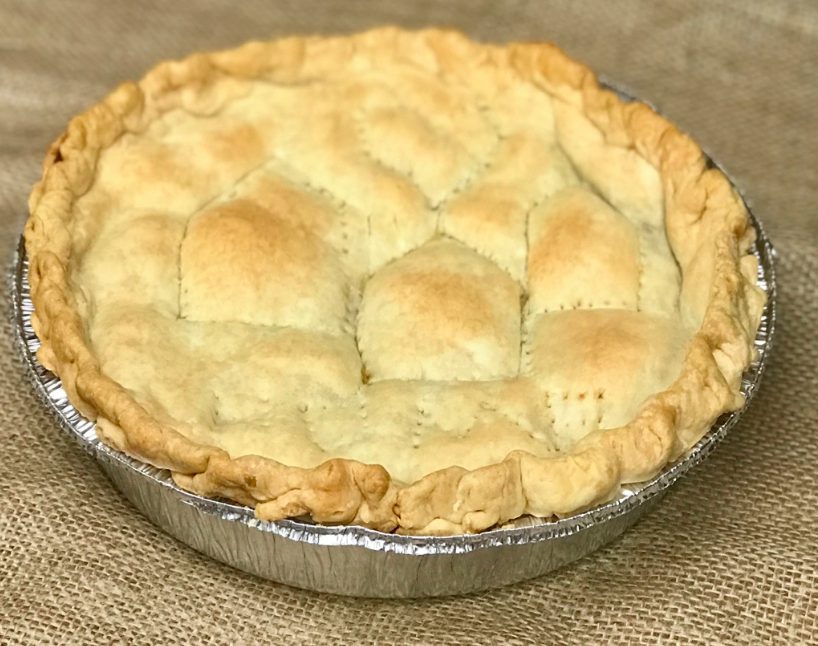
In a pie pan place one of the refrigerated pie crusts. Top the chicken mixture over the pie crust. Place the remaining pie crust on top of the veggie mixture. With a fork or knife, make sure to vent some areas in the top of the pie crust so that the steam can escape.

Bake for around 40 minutes or until pie crust starts to become brown and the chicken mixture is bubbly.

This yields one chicken pot pie. If you are going to use an entire rotisserie chicken, I would double the recipe and you could freeze one of the pies for later.

Serve and enjoy! We love to have this with a salad or fruit.

Prego® Cooking Sauces-Your Family’s New Favorite Pasta Optional Meal!

This is a sponsored conversation written by me on behalf of Prego®. The opinions and text are all mine.

We all lead super busy lives these days. We have demanding jobs, the kids are involved in sports and extracurricular activities, and the list goes on and on. The last thing that many of us have on our minds each morning is what we will be making for dinner that night. You are sure to put a big smile on your family’s face when you bring home a new family favorite with Prego® Cooking Sauces!

There’s no reason to wait for pasta night to bring everyone around a delicious Prego® family meal. All you need is chicken, 20 minutes, and Prego Cooking Sauce to create your family’s new favorite meal. The best part about Prego Cooking Sauces? They are pasta optional! We can enjoy “pasta night” more often without having to serve pasta – “just add chicken”.

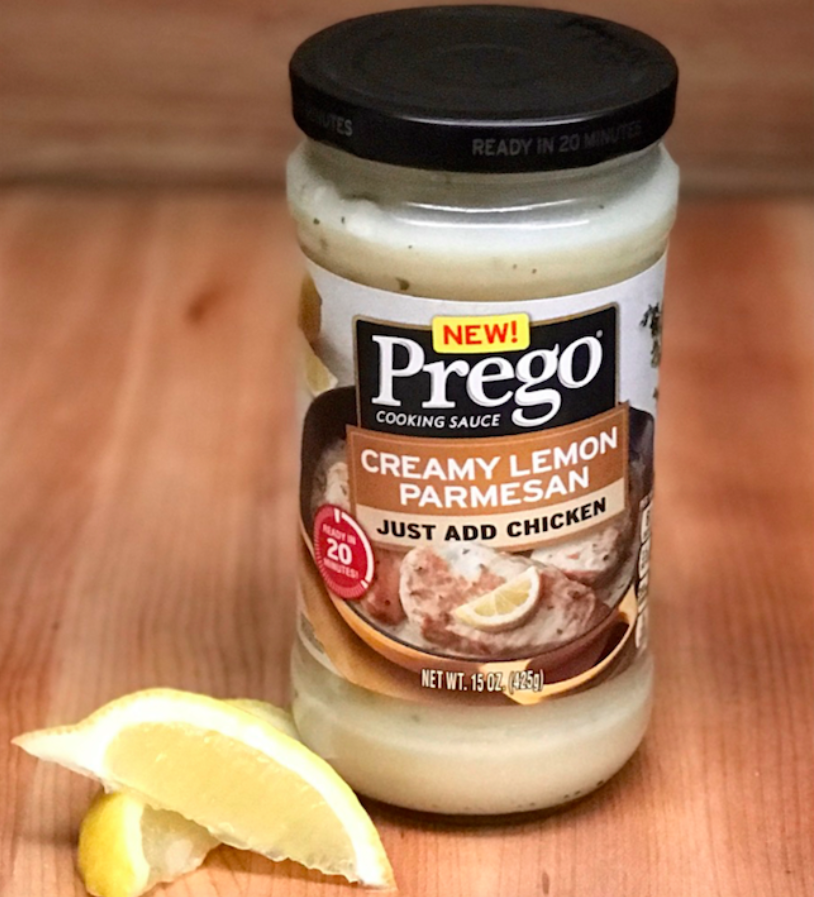
Prego Cooking Sauces are available in three delicious varieties at your local Publix. Choose from Creamy Lemon Parmesan, Creamy Marsala, and Tomato & Fresh Ricotta. You are sure to be the hero of the dinner table when you stock up your pantry with these delectable Prego Cooking Sauces with the BOGO sale now through 8/3/2018. Head on over to Publix.com where you can check out all of the details!

My family and I enjoy lemon and Parmesan, so we were excited to try the Creamy Lemon Parmesan Prego Cooking Sauce that I picked up at my local Publix. Every bite was packed full of cream, Parmesan cheese, garlic and lemon. So delicious!

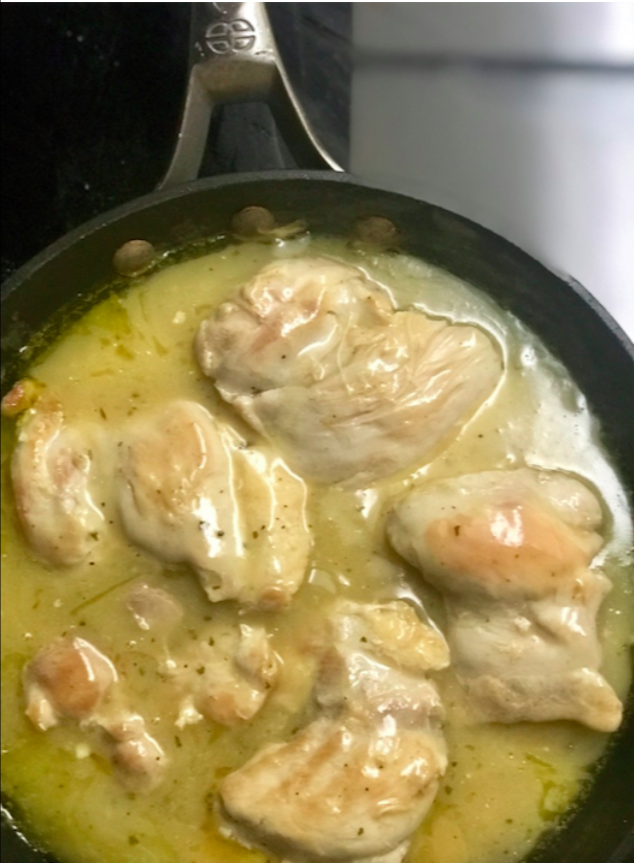
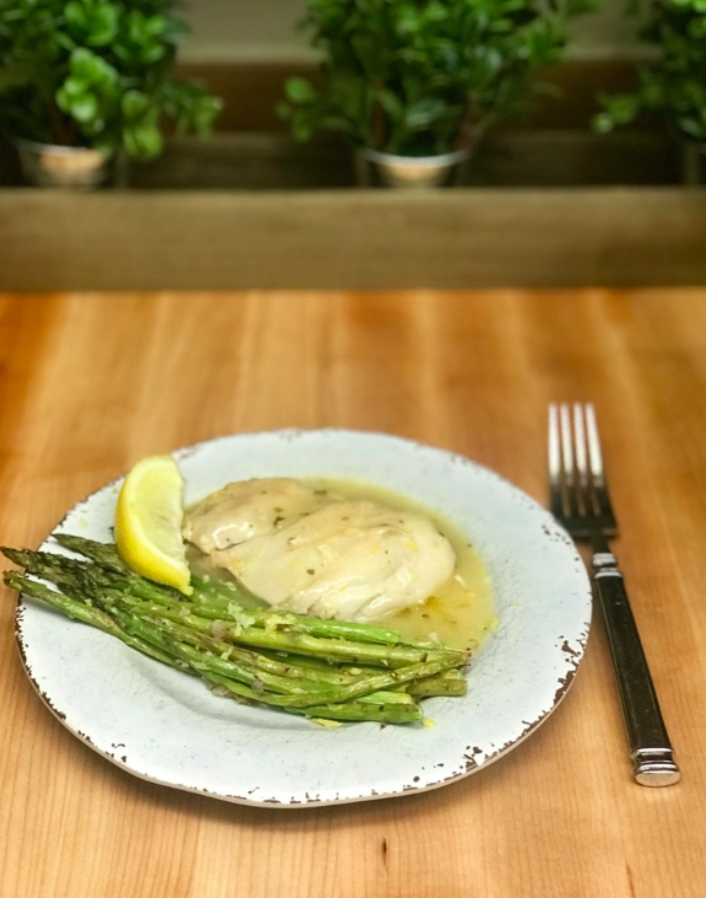
Using the Prego Cooking Sauce couldn’t be easier and did I mention that it is ready in just 20 minutes? I browned 1lb. chicken with 1tbs. of olive oil in a non-stick skillet until it was browned on both sides then added the 15oz. jar of Creamy Lemon Parmesan Prego Cooking Sauce. I simmered for 20 minutes, and voilà, dinner was ready! While the chicken was simmering, I roasted some asparagus with lemon zest and shallots in the oven at 375 degrees for 15-17 minutes. Asparagus makes the perfect compliment to lemon and Parmesan and it was definitely a hit with my guys paired with the Creamy Lemon Parmesan Prego Cooking Sauce!

No matter which variety of Prego Cooking Sauce that you choose, you are sure to have a new family favorite pasta optional meal!

Be Your Best You With $60 in Savings at Publix + Cream Cheese Chicken Pocket Recipe Featuring Tyson® Chicken and Arla® Cream Cheese

This is a sponsored conversation written by me on behalf of Best You Available at Publix. The opinions and text are mine.

As the mom of two very busy school-aged boys, I am always on the lookout for ways to simplify my life and to make it the best that it can be. Whether it be time management, meal-planning or even weekly routines, it is important to have a game plan so that I am able to be the best wife and mother that I can be.

One of the most important ways that I can simplify my life, and to let it be the best that it can be is by preparation. I especially love to prepare in the area of meal-planning. There are many nights that we have sports practices or other school activities, so I love to have my meals planned the week before if at all possible.

My local Publix is going to help me in the area of preparation with their BEST YOU sale that begins May 26. During this sale, you can save $60 on all sorts of products to help you with everyday life. I love to save money on the products that I use, don’t you? Be sure to check out all of the coupons at www.GetTheSavings.com/BestYou so that you can see what items to stock up on at your local Publix! I plan on using the following coupons towards ingredients to make my Cream Cheese Chicken Pockets for a quick and easy dinner!

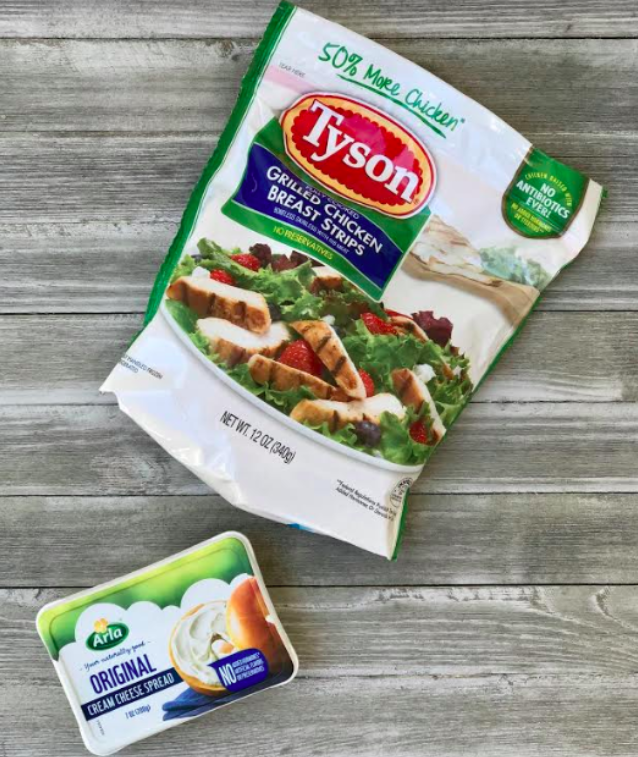
  • $1.00 off Any One (1) Tyson® Fully Cooked Grilled Chicken Breast Strips 12 oz.
  • $1.50 off Any One (1) Arla® Cream Cheese 7 oz. Tub or 6.2 oz. Squeeze Tube

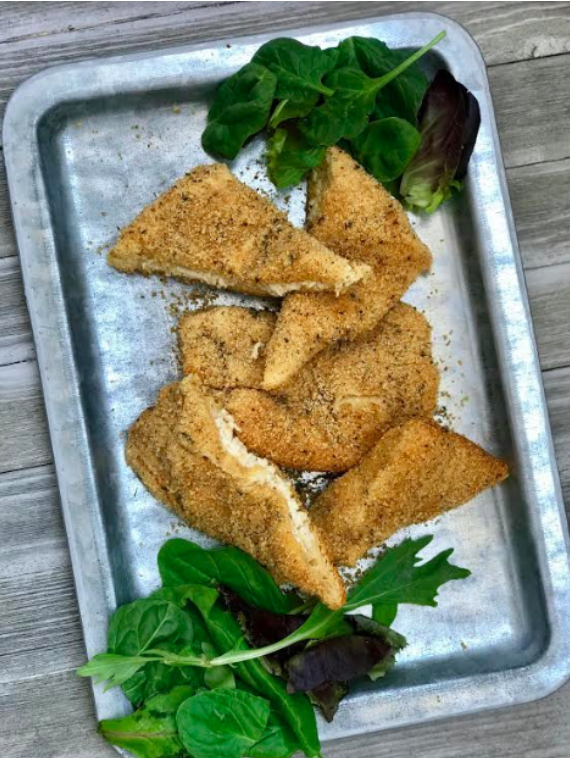
Would you like a quick and easy dinner idea to have on hand that is sure to make you the BEST wife and mom on the block? My Cream Cheese Chicken Pockets featuring Tyson Chicken and Arla Cream Cheese will be a hit with your entire family! Tyson Fully Cooked Grilled Chicken Breast Strips are so versatile and they allow you to prepare a meal in just minutes since they are already fully cooked! Arla Cream Cheese is my favorite cream cheese as it is creamy, delicious and made with natural ingredients. Combine these 2 products together in my Cream Cheese Chicken Pockets and you have one tasty dish!

Cream Cheese Chicken Pockets

Ingredients:

1 bag Tyson Fully Cooked Grilled Chicken Breast Strips, 12 oz. shredded

1 7oz. tub Arla Cream Cheese removed from package and softened in the microwave

2 8-count packages of crescent rolls

2 cups breadcrumbs

1 stick butter, melted

salt/pepper to taste

¼ tsp. garlic powder

¼ tsp. onion powder

Directions:

Preheat oven to 350 degrees F.

Place shredded chicken and softened cream cheese in a bowl.

Add in seasonings and mix until combined.

Unroll the crescent dough. Use 2 squares of dough to form your pocket. Place the chicken mixture inside the dough and fold over to form a “pocket”.

Dip the chicken pockets in the melted butter then into the breadcrumb mixture.

Place the pockets in a baking dish and bake until golden brown.

Serve with your favorite vegetable or salad and enjoy! My guys love this dish and ask for it quite frequently!

I love shopping at Publix and appreciate that the products they sell allows me to be my BEST ME! How will you be the best you and what coupons will you be using to stock up on your family’s favorite products? Be sure to let me know!

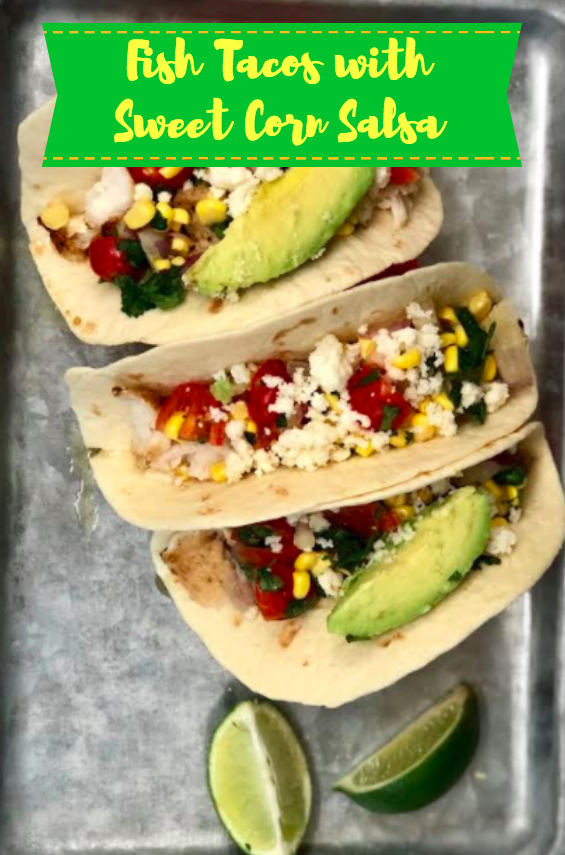
Fish Tacos with Sweet Corn Salsa

This post was sponsored by Fresh From Florida as part of an Influencer Activation for Influence Central, however, all opinions expressed are my own. 

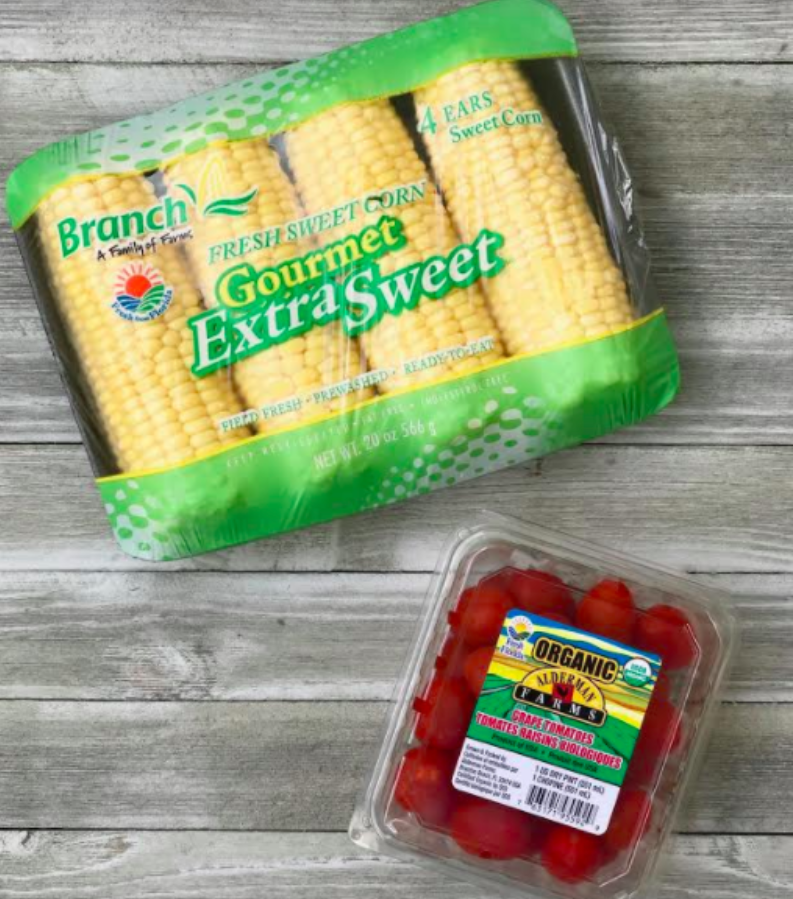
 I often feel that since we live in Florida it is sometimes easy to take for granted the wealth of fresh in-season produce that abounds. Whether it be fresh sweet corn, zucchini, tomatoes or peppers, there is always something in-season! While Florida farmers make it easy for everyone to eat fresh produce year-round, my local Publix supermarket is my go-to place for Fresh From Florida in-season produce.

A couple of our favorite varieties of Fresh From Florida produce are tomatoes and sweet corn. I used these products last week to whip together a batch of our favorite Fish Tacos and Sweet Corn Salsa. My entire family loves this dish, and I take pride in knowing that I am giving them fresh, quality ingredients. Why not try my Fish Tacos with Sweet Corn Salsa for yourself? 

Fish Tacos with Sweet Corn Salsa

Ingredients:

1 lb. fresh tilapia

1/2 bunch of chopped cilantro

4 ears of fresh sweet corn, cut off the cob

1/2 red onion, diced

1 small diced jalapeño

1 small diced chili pepper

1 carton of red grape tomatoes halved

the juice from 2 limes

salt/pepper to taste

1/2 tbsp. butter for the fish

tortillas, warmed

Cotija Mexican cheese

avocados sliced

Directions:

Season tilapia with salt and pepper. Place into a buttered skillet and cook until flaky and tender. Cut into bite size pieces and set aside.

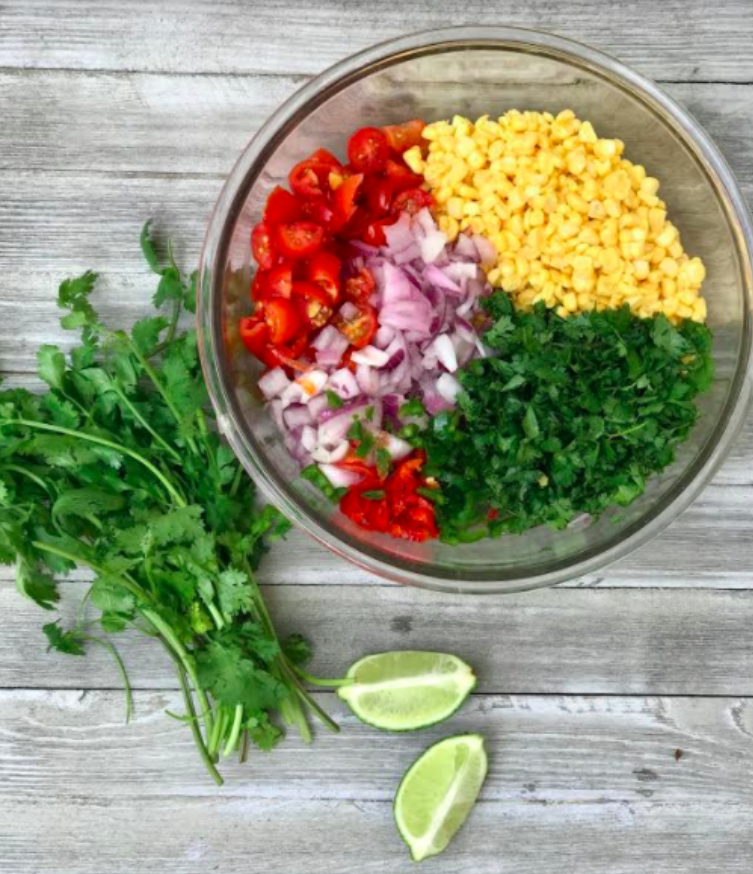
To make the Sweet Corn Salsa, combine the tomatoes, corn, red onion, jalapeño, red chili pepper and cilantro. Add in the lime juice and season with salt and pepper to taste.

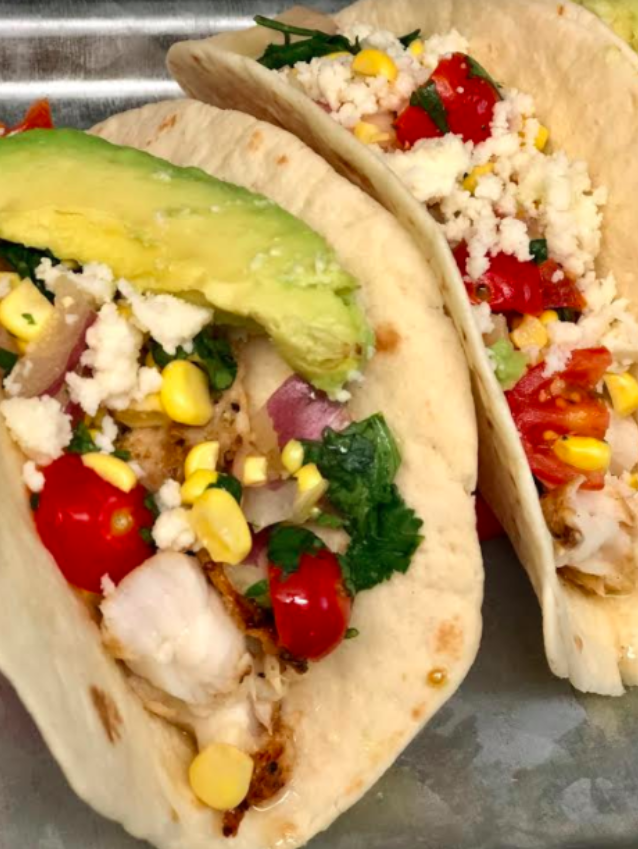
To assemble the fish tacos, place bite-sized fish pieces into a warmed tortilla and top with salsa. Add avocado slices and cotija cheese. Squeeze fresh lime juice on top and serve. These are so fresh and mouthwatering. Each bite has the perfect amount of sweetness and heat!

Follow the Fresh

Would you enjoy seeing more recipes made with Fresh From Florida produce? I highly recommend that you Follow the Fresh! Get healthy and flavorful recipes as well as how-to-videos and more.

Centsible Suppers: Barbecue Chicken Shepherd’s Pie

(All posts may contain affiliate links or sponsored content. Please see my disclosure policy)

It is once again time for Centsible Suppers with My Sweet Savings! This week I shopped at Walmart and everything for my meal was right under $10. I had a great idea for this week’s meal as it combines all of my favorite items from a barbecue chicken dinner into one dish- Barbecue Chicken Shepherd’s Pie! I have to tell you that my family loved this dish and I will definitely be making it again! This should be enough to feed 4-6 people easily. You could add in another veggie if your prefer to make the meal go even farther. 

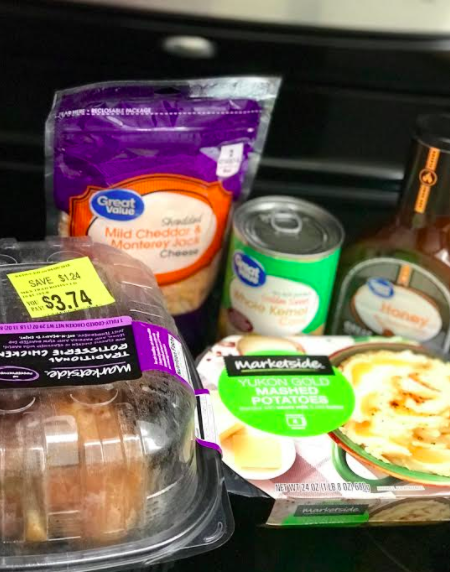
Here is what I bought:

Rotisserie Chicken marked down to $3.74. TIP: If you go to Walmart in the morning, they often have meat on markdown. I always buy several chickens, take the meat off the bone and freeze it!

1 can of sweet corn, drained $0.50

1 bag of mild cheddar and monterey jack shredded cheese, $2.24

1 bottle of honey barbecue sauce, $1.27

1 carton of pre-made mashed potatoes cooked according to microwave directions on package, $2.78

2-3 diced green onions, $0.50 (I forgot to add them in the picture)

Directions:

Preheat oven to 350 degrees.

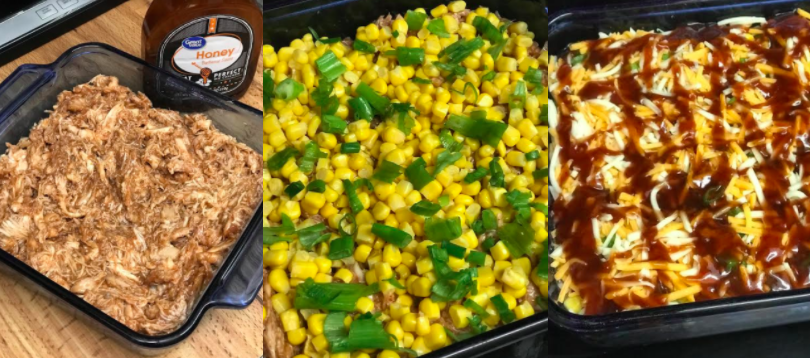
Shred the rotisserie chicken and place in a bowl. Pour 3/4 jar of the barbecue sauce over the chicken and mix together.

In a small baking dish, place the barbecue chicken as the bottom layer

Layer the corn on top of the barbecue chicken

Sprinkle on the diced green onion

Add half the bag of cheese (around 1 cup)

Pour over the remainder of the barbecue sauce

Top with your cooked mashed potatoes and sprinkle with some seasoned salt.

Bake until bubbly around 20-25 minutes. During the last few minutes of baking, turn up the heat on the oven and let the potatoes broil.

Serve and enjoy! If you make this dish I would love to hear what you think!