Dessert

Gluten Free Cranberry Cake

(All posts may contain affiliate links or sponsored content. Please see my disclosure policy)

This Gluten Free Cranberry Cake recipe continues to be a family favorite! I am definitely make some in the next few weeks! The flavors of cranberry and orange together with the delicious buttery cake are a perfect combination! I originally posted this recipe over at the Mommy Spot Tampa Bay back in 2016.

Gluten Free Cranberry Cake

Ingredients:

2 cups sugar

3 eggs

12oz. fresh cranberries

¾ cup softened butter

pinch of cinnamon

1 tsp. vanilla

2 cups Bob’s Red Mill Gluten-Free Flour (I find this is the best Gluten-Free flour on the market in my opinion and it can be used 1 to 1 for regular flour)

For Orange Glaze:

1 cup powdered sugar

2 tablespoons of Orange Juice

Directions:

Preheat oven to 350 degrees. In a mixer, cream together the sugar and eggs. Beat for about 5 minutes until the batter almost doubles in size. The eggs are working as your leavening agent. Be sure that you do not skip this step! Add the softened butter, vanilla and pinch of cinnamon. Beat for another 2 minutes. Stir in the flour just until combined. Add in the fresh cranberries and stir to mix throughout.

Spread in buttered 9×13 pan and bake for around 40-45 minutes. I baked mine exactly 44 minutes and it came out of the oven perfectly lightly browned and gorgeous! You can use a toothpick to insert in the middle of the cake. When it comes out clean you will know that your cake is done.

Set cake aside and let cool for a few minutes. In the meantime, whisk together 1 cup of powdered sugar and 2 tablespoons of orange juice to form a nice glaze. Drizzle over the top of the cake and enjoy. I also like to sprinkle some extra sugar on the top for a nice touch.

The orange with the cranberry has such a wonderful flavor! I love to enjoy this with my favorite cup of coffee! Delish!

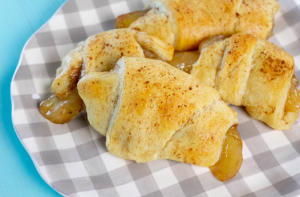
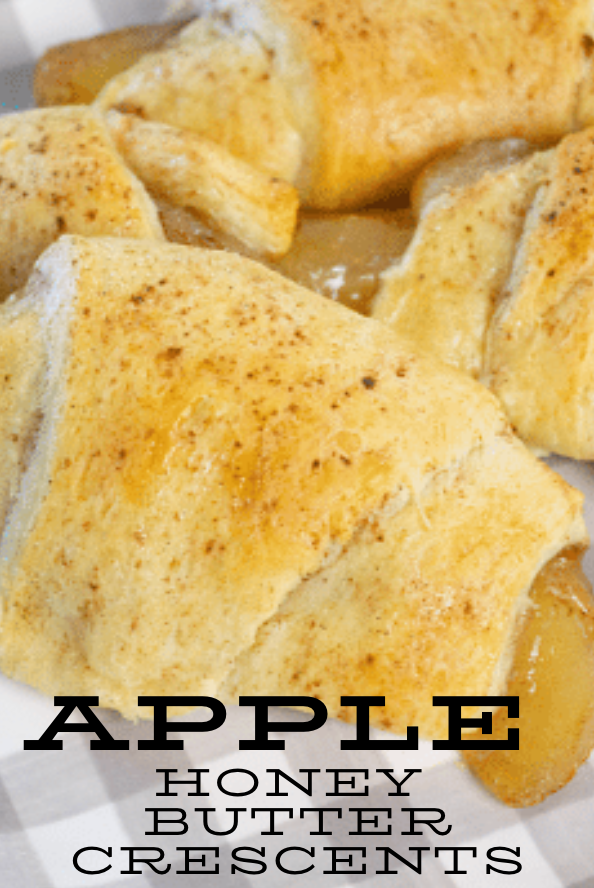
Apple Honey Butter Crescents

(All posts may contain affiliate links or sponsored content. Please see my disclosure policy)

I don’t know about you, but fall is my favorite time of the year. I love the food, fun and activities that surround this time of the year. These Apple Honey Butter Crescents are definitely fall in a bite and they couldn’t be easier to make! If you are looking for a fun and easy recipe to make this weekend, give these a try!

Apple Honey Butter Crescents

Ingredients:

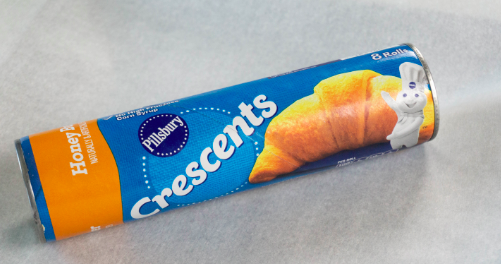
1 can Pillsbury honey butter crescent rolls

1 can apple pie filling (may opt to use homemade filling)

1 teaspoon cinnamon

Instructions:

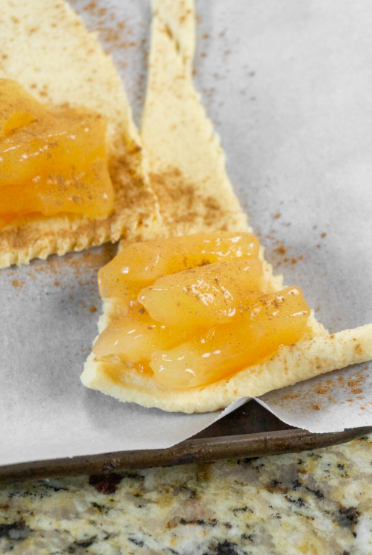
Unroll the crescent dough onto a baking sheet lined with parchment paper. Preheat oven to 350 degrees F. Place a spoonful of the apple pie mixture into each crescent and roll the dough. Sprinkle with cinnamon. Bake for 18 to 20 minutes until crescent is golden on the outside.

Enjoy! These would also be good with a scoop of your favorite vanilla ice cream!

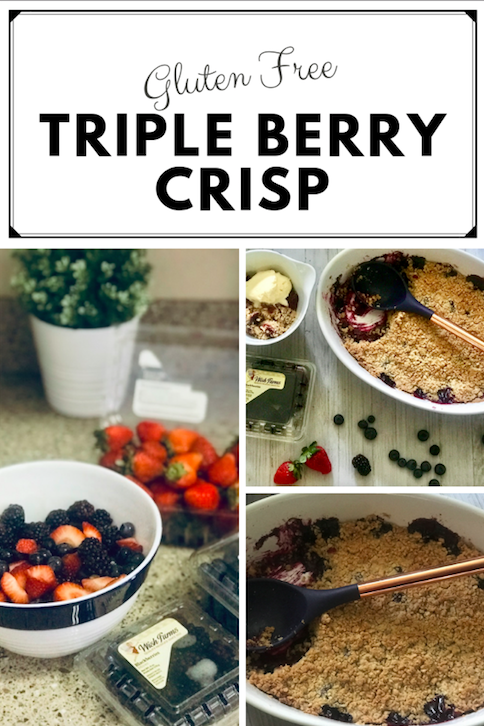
Gluten Free Triple Berry Crisp

This recipe was created in part of a sponsored campaign for Wish Farms. (All posts may contain affiliate links or sponsored content. Please see my disclosure policy)

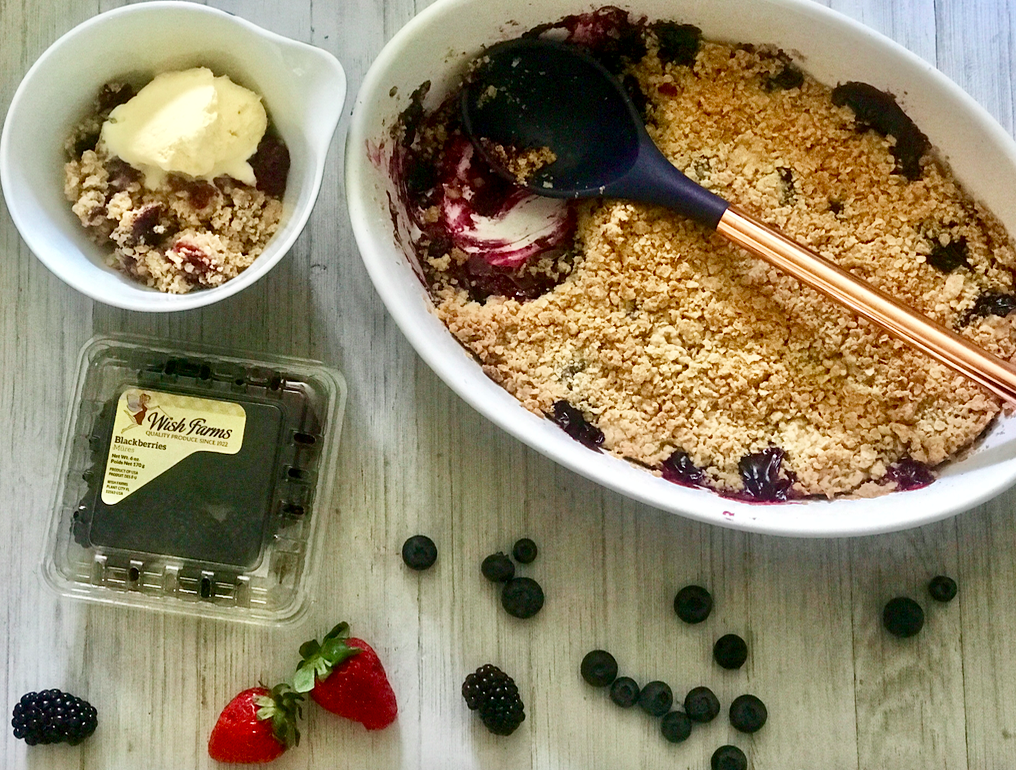
There is something about the summertime that makes me want to eat all the berries! Strawberries, blueberries, blackberries, raspberries…..I love them all! This recipe for Gluten Free Triple Berry Crisp was created around my love for berries, and is packed full of berry goodness in every bite! I hope that you will enjoy it as much as we did! This is a gluten free recipe, but you can easily adjust to make it your own by not using gluten free flour and oats.

Gluten Free Triple Berry Crisp

Ingredients

Filling

1 1/2 cups fresh halved strawberries

2 cups fresh blueberries

1 cup fresh blackberries

1 1/2 Tbsp cornstarch

2 Tbsp. Swerve or regular sugar


Crumble

3/4 cup gluten flour of your choice (this is what I used)

1 cup of gluten free oats of your choice (love these)

1/2 cup packed brown sugar

1/4 cup Swerve (you can also use regular sugar)

1 1/2 sticks unsalted cold butter diced into small pieces

1/4 tsp. cinnamon

1/4 tsp. salt


Instructions

Preheat the oven to 350 degrees and grease a 9 x 9 or 11 x 7 baking dish.

In a mixing bowl, place the flour, oats, granulated sugar, brown sugar, cinnamon and salt. Whisk together just until mixed.

Add the cold butter pieces into the flour/sugar mixture, and with a fork or pastry blender, mix together just until it resembles coarse crumbs. Set aside or place in the refrigerator until you are ready to use.

In a separate bowl, add the berries. Sprinkle with the 2 Tbsp. of Swerve and Cornstarch and lightly mix together. Make sure that all of the berries are evenly coated.

Spread the berry mixture in the buttered baking dish.

Spread the Crumble mixture evenly over the top of the berries.

Bake in preheated oven and cook until golden brown and bubbly. Cooking time is approximately 30-35 minutes.

Serve with ice cream or fresh whipped cream and enjoy!

Pin it for later HERE!

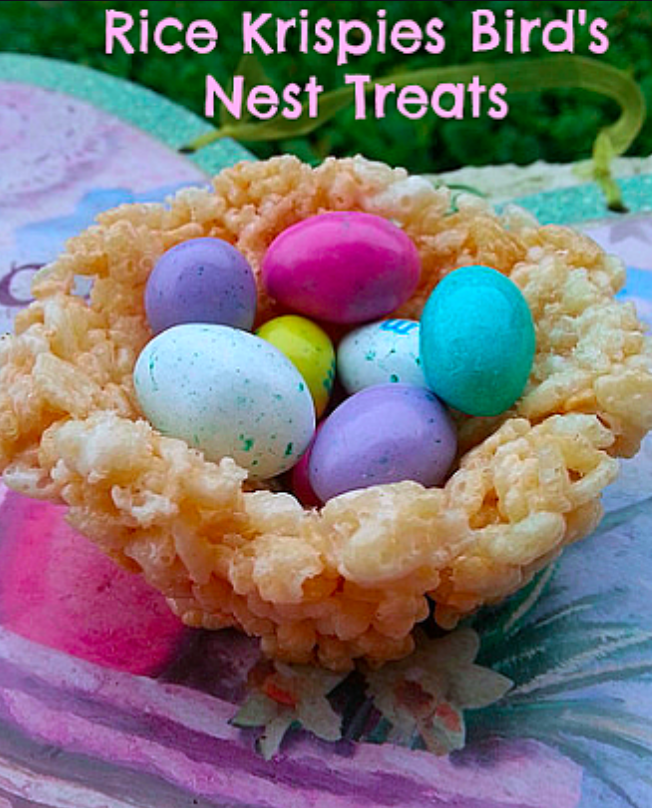
Rice Krispies Bird’s Nest Treats

(All posts may contain affiliate links or sponsored content. Please see my disclosure policy)  

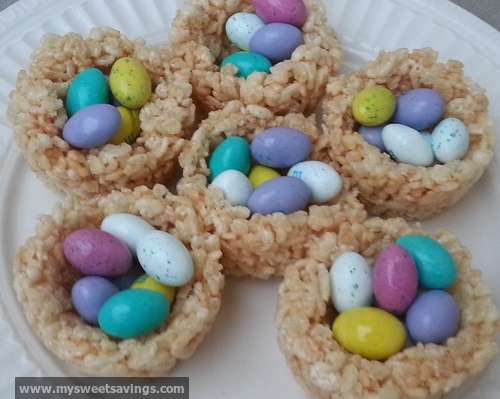
Easter is quickly approaching and these Rice Krispies Bird’s Nest Treats are always a hit at my house. The boys love to help me make them and they are very yummy! You can change out the candies inside if you prefer something else over M&M’s.

INGREDIENTS:

  • 3 tablespoons butter or margarine
  • 1 package (10 oz., about 40) JET-PUFFED Marshmallows
  • 4 cups JET-PUFFED Miniature Marshmallows
  • 6 cups Rice Krispies Cereal
  • Bag of Speckled Easter Egg M&M’s

DIRECTIONS:

Melt the butter in the microwave for about 1 minute.

Add in the marshmallows and stir with the butter. Place back in the microwave for about 1 minute and 45 seconds. Stir together until completely melted together and smooth.

Place the Rice Krispies in the mixture and stir completely.

Have a 12-count Muffin pan already sprayed with Cooking Spray ready to go.

Take a generous amount of the mixture and place in each Cupcake slot.

While the slots are still soft, take a spoon and create a small hole in the middle of each one to form a nest or basket.

Let the nests harden for about 10-15 minutes. You can also go back at this time to adjust your nests and take out more of the mixture if needed.

Add in the speckled M&M’s to your nests.

Eat and Enjoy!

You could really use whatever candies that you like in the middle of the nests but I love these speckled M&M’s for Easter!  

image_1

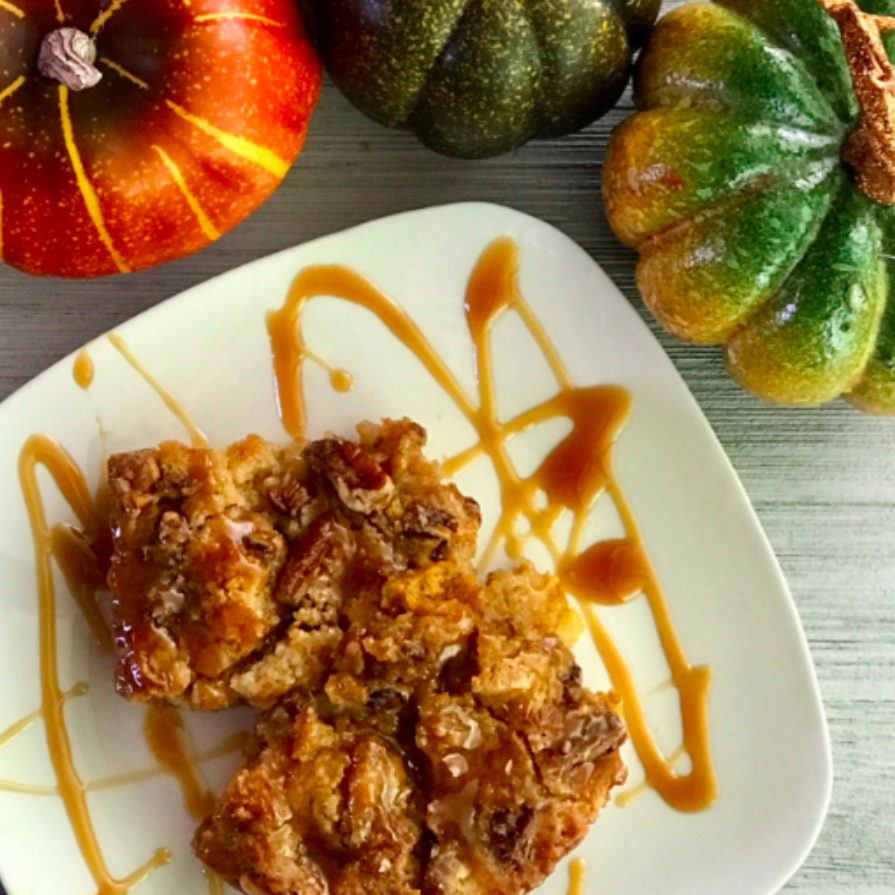
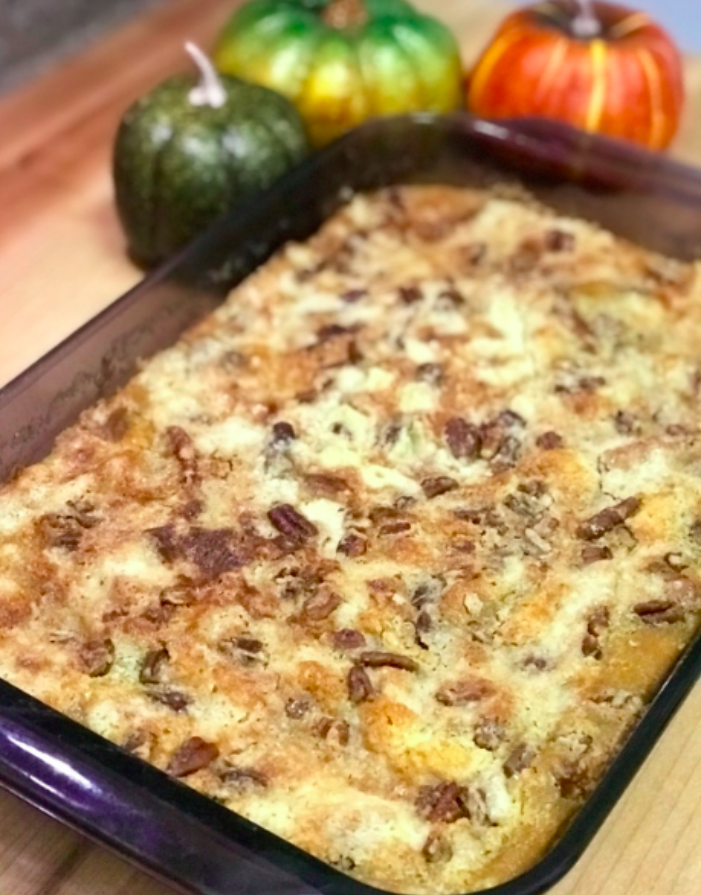
Salted Caramel Pumpkin Crunch Bars with Miss Jones Baking Co. Vanilla Cake Mix

Disclosure: As a brand ambassador, I received products to facilitate this post. All thoughts and opinions are my own. Please see my disclosure policy)

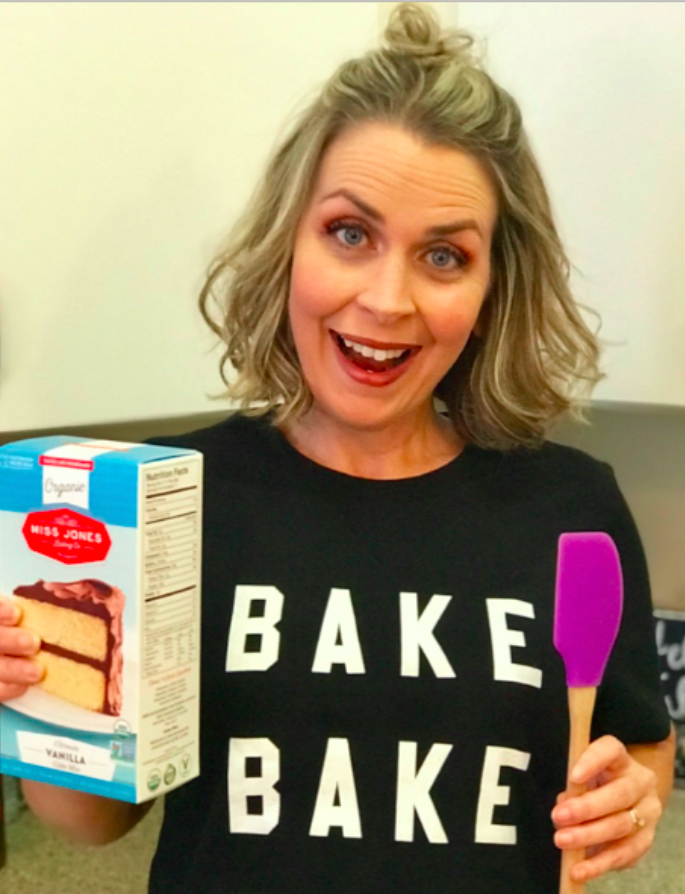
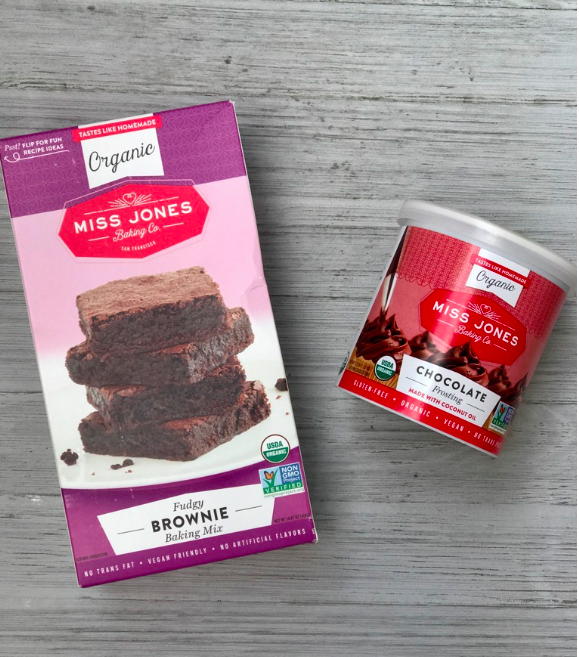
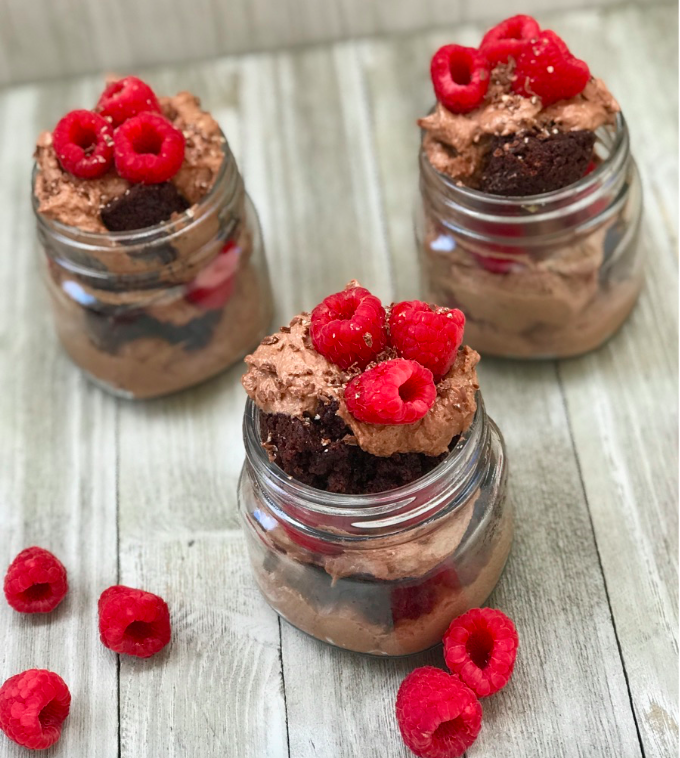
I am thrilled to once again be partnering with Miss Jones Baking Co.! You may remember from my previous post HERE, that I made yummy Chocolate Raspberry Brownie Cheesecake Trifles with their Fudgy Brownie Mix and Miss Jones Chocolate Frosting Made with Coconut Oil. 

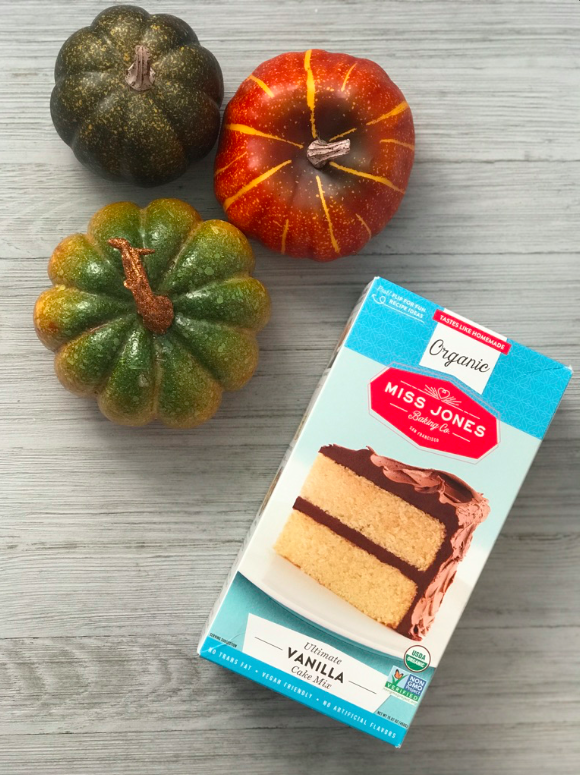
For today’s recipe, Salted Caramel Pumpkin Crunch Bars, I am using the Miss Jones Baking Co. Organic Vanilla Cake Mix. This is the mix that started it all! Miss Jones’ recipe for this moist, fluffy treat has the perfect hint of vanilla. It is simple yet delicious. I love how versatile this mix is too! Not only can you use it for cakes, but for cookies and bars like I did today. 

I don’t know about you, but when fall arrives that means one thing. Pumpkin everything! I am a huge pumpkin fan so I knew that I wanted to create a dessert with Miss Jones Baking Co. Organic Vanilla Cake Mix that incorporated my love of pumpkins and fall. I think that this recipe is a winner! My guys could not stop raving about how delicious that these bars are! I hope that you will enjoy them too!

Salted Caramel Pumpkin Crunch Bars

Ingredients:

1 box Miss Jones Baking Co. Organic Vanilla Cake Mix

3 eggs

3/4 cup melted butter

1 12oz. can evaporated milk

1 15oz. can pumpkin (not pumpkin pie filling)

1 cup sugar

1 cup chopped pecans

2 tsp. cinnamon

1 tsp. pumpkin pie spice

Himalayan Salt Grinder

Caramel sauce

Directions:

Preheat oven to 350 degrees and grease a 9×13 baking dish. In a bowl, mix eggs, pumpkin, sugar, evaporated milk and cinnamon. Pour mixture into the greased baking dish.

Sprinkle the dry Miss Jones Baking Co. vanilla cake mix on top of of the pumpkin mixture. Sprinkle with pecans then drizzle with melted butter.

Bake at 350 degrees for 50 minutes or until the middle is set. Let set for at least 30 minutes. Drizzle with caramel sauce then grind Himalayan Sea Salt on top of bars before serving. You could even serve with ice cream or whipped cream.

Enjoy! These bars are salty, sweet and oh-so delicious! They are definitely fall in every bite!

***********************

Did you know that Publix carries a full lineup of Miss Jones Baking Co. products? You can also find their products on Amazon and other retailers. Check out their website HERE for a delicious lineup of products and location finder.

Be sure to follow Miss Jones Baking Co. on Instagram, FacebookTwitter and Pinterest

Peaches and Cream Pretzel Dessert

 (All posts may contain affiliate links or sponsored content. Please see my disclosure policy)

Do you remember that delicious Strawberry Salad Dessert that used to be so popular back in the day? To this day I love that dish so much! I decided to take my own spin on it and create something using Peaches instead. I am in love with peaches during the Summertime and this Peaches & Cream Pretzel Dessert did not disappoint! I also used Gluten Free pretzels to make the dish Gluten Free. The real beauty of this dessert is the fact that it is so versatile and you can change up the fruit to use whatever sounds good! I am going to try Blackberries next as that would be delicious too!

*If you love this recipe don’t forget to Pin it HERE.

Ingredients:

2 cups crushed pretzels (I used Gluten Free but you can use regular as well)

3/4 cup butter, melted

3 tablespoons white sugar

1 (8 ounce) package cream cheese, softened

1 cup white sugar

1 (8 ounce) tub of Cool Whip

2 (3-ounce boxes) of Peach flavored JELL-O

2 cups of boiling water

2 (10 ounce) bags of frozen peaches

Directions:

Mix together the melted butter, crushed pretzels and 3 tablespoons of sugar.

Press the mixture into the bottom of a 9×13 pan.

Bake for 8-10 minutes just until browned and set aside to cool.

In the meantime, beat together the cream cheese and sugar. Fold in the Cool Whip.

Spread the mixture out across the cooled Pretzel crust.

Dissolve Gelatin in the Boiling water. Stir in the Frozen Peaches and let them set very briefly. Continue to stir until mixture is about the consistency of egg whites. Take mixture and spoon over the top of the cream cheese layer. Place in refrigerator to let set. I would give it at least 3-4 hours to set up.

Enjoy! You could even add more Cool Whip on the top if you desire. Think about taking this to your next picnic or potluck! I guarantee that there will be none left!

(recipe inspired from AllRecipes.com)

Chocolate Raspberry Brownie Cheesecake Trifles with Miss Jones Baking Co.

Disclosure: As a brand ambassador, I received products to facilitate this post. All thoughts and opinions are my own. Please see my disclosure policy)

I was recently given the wonderful opportunity to become a Baker Babe Brand Ambassador with Miss Jones Baking Co. This awesome company based in San Francisco, California offers homemade-tasting organic cake, brownie and cookie mixes and frostings. Everything that they make features simple, non-GMO ingredients, no hydrogenated oils or trans fats, no artificial flavors or colors. 

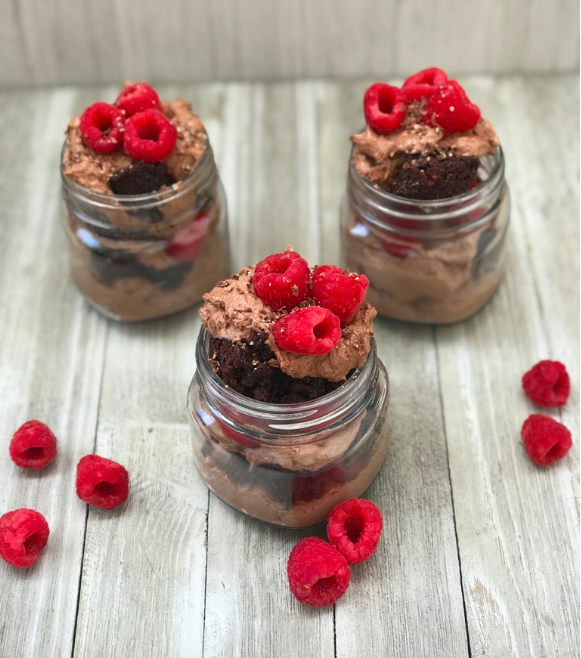
As a brand ambassador, I was sent several products so that I could create some amazing goodies and share them with you all! I wanted to think out of the box with these delicious products and thought that a trifle would be a great dessert for summertime! For my Chocolate Raspberry Brownie Cheesecake Trifles, I used Miss Jones Baking Co. Fudgy Brownie Baking Mix and the Miss Jones Chocolate Frosting Made with Coconut Oil. With a few extra additions, I ended up with the most delicious and decadent dessert that you could ever sink your teeth into!

Ingredients:

1 box Miss Jones Baking Co. Fudgy Brownie Baking Mix

1 tub Miss Jones Chocolate Frosting Made with Coconut Oil

2 eggs

2T. water

1/2 cup vegetable oil

1 8oz. brick softened cream cheese

1 pint of raspberries

Mason Jars trifles

Directions:

Preheat oven to 350 degrees. In a large mixing bowl, mix together the brownie mix, eggs, oil and water. Grease a 8×8 baking pan and pour batter in pan. Bake for 33-37 minutes or until center is set with a toothpick. Take out of oven and set aside to cool.

While brownies are cooling, take the tub of Miss Jones Chocolate Frosting and place inside a large mixing bowl with the brick of softened cream cheese. Beat on low with a mixer until nice and fluffy. Set aside.

Now that brownies are cooled, cut them into small squares to fit into the mason jars. Take a spoonful of chocolate cream cheese mixture and place in a mason jar. Top with a brownie square and add raspberries on top. Keep alternating back and forth. Make sure that you end with chocolate cream cheese mixture and raspberries on top. You can even shave some chocolate on the top for a nice touch.

Enjoy! I hope that you love Miss Jones Baking Co. products as much as I do!

Stay tuned as I will be sharing more of their delicious products with you in the next months! In the meantime, be sure to follow Miss Jones Baking Co. on Instagram, Facebook, Twitter and Pinterest. Don’t forget to check out their website HERE for a delicious lineup of products and location finder.

Swerve Sweetener Review + Lemon Butter Cakes Recipe

Disclosure: I was provided with products to facilitate this review. All thoughts and opinions are my own. Please see my disclosure policy)

As someone who strives to live a healthy lifestyle, I am always on the lookout for products to incorporate in my recipes that will not only make them taste great, but that are also a great substitute for other products that may be sugar-laden, higher in fat, calories, etc…. I feel that I hit it out of the ball park with Swerve Sweetener! These products are also perfect for Low Carb, Ketogenic diets! Have you tried Swerve before? I would love to hear your thoughts!

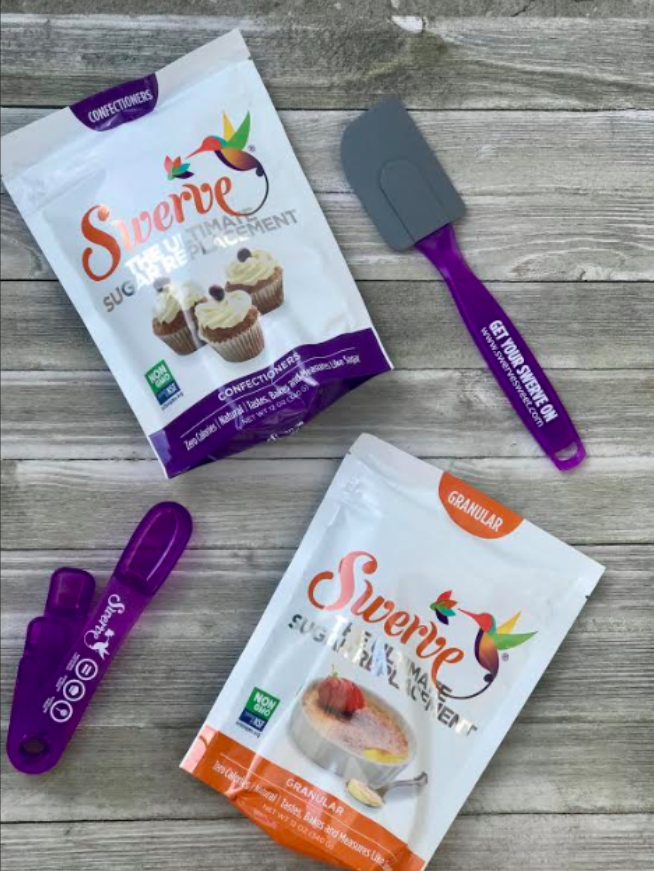
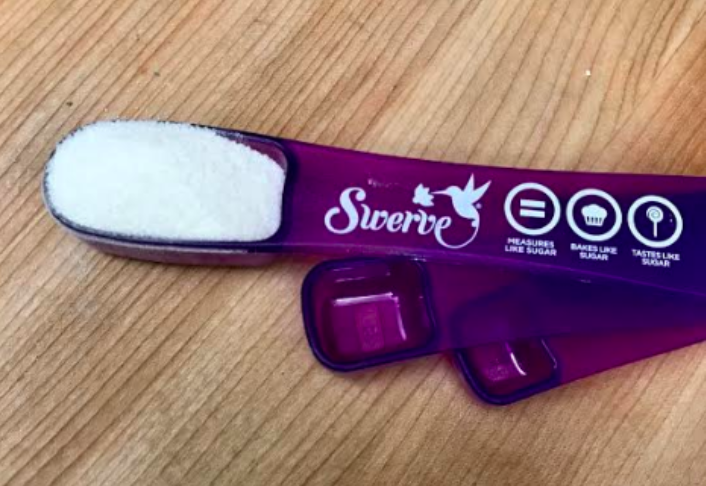
Swerve Sweetener is zero-calorie, non-glycemic and measures cup-for-cup like sugar. It’s sweet, safe and natural. Out of all the sweeteners that I have ever used before, Swerve is by far by the best-tasting sugar replacement product that I have found. So many of the other Stevia products on the market leave an aftertaste in your mouth. Not Swerve! It tastes just like sugar and bakes likes likes sugar so baking is a breeze! 

How does Swerve get its sweetness? Swerve is made from ingredients found in select fruits and starchy root vegetables, and contains no artificial ingredients, preservatives or flavors. It’s zero-calorie, non-glycemic and safe for those living with diabetes, since it has no effect on blood glucose or insulin levels.

Swerve has many products in their lineup, but my 2 favorites that I use all of the time are the Swerve Sweetener Granular and the Swerve Sweetener Confectioners. These 2 products have revolutionized my life and have replaced all of the other sugars in my pantry! I love that Swerve also has a confectioners product so that I can make homemade frostings and glazes for my cupcakes and muffins!

Swerve was so gracious to send me several bags of granular and confectioner’s sugar and I was excited to try one of the recipes from their website. There is something about this time of the year that has me loving all things lemon so I made the Lemon Butter Cakes. These cakes were so moist and sweet. You definitely would have no idea that there is no sugar in them if I had not told you! Everyone who tasted them told me how delicious that they were. They were a hit with everyone in my house so that was a win in my book!

Lemon Butter Cakes

Ingredients:

  • 1 1/2 cups almond flour
  • ¼ cup coconut flour
  • 1 tsp xanthan gum
  • 1 TBSP baking powder
  • ½ tsp salt
  • ½ cup butter, softened
  • 1 cup Swerve, Granular
  • 4 large eggs, room temperature
  • 1 tsp vanilla extract
  • 1 cup unsweetened almond milk or milk
  • 2 TBSP lemon zest (1 lemon)
  • 2 TBSP lemon juice (4 large lemons) or 2 tsp lemon extract
  • 6 drops of yellow food coloring to help give the cakes a stronger yellow coloring

Glaze:

  • ¼ cup of Swerve, Confectioners
  • 2 TBS of fresh lemon juice
  • ½ -1 teaspoon lemon zest

Directions:

  1. Preheat the oven to 350°F. Place cupcake liners in cupcake pan or excessively butter the entire cupcake pan.
  2. In a medium bowl, whisk together the almond flour, coconut flour, baking powder, xanthan gum and salt. Set aside.
  3. In a large bowl on medium high to high speed, beat butter with Swerve until light and fluffy, about 5 minutes. Beat in eggs, food coloring, and vanilla extract until blended. On low speed, beat in half of the almond flour mixture. Beat in milk, and then the remaining almond flour mixture until combined. With a spatula, mix in lemon juice and lemon zest.
  4. Divide the batter evenly among the muffin pan, and shake the pan gently to ensure batter is evenly spread in each cup.
  5. Bake for 20-24 minutes until edges are browned, and toothpick inserted comes out clean. Remove from oven, and let cool for 10 minutes before gently removing each cake from pan.
  6. In small bowl, combine lemon juice, Swerve Confectioners, and lemon zest. Mix together until well combined. Drizzle onto each cake.

These cakes are absolutely delicious! I added fresh blueberries when serving for even more freshness, but you could also serve with strawberries or even raspberries. Yum!

To check out all of the delicious recipes that can be made with Swerve, check them out HERE.

Stay up to date on all of the latest Swerve news and product offerings by following them on Facebook, Twitter and Instagram and Pinterest.

No Bake Chocolate Strawberry Lasagna #SundaySupper #FLStrawberry

This post is sponsored by Florida Strawberry in conjunction with a social media campaign through Sunday Supper LLC. All opinions are my own.

It is no secret that I like strawberries. But, I LOVE Florida Strawberries! Living in Florida, I feel especially blessed to be right near the gorgeous Florida strawberry fields. The plump red gems of juicy goodness are the perfect portable bite, and I love that they can be eaten any time in any place. Just wash, eat and enjoy!

You may not know this, but Florida strawberries are actually harvested in the winter. Florida strawberry season is ALL winter long from December through April, so you don’t have to wait until the summer months to enjoy them! If you don’t see Florida strawberries carried at you local grocery store, be sure to ask your produce or store manager. You will be so happy that you did as there is nothing like a juicy and mouth-watering Florida strawberry!

Not only are Florida strawberries packed full of flavor, they are also packed full of nutritional benefits. Strawberries are virtually fat free, have no cholesterol, and are full of Vitamin C! In fact, did you know that just 8 medium strawberries contain more Vitamin C than one orange? You can learn about all of the nutritional benefits of strawberries HERE.

One of the things that I love most about Florida strawberries is just how versatile that they are. They can be preserved, used in desserts and salads and so much more! Today, I am sharing with you just how easy Florida strawberries are to use in no-bake desserts. No bake desserts are often much simpler and easier to make than baked desserts, and many of them are even healthier. I also feel that no bake desserts are such a time-saver! When you pair Florida strawberries into your no bake dessert, you have a win-win! And, you didn’t have to fire up the oven!

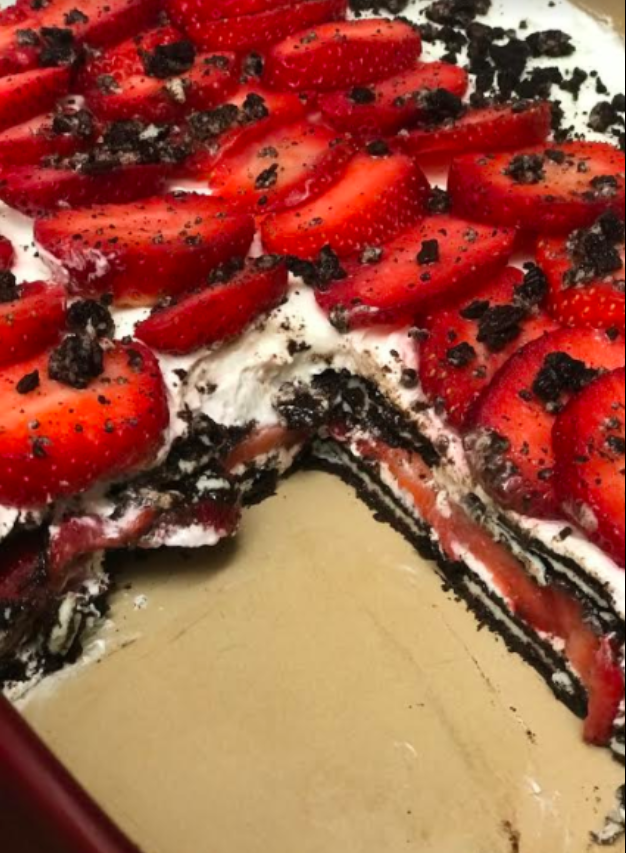
What can be better than Florida strawberries combined with chocolate and cream cheese? My recipe for No Bake Chocolate Strawberry Lasagna will definitely have you coming back for more! Layers of fresh Florida strawberries, Oreo Thins and a decadent cream cheese mixture couldn’t be easier to make! This will be the perfect treat for your next party or potluck and your guests will think you spend hours on it!

No Bake Chocolate Strawberry Lasagna

Ingredients:

2 lbs. fresh sliced Florida Strawberries

2 (8oz.) packages of softened cream cheese

1 (8oz.) container of Cool Whip

¾ cup sugar

1 tsp. vanilla extract

2 (10.1 oz.) packages of Oreo Thins Cookies (set aside 4-5 cookies to crumble for the topping)
Directions:

With an electric mixer, combine the cream cheese, sugar and vanilla extract until smooth and creamy. Fold in the container of Cool Whip. Set aside in a small bowl.

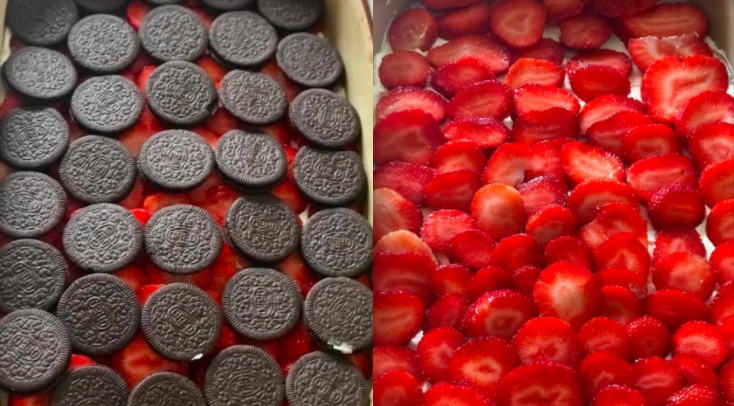
In the bottom of a 9×13 dish, place one layer of Oreo Thins. Place a layer of the cream cheese mixture, then a layer of the sliced Florida strawberries. Repeat this process one more time. On the top, you can decorate with the last strawberry layer how you prefer. I did not take them across the entire way so that you can see part of the cream cheese layer. On the top, sprinkle your Oreo Thins crumbles that you set aside.

Chill in the refrigerator for 3-4 hours. Serve and enjoy this berry-licious no bake dessert! You will not be able to eat just one slice!
Need more Florida strawberry inspiration? Visit Strawberry Sue or follow Strawberry Sue on You Tube or Twitter. Florida Strawberry can be found on FacebookTwitterInstagramGoogle +and Pinterest.

Do you have a no-bake strawberry recipe that you would make with Florida strawberries? I would love to hear!

In addition, be sure to check out my fellow Sunday-Supper blogging friends below who have even more delicious Florida Strawberry no-bake recipes.

No Bake Strawberry Desserts

No Bake Strawberry Cakes and Pies

Tasty Strawberry Layered Desserts

Special and Delicious Strawberry Treats

Sunday Supper MovementThe Sunday Supper Movement is committed to bringing our readers delicious recipes that encourage them to gather and eat together around the family table. Search for your favorite ingredients on our Sunday Supper website. Also check out the Sunday Supper Pinterest boards for plenty more ideas and inspiration.
Homemade Strawberry Valentine’s Day Love Notes

(All posts may contain affiliate links or sponsored content. Please see my disclosure policy)

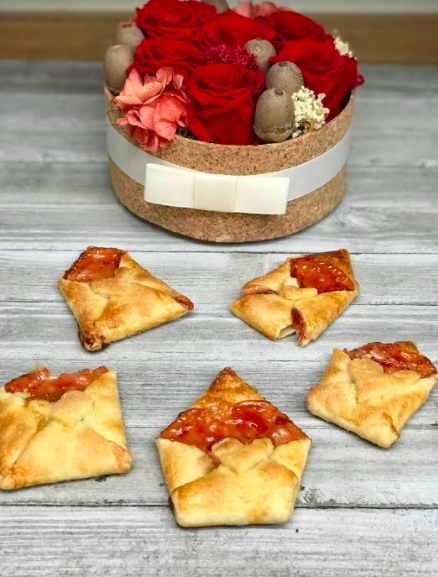
If you need a cute yet inexpensive treat for your family this Valentine’s Day, these Homemade Strawberry Love Notes are perfect and oh so yummy! Oh, and did I mention that they are super easy to whip up! I made these for my guys last night and they were gone in a flash!

Homemade Strawberry Love Notes

(recipe inspiration from Delish)

INGREDIENTS:

1 2-count box of refrigerated pie crusts

1/2 cup of your favorite jam. I used strawberry, but you could really use any that you like.

Egg wash

1/2 cup Granulated sugar

DIRECTIONS:

On a lightly floured surface, roll out 1 pie crust. 

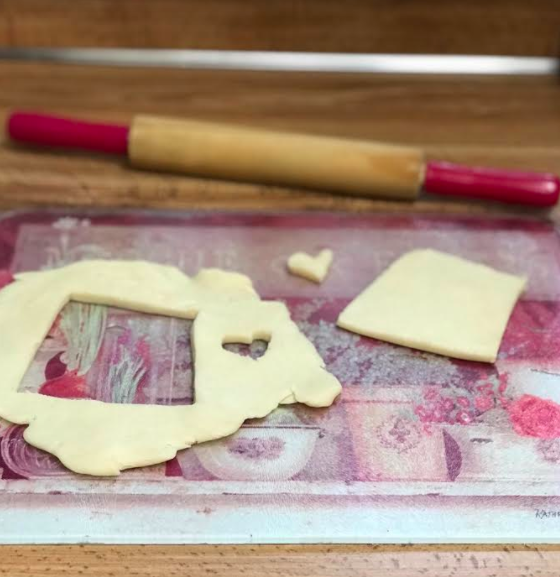
With a paring knife, make diamond shapes roughly 4 inches in size.  You will also want to make little hearts for the love notes.

Place a small layer of jam in the middle of the love note.

Form the dough to look like a little envelope.

Place the heart on top of the love note.

Repeat until you have used up the majority of the dough. You should yield around 12 love notes depending on how big that you make them.

With your egg wash brush each love note.

Sprinkle sugar on the top of each note to give them a nice glisten when they bake.

Bake in the oven on 375 degrees for around 15 minutes or until nice and golden brown.

Enjoy!

Happy Valentine’s Day!