Posts tagged with "recipes"

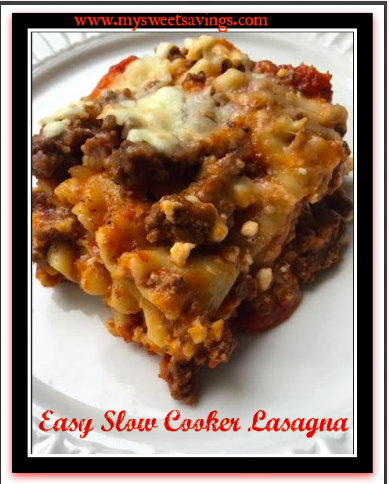
Slow Cooker Lasagna

(All posts may contain affiliate links or sponsored content. Please see my disclosure policy)

If you love Lasagna but don’t enjoy the tediou

online pharmacy order cymbalta online with

online pharmacy order robaxin online with best prices today in the USA

best prices today in the USA

s task of assembling it, this dish is for you! Lasagna made right in your slow cooker! My family loves this dish and raves over it even more than when I make a regular lasagna in the oven. And, the best part? It can cook in the slow cooker and be ready for you when you need dinner on the table at night!

INGREDIENTS:

1 pound of Ground Turkey or Ground Beef

1 Small Onion Diced

Dried Garlic

Uncooked Lasagna noodles

1 jar of your favorite spaghetti sauce

1 1/2 cups cottage cheese

1 1/2 cups shredded Mozzarella cheese

2 tablespoons grated Parmesan cheese

DIRECTIONS:

Brown the Ground Beef or Turkey with Diced Onion and Sprinkle Dried Garlic over. Drain. Spoon 1 Cup of Spaghetti Sauce over the bottom of the Slow Cooker. Place 2-3 Lasagna Noodles on Top of the Sauce. Next, Place 1/3 of the Meat mixture on top of the noodles. Spread 3/4 Cup of Cottage Cheese on top of Meat Mixture followed by 1/2 cup of Shredded Mozzarella Cheese. Repeat these steps 2 more times. For the last step, place the 2 tablespoons of Parmesan Cheese on top. Cook on low for 4 hours. Do not cook more than 4 hours or it may get overdone.

Chocolate Peanut Butter Cheerios Chex Muddy Buddies Party Mix is the Ultimate Holiday Snack!

This is a sponsored conversation written by me on behalf of Chex™. The opinions and text are all mine. 

There’s something about the holiday season that puts me in the mood to make homemade gifts for my friends and family that are made right from my own kitchen! I also love this time of the year because it allows me to spend quality time with my boys while preparing these treats or hosting a fun holiday party. Chocolate Peanut Butter Cheerios™ Chex™ Muddy Buddies™ Party Mix, made with ingredients found at your local Publix store, is sure to be a hit with anyone on your gift list this holiday! This would also be the ultimate snack for any of your holiday parties or gatherings.

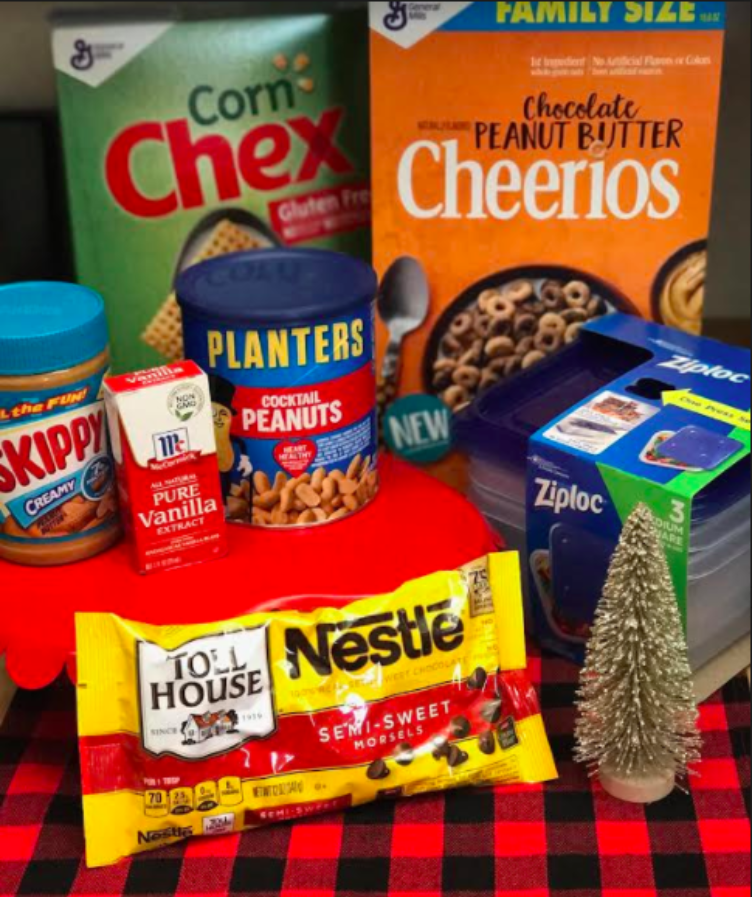
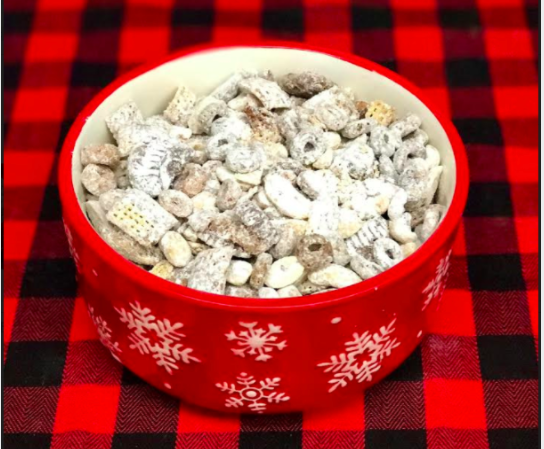
Have you ever made Muddy Buddies before? If not, you are totally missing out! This version of Muddy Buddies, the Chocolate Peanut Butter Cheerios Chex Muddy Buddies, is sure to be a new favorite! Powdered sugar mixed with Chocolate Peanut Butter Cheerios, Chex cereal, peanut butter cups, peanuts and chocolate chips makes this Muddy Buddies recipe a chocolate and peanut butter lover’s dream! 

The recipe is very easy to prepare, and thanks to a printable coupon at www.getthesavings.com/chex, we can score one (1) FREE box of Chocolate and Peanut Butter Cheerios with the purchase of any three (3) Chex cereals. Stock up now so that you will be prepared to make this delicious treat all holiday season!

Ingredients:

9 cups Rice or Corn Chex Cereal

1 cup Nestlé® semisweet chocolate chips

½ cup Skippy® Creamy peanut butter

¼ cup butter

1 teaspoon McCormick® Pure Vanilla

1½ cups powdered sugar

3 cups Chocolate Peanut Butter Cheerios cereal

32 miniature peanut butter cups, unwrapped, cut in half

1 cup Planters® salted cocktail peanuts       

Ziploc® 2-4 count containers

Directions:

Place 9 cups of Rice or Corn Chex Cereal in a bowl

Melt the butter with the chocolate chips and peanut butter on high in the microwave for 1½ minutes until smooth, removing to stir every 30 seconds

Add the vanilla into the chocolate peanut butter mixture and stir. Place the chocolate peanut butter mixture over the Chex Cereal and stir until the cereal is coated

Place cereal mixture in a 2-gallon resealable Ziploc® bag

Add in the powdered sugar and shake in the bag until well coated

Add 3 cups of Chocolate Peanut Butter Cheerios, the halved peanut butter cups and the peanuts to the Ziploc bag

Seal bag and shake until well coated

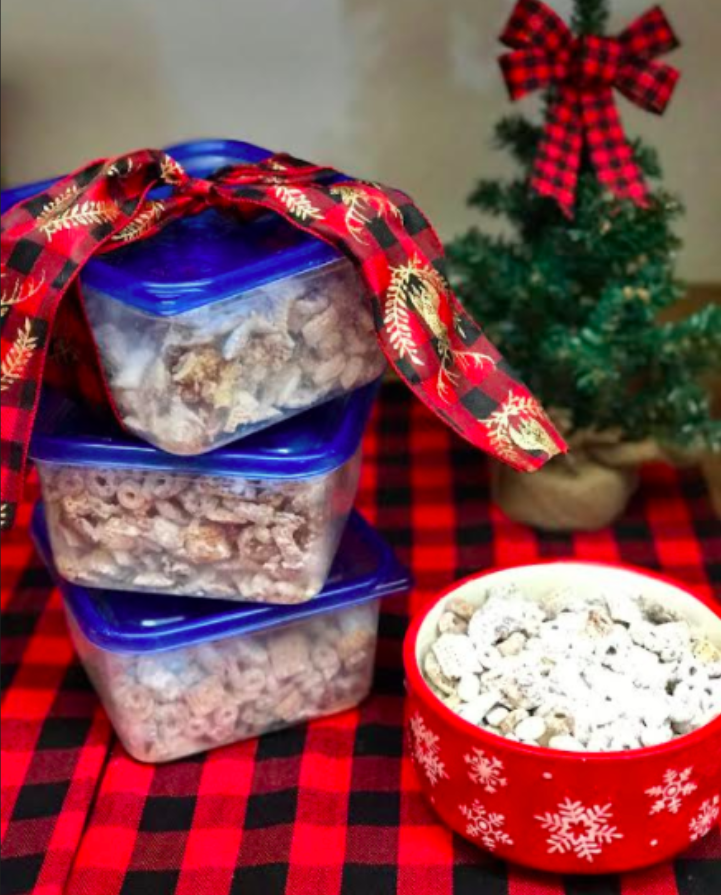
Place in a Ziploc container and enjoy! This is so delicious that you will not be able to eat just one helping! You can place a festive bow on the top of the Ziploc container for delicious gifts that anyone is sure to love this holiday!

High Value Printable Luck’s Coupons + Store Deals! #SaveOnLucks

This post is sponsored by Savings.com. All thoughts and opinions are my own. Please see my disclosure policy)

Many people don’t know this, but I am a huge fan of pinto beans! Since I have lived in the south most of my life, I definitely love the southern cuisine! What’s better than a big bowl of pinto beans with a slice of delicious cornbread? One of my favorite brands of pinto beans is Luck’s. They have the perfect amount of seasoning and flavor. Luck’s is a brand that has been around for many years. Not only do they offer delicious beans, but they also have the most delicious fried apples, peaches and chicken & dumplings.

One of the things that I love most about the Luck’s brand is how affordable that the products are. And, right now, there are some high-value Luck’s coupons available to make for one sweet deal! I have also included some in-store scenarios so that you can save even more! In addition, be sure to keep an eye out for even more coupons in your Valpak envelope when it arrives in the mail.

SAVE $.60 on any ONE (1) Luck’s® Chicken & Dumplings, any size

SAVE $0.80 on any TWO (2) cans of Luck’s® Beans, any size

SAVE $0.60 on any ONE (1) can of Luck’s® Fried Apples or Fried Peaches

Walmart:

Luck’s Pinto Beans $0.74 each

Use $0.80/2 Luck’s coupon HERE

Final price: $0.34 each when you buy 2


Luck’s Black Eye Peas $0.74 each

Use $0.80/2 Luck’s coupon HERE

Final price: $0.34 each when you buy 2


Luck’s Fried Apples with Cinnamon Fat Free $3.38 each

Use $0.60/1 coupon HERE

Final price: $2.78


Kroger:

Luck’s Pinto Beans $0.89 each

Use $0.80/2 Luck’s coupon HERE

Final price: $0.49 each when you buy 2


Luck’s Chicken and Dumplings $2.19 each

Use $0.60/1 coupon HERE

Final price: $1.59


Luck’s Fat Free Fried Apples $1.57 each

Use $0.60/1 coupon HERE

Final price: $0.97


Harris Teeter:

Luck’s Black Beans $1.29 each

Use $0.80/2 Luck’s coupon HERE

Final price: $0.49 each when you buy 2 after doubles


Luck’s Fat Free Fried Apples $1.75 each

Use $0.60/1 coupon HERE

Final price: $0.30 each after doubles


Luck’s Chicken and Dumplings $1.50 each

Use $0.60/1 coupon HERE

Final price: $0.30 each after doubles

Publix: 

Luck’s Pinto Beans $1.09 each

Use $0.80/2 coupon HERE

Final price: $0.69 each when you buy 2

If you purchase the Luck’s Black Beans, be sure to check out my recipe for Slow Cooker Chicken Tortilla Soup.

Chicken Alfredo Bacon Pizza Featuring RAGÚ® Classic Alfredo Sauce

This i

online pharmacy order professional cialis online with best prices today in the USA

s a sponsored post written by me on behalf of RAGÚ® Pasta Sauce. All opinions are entirely my own. 

As a busy mom, I am always on the lookout for quick and easy dinner ideas. Nothing says “Easy Weeknight Dinner” to my family more than a delicious homemade pizza! RAGÚ® Pasta Sauce found in the pasta sauce aisle at my local Publix store, provides the perfect base for a delicious pizza that we can enjoy any night of the week.

One of our favorite varieties of RAGÚ pasta sauce for homemade pizza is the RAGÚ Cheese Creations Classic Alfredo Pasta Sauce. Not only is the RAGÚ Classic Alfredo Pasta Sauce made with real cheese and fresh cream, but it is also bursting with cheese flavor. In fact, every bite of RAGÚ Classic Alfredo is packed with Parmesan and Romano cheese. I also love that this sauce is great in a variety of dishes including Chicken Alfredo. The sauce is available in both 16 oz. and family size 21.5 oz. jars.

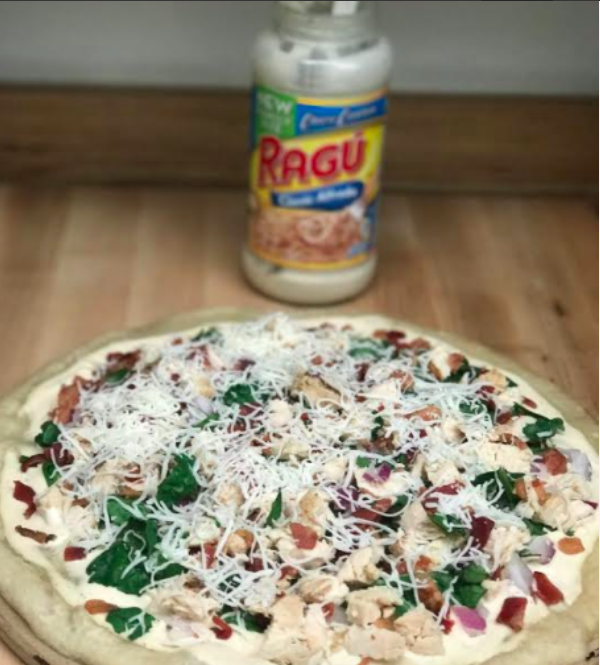
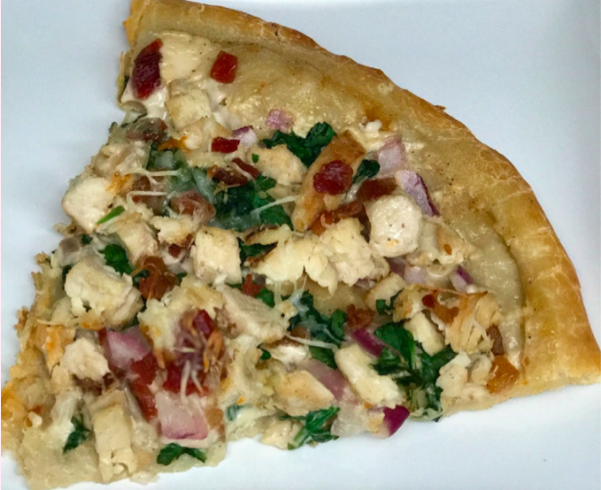
Chicken Alfredo Bacon Pizza made with RAGÚ Classic Alfredo Pasta Sauce is sure to be a new favorite in your house! Every bite is filled with delicious cheese flavor, and your family is sure to request this tasty dish over and over.

Be sure to head to your local Publix now through Wednesday, October 11th, as the

online pharmacy order addyi online with best prices today in the USA

 RAGÚ Cheese Creations Classic Alfredo Pasta Sauce will be on sale during their RAGÚ BOGO event. This is a great time to stock up your pantry with delicious RAGÚ Pasta Sauces so that you can get dinner to the table in no time at all! 

Chicken Alfredo Bacon Pizza (yields 2 pizzas) 

Ingredients:

1 21.5 oz. Family-sized jar RAGÚ Cheese Creations Classic Alfredo Pasta Sauce

2 cans refrigerated pizza dough

½ bag spinach chopped into bite-sized pieces

1 bag of pre-cooked bacon pieces

1 small red onion diced

1 bag of refrigerated cooked chicken strips chopped into bite-sized chunks

1 bag Italian cheese blend

Directions:

Spray 2 non-stick pizza stones with cooking spray.

Unroll the refrigerated pizza dough and place on each pizza stone.

Spread the RAGÚ Cheese Creations Classic Alfredo Pasta Sauce over the pizza crust.

Top with chicken, onion, bacon pieces, spinach, and Italian cheese blend.

Place in 350 degrees oven until pizza crust is golden brown and the Alfredo sauce is bubbly.

Serve and enjoy! You will not be able to eat just one bite. The cheesy goodness of the RAGÚ Alfredo sauce is definitely the star of this dish!

Autumn Squash Soup

 (All posts may contain affiliate links or sponsored content. Please see my disclosure policy) 

It’s autumn and that means we are looking forward to hearty and comforting meals. I especially love a delicious bowl of soup. What are you favorite soups to comfort you and your family during those chilly fall days and nights?

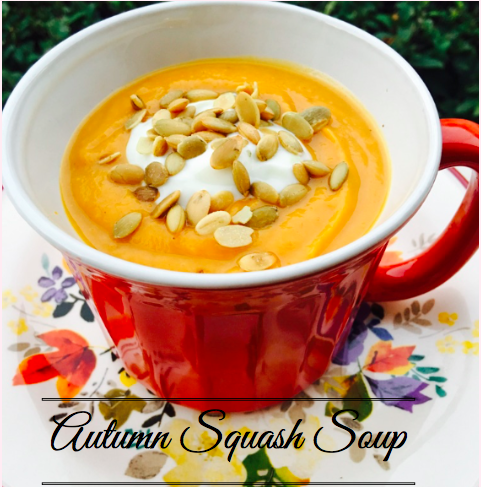
The soup is one of my absolute favorites that I get every. single. time. at Panera during the fall months…. Autumn Squash Soup. If you are not familiar with this soup, you must try it. It is so amazing! It is also Gluten Free which I love! This particular recipe is compiled of several different recipes that I created to make my own. It tastes just like the one at Panera! If you love this recipe don’t forget to pin it HERE.

Autumn Squash Soup

INGREDIENTS: 

1 Large Butternut Squash (Mine was about 3 pounds)

1 15oz. Can of Pumpkin Puree

2 Tablespoons Olive Oil

3 Tablespoons of Brown Sugar

1/2 Teaspoon Cinnamon

1/4 Teaspoon Nutmeg

1 1/2 Teaspoons of Sea Salt

1/4 Teaspoon of Pepper

1/4 Teaspoon Curry

1 Cup Apple Juice

2 Cups Vegetable Stock

1 1/2 Cups Half Half

Roasted Pumpkin Seeds and Sour Cream for Garnish

DIRECTIONS:

Peel the Butternut Squash, Remove seeds and Dice into Cubes. Place into a Baking Dish. Drizzle with Olive Oil, Sprinkle with Salt and Pepper and massage into the squash.

Bake in 400 oven for about 35 minutes or until Squash is fork tender.

Mash the Squash with a Potato masher or whatever tool you have on hand and place in a Ninja Blender (Or, you can place the Mash directly in the Stock Pot and use an Immersion Blender)

Add the canned Pumpkin Puree, Vegetable Stock, Apple Juice, Half and Half.

Place the Blender on High and Puree Until Silky Smooth.

Add the Brown Sugar, Curry, Cinnamon, Nutmeg, Salt and Pepper and place on Medium Heat until heated through.

Garnish with Pumpkin Seeds and Sour Cream.

Serve and Enjoy!

Gluten-Free Zucchini Muffins

(All posts may contain affiliate links or sponsored content. Please see my disclosure policy)  

I don’t know about you, but we love zucchini! I love to roast it, spiralize it, eat it raw, the list goes on and on! We also love a good Zucchini muffin so I was thrilled to come across this recipe that used Bob’s Red Mill Gluten-Free Baking Flour. If you have not yet tried this flour, it is the bomb! Seriously, it is the best-tasting gluten-free flour out there. I love that it can be used in any of your regular recipes as it measures 1 to 1 for baking flour. 

These zucchini muffins are so delicious and you will want to make them again and again! I have made them now 3 times and every time they are devoured by my entire family! 

Zucchini Muffins

Recipe adapted from Bob’s Red Mill recipes 

Ingredients

Instructions

Preheat the oven to 350 degrees. Line

online pharmacy order wegovy online with best prices today in the USA

muffin pan with liners or spray with oil.

In a large bowl, sift together the flour, sugar, baking soda, cinnamon and salt. In a separate bowl, mix together the eggs, almond milk, apple cider vinegar and vanilla. Using a stand or hand mixer, slowly add in the wet ingredients to the dry just until combined. Add in the stick of butter until combined then mix in the shredded zucchini. Divide the batter into the prepared muffin tin, sprinkle each muffin with 1/2 tsp turbinado sugar and bake around 25-30 minutes or until a toothpick inserted in the center comes out clean.

Enjoy! You won’t be able to eat just one, I promise! 

Gluten-Free Zucchini Muffins

(All posts may contain affiliate links or sponsored content. Please see my disclosure policy)  

I don’t know about you, but we love zucchini! I love to roast it, spiralize it, eat it raw, the list goes on and on! We also love a good Zucchini muffin so I was thrilled to come across this recipe that used Bob’s Red Mill Gluten-Free Baking Flour. If you have not yet tried this flour, it is the bomb! Seriously, it is the best-tasting gluten-free flour out there. I love that it can be used in any of your regular recipes as it measures 1 to 1 for baking flour.

These zucchini muffins are so delicious and you will want to make them again and again! I have made them now 3 times and every time they are devoured by my entire family!

Zucchini Muffins

Recipe adapted from Bob’s Red Mill recipes

Ingredients

Directions

Preheat the oven to 350 degrees. Line muffin pan with liners or spray with oil.

In a large bowl, sift together the flour, sugar, baking soda, cinnamon and salt. In a separate bowl, mix together the eggs, almond milk, apple cider vinegar and vanilla. Using a stand or hand mixer, slowly add in the wet ingredients to the dry just until combined. Add in the stick of butter until combined then mix in the shredded zucchini. Divide the batter into the prepared muffin tin, sprinkle each muffin with 1/2 tsp turbinado sugar and bake around 25-30 minutes or until a toothpick inserted in the center comes out clean.

Enjoy! You won’t be able to eat just one, I promise!

Quick and Easy Cuban Pork Sliders Made with Smithfield Pork #RealFlavorRealFast

This is a sponsored post written by me on behalf of Smithfield® Marinated Fresh Pork. The opinions and text are all mine. #RealFlavorRealFast

I can hardly believe that it is almost time for school to begin! I am not quite sure where the summer has gone, but alas, it is once again time to get back into a routine of prepping, planning and preparing easy weeknight dinners.

Since both of my boys will be in school full-time this year and they are involved in many extracurricular activities, it is especially important to me that I have easy and delicious meals on the table that require little effort but that provide real flavor, real fast. Easy and delicious meals will ensure that we have just a few more minutes in our day to enjoy as a family all while going about the hustle and bustle of everyday life.

One of my favorite items to prepare for quick and delicious dinners are Smithfield Marinated Fresh Pork products purchased right in the fresh meat section at my local Safeway store. Smithfield Marinated Fresh Pork allows me to get dinner on the table in 30 minutes or less any night of the week. These products are also super versatile as they can be grilled, roasted, sautéed or slow cooked. In addition, they are already marinated which means that they are packed full of scrumptious flavor.

My Safeway store had a wide variety of Smithfield Marinated Fresh Pork products, so it was hard for me to decide on just one! When I saw the Smithfield Roasted Garlic and Herb Pork Loin Filet, I knew right away that it was the one! This product is dry rubbed and marinated with garlic, onion powder, spices and natural smoke. Smithfield delivers real flavor, real fast right to my table any night of the week.

Sliders and sandwiches are always a fun and easy dinner and one that my boys will devour any day of the week. With the Smithfield Roasted Garlic and Herb Pork Loin Filet, I was able to create a delicious Cuban pork slider that reminded us of our vacation last summer in South Florida.

The Cuban Pork Slider created with Smithfield Roasted Garlic and Herb Pork Loin Filet was definitely a winner at my house! I first cooked the Smithfield pork in the slow cooker, which made it so tender and delicious! Using the slow cooker with the already marinated Smithfield pork saves you even more time in the kitchen, and you have a delicious meal on the table in just minutes!

Smithfield Roasted Garlic and Herb Pork Loin Filet Cuban Pork Sliders

Ingredients:

Smithfield Roasted Garlic and Herb Pork Loin Filet

12 slider buns

12 small pieces of deli ham

12 small pieces of Swiss cheese

12 pickles

Mustard

Directions:

Place the Smithfield Pork Loin Filet in a slow cooker for 4-6 hours on low. You will want to ensure that the meat is cooked through to 145 degrees Fahrenheit. Slow cooking the Smithfield Roasted Garlic and Herb Pork Loin Filet allows the flavors to really distribute throughout the meat and it becomes so tender and juicy!

Remove the pork from the slow cooker and let it rest on a cutting board while you set out the other items for the sliders. Slice the pork into medium sized medallions to place on the sliders.

Place a couple of pork medallions onto a slider bun and assemble the rest of the slider with ham, Swiss cheese, pickles and mustard. Voila! You have the perfect Cuban Pork Sliders! This quick and easy dish is sure to be one of your new family favorites and one that you will reach for again and again!

When you use Smithfield Marinated Fresh Pork products, there is no need for marinades or rubs, as the meat is already pre-seasoned. This ensures that you receive real flavor, real fast and that you have a meal on the table the entire family will love!

Do you have a delicious recipe that you would like to share? Smithfield is also challenging you to submit your tips on how to get dinner on the table in 30 minutes or less using Smithfield Marinated Fresh Pork. Head over to www.SmithfieldRealFlavorRealFast.com for all the details. Submit an original recipe for a chance to win great prizes!

Easy Sesame Chicken

 (All posts may contain affiliate links and/or sponsored content. Please see my disclosure policy

Are you looking for a yummy chicken dish that tastes just like your favorite takeout? Easy Sesame Chicken is absolutely delicious! Not only will you save money by making your own takeout, but this dish is very easy to prepare as well! My guys devoured this dish and there were no leftovers!

(recipe adapted from Budget Bytes)

INGREDIENTS: 

Chicken:

1 large egg

2 Tbsp cornstarch

Salt & pepper to taste

1 lb. boneless skinless chicken thighs

2 Tbsp veg. oil for frying the chicken


Sauce:

4 Tbsp soy sauce 

2 Tbsp water 

1 Tbsp toasted sesame oil 

3 Tbsp brown sugar 

3 Tbsp rice wine vinegar 

2 inch fresh ginger, grated 

2-3 cloves minced garlic 

2 Tbsp sesame seeds 

1 Tbsp cornstarch 


For Serving:

Chopped green onions for garnish

Hot jasmine rice to serve the chicken on top of 

Extra sesame seeds


DIRECTIONS:

In a large bowl, whisk together the egg, 2 Tbsp cornstarch, salt and pepper. Cut chicken thighs into 1 inch pieces. Toss the chicken in the egg and cornstarch mixture.

Heat a large skillet or wok with 2 Tbsp of vegetable oil over medium-high heat. When the oil is very hot, add the chicken and all of the egg mixture. Cook the chicken, stirring only occasionally, until it is golden brown and cooked through (about 7-10 minutes). 

While chicken is cooking, prepare the sauce. In a small bowl stir together the soy sauce, water, sesame oil, brown sugar, rice vinegar, fresh ginger, minced garlic, cornstarch, and sesame seeds. 

After chicken is cooked through and golden brown, pour the sauce over top. Toss the chicken to coat in the sauce. The sauce should begin to thicken as soon as it hits the hot skillet. Once the chicken is coated and the sauce thickened, turn off the heat.

Serve over hot jasmine rice and sprinkle with chopped green onions and additional sesame seeds if you prefer.

Enjoy!