Posts made in February 2020

Mickey Mouse Personal Pizzas

(All posts may contain affiliate links or sponsored content. Please see my disclosure policy)

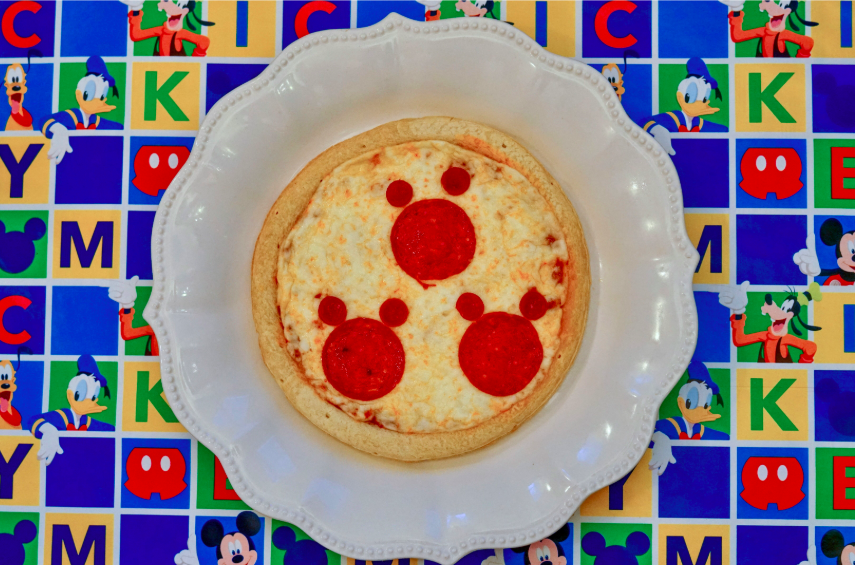
Does your family do pizza night? These Mickey Mouse Personal Pizzas are going to a be a fun addition to your weekly pizza festivities! They are super easy to make and everyone is sure to love them!

Mickey Mouse Personal Pizzas

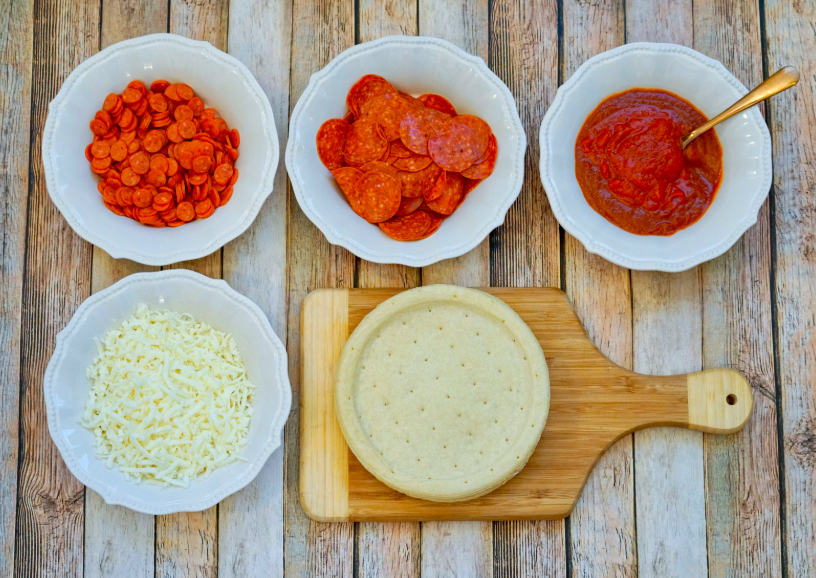
Ingredients 

  • Mini Pizza Crusts
  • Pizza Sauce
  • Mozzarella Cheese
  • Pepperoni 
  • Mini Pepperoni 

Instructions

  1. Pre-heat the oven to 350 degrees.
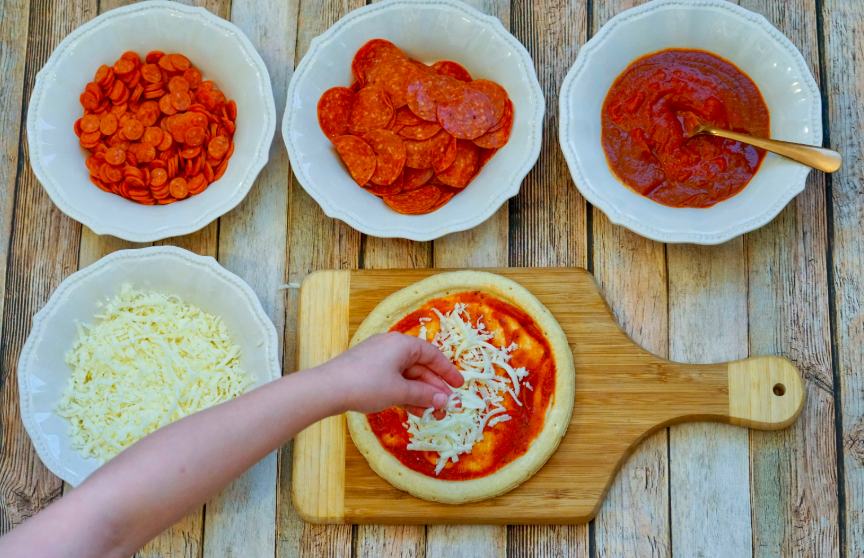
  2. Spread pizza sauce over the pizza crust.
  3. Sprinkle with mozzarella cheese.
  4. Take a pepperoni and two mini pepperoni and create Mickey heads all over the pizza.
  5. Place in the oven and cook for 8-10 minutes or until cheese is fully melted.
  6. Serve & enjoy!

Best Buy: HP 14″ Laptop Only $200 Shipped! (reg. $300)

(All posts may contain affiliate links or sponsored content. Please see my disclosure policy)

Wow! If you need a new laptop for yourself or the kiddos, this is a fantastic deal from Best Buy. Today only you can pick up the HP – 14″ Laptop – AMD A9-Series – 4GB Memory – AMD Radeon R5 Graphics – 128GB Solid State Drive for just $200 + tax shipped! (reg. $300)

Runs the latest Windows operating system

Includes Windows 10 Home in S Mode, to do the things you want with protection you can count on and performance that lasts.

14″ display

BrightView glossy screen maintains the vivid colors in your photos and videos. Typical 1366 x 768 HD resolution. WLED backlight.

4GB system memory for basic multitasking

Adequate high-bandwidth RAM to smoothly run multiple applications and browser tabs all at once.

Solid State Drive (PCI-e)

Save files fast and store more data. With massive amounts of storage and advanced communication power, PCI-e SSDs are great for major applications, multiple servers, daily backups, and more.

AMD Radeon R5

Integrated graphics chipset with shared video memory provides solid image quality for Internet use, movies and basic photo editing.

Weighs 3.24 lbs. and measures 0.8″ thin

Ultrathin and ultralight for maximum portability, featuring a smaller screen size and omitting the DVD/CD drive to achieve the compact form factor. 3-cell lithium-ion battery.

HDMI output expands your viewing options

Connect to an HDTV or high-def monitor to set up two screens side by side or just see more of the big picture.

Built-in media reader for simple photo transfer

Supports SD memory card formats.

Wireless/Wired connectivity (WiFi 4 – 802.11 b/g/n)

CBuilt-in high-speed wireless LAN connects to your network or hotspots on the most common Wi-Fi standards. The Gigabit Ethernet LAN port also plugs into wired networks.

Built-in HP TrueVision HD webcam with dual-array digital microphone

Makes it easy to video chat with family and friends or teleconference with colleagues over Skype or other popular applications. Automatically adjusts for available light.

Basic software package included

30-days trial of Microsoft Office 365.

Additional port

Headphone/microphone combo jack.

Elbow Sleeve Ruffle Tee Dress Only $11.98 Shipped! (over 10 color options)

(All posts may contain affiliate links or sponsored content. Please see my disclosure policy)

This is one of my favorite dresses ever from Jane! Thank you to my friend Natalie for telling me it is back! The Elbow Sleeve Ruffle Tee Dress is a staple in my wardrobe and is so versatile! I have never seen it priced before at $7.99, so at this price, grab several colors! It is available in over 10 beautiful color options and in sizes S-3X! Add a jean jacket, scarf or cardigan and you have an adorable outfit that can take you from day to evening! Shipping is $3.99 for the first item and $1.99 for additional items.

Rotisserie Chicken Lettuce Wraps

(All posts may contain affiliate links and/or sponsored content. Please see my disclosure policy)

If you are searching for some quick and healthy lunch ideas, these Rotisserie Chicken Lettuce Wraps are the perfect solution! They couldn’t be easier to prepare, and they are so delicious! 

Rotisserie Chicken Lettuce Wraps

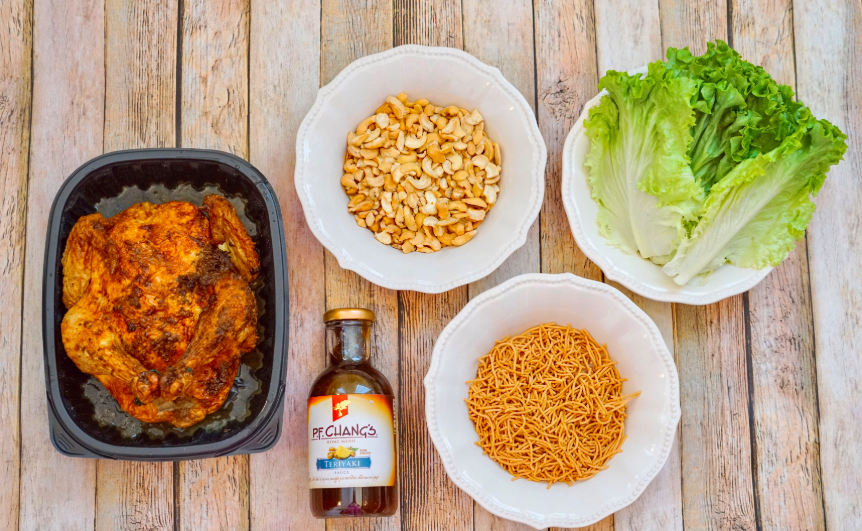
Ingredients 

  • 1 Rotisserie Chicken 
  • Cashews
  • Crunchy Chow Mein Noodles 
  • Teriyaki Sauce
  • Leaf or Romaine Lettuce 

Directions

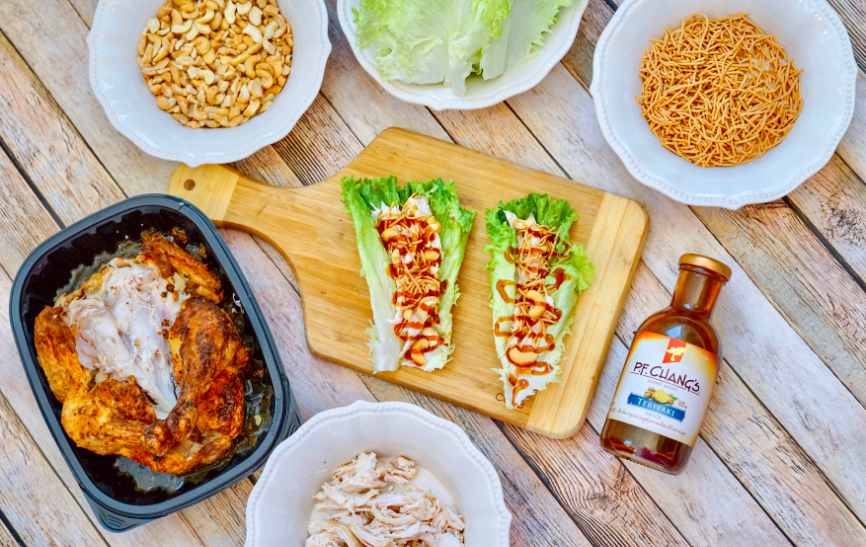
  1. Remove skin from rotisserie chicken and shred the chicken. 
  2. Break apart lettuce and lay each leaf out on a flat surface. 
  3. Add shredded chicken.
  4. Sprinkle chow mein noodles & cashews on top of the chicken.
  5. Drizzle with teriyaki sauce.
  6. Serve & enjoy! I love to serve these with a fresh fruit salad! 

Sam’s Club & Costco Membership Deals

(All posts may contain affiliate links and/or sponsored content. Please see my disclosure policy)

If you have been wanting to join Sam’s Club or Costco, these awesome membership deals are still available!

Sam’s Club

If you are still looking to join Sam’s Club in 2020, this is a fabulous deal! Right now when you join for $45 you will score FREE $45 back in Instant Savings! $45 offer* is an Instant Savings** offer and loads directly onto your membership card within 72 hours of joining. This offer expires 60 days after membership activation.

GO HERE to see more details and to take advantage of this offer.

Costco

If you are looking for a Costco Membership deal, then you need to take advantage of this rare offer!

Right now when you sign up for a Gold Star Membership, you will receive a $10 Costco Shop Card. If you sign up for a Gold Star Executive Membership, you will receive a $20 Costco Shop Card. 

Here is how to take advantage of this offer:

  1. GO HERE to sign up for the membership of your choice (choose from the options listed above)
  2. You will receive your Costco Membership Activation Certificate to the email that you sign up with. 
  3. Bring your Costco Membership Activation Certificate to any U.S. or Puerto Rico Costco location to join as a new member.
  4. Enjoy your savings!

Creating the Perfect Nursery

(All posts may contain affiliate links or sponsored content. Please see my disclosure policy)

Creating a nursery is so much fun, but no matter how prepared you feel, it’s hard knowing where to start. When I was creating Brady’s nursery, I had no idea where to start. There are so many things that you are supposed to buy, so many things that you are supposed to do, and it can be very overwhelming. If you are in the same boat when it comes to creating a nursery for your bundle of joy that is on the way, keep reading. Here are a few ways that you can create a special and perfect nursery for your bundle:

Consider Your Space

First of all, you absolutely need to consider your space. What do you have room for? When it comes to creating a nursery (especially if it is your first one), it is very important to crawl before you can walk, no pun intended. Make sure you are not getting too carried away with all of the crazy things that you see on Pinterest and instead, focus on what is practical and what you can fit in your space.

The first thing you need to consider, like I mentioned, is the amount of available space that you have. You do not want the room to look too cluttered, so you might have to cut back on some of the non-essentials and only choose essential items, such as a crib, a recliner or rocker, and a dresser/changing table.

My favorite way to help yourself out with this process is by creating a tentative floor plan. Draw a rough outline of the room and then pencil in each piece of furniture. Of course, sizing will probably be off, but this gives you a great start before you actually take the time to measure.
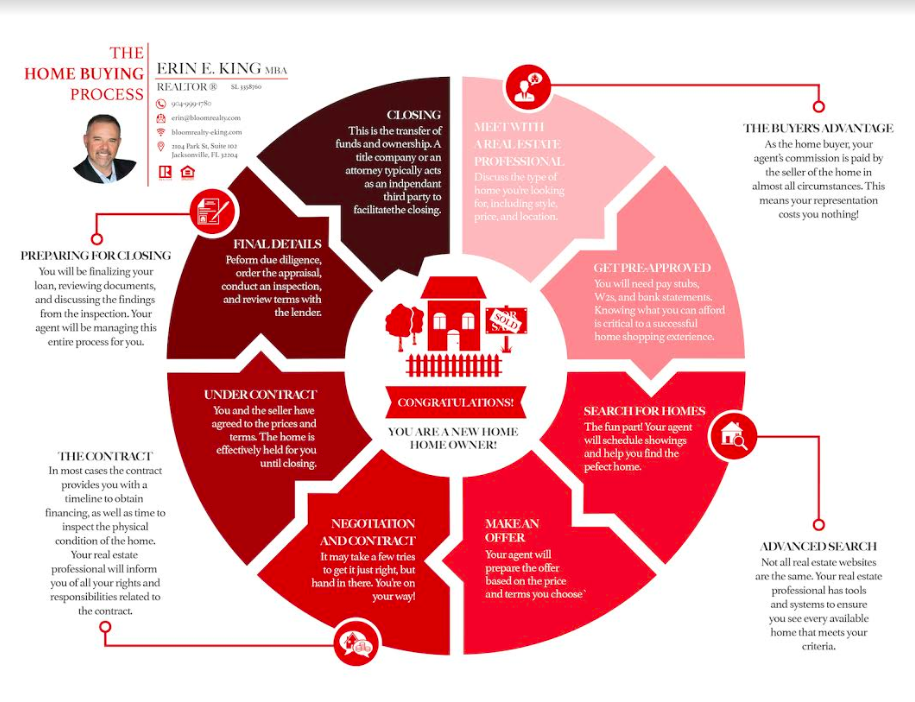
However, you do not have to consider your space if you are moving, which a lot of couples choose to do when finding out that they are having a baby. If this sounds like your situation, make sure that you are making sure that the home works for you now and in the future, as well. So, look at the nursery size, consider the number of bathrooms and what is in the bathrooms (is the tub safe, etc.), will the home have a playroom, etc. Tell your real estate agent that you are expecting and need a home that is safe for your baby-to-be. The reason why you need to be so specific with your wants and needs is because “purchasing a property is most likely the biggest financial decision you will ever make. Whether this is your first purchase or you are an experienced buyer, this decision must be made carefully,” according to Erin King with Jax Historic Realty. “Erin, who previously worked in financial services and holds an MBA with an economics focus, brings a deep understanding of buying and selling historic homes. He enjoys sharing that knowledge with clients, from how to fit a 21st century lifestyle into a historic home and where to seek financing for renovation with a home purchase, to accurately pricing homes in Historic Districts such as Riverside, Avondale, Ortega, Springfield, Murray Hill, and San Marco. Erin, who prides himself on close attention to detail and quick response to clients, has put together a support team of contractors and other professionals who help transactions go smoothly.” So, no matter if you are looking for old homes for sale in San Marco, or a new build, talk with Erin, or your personal real estate agent to make sure that you are getting what you need for your growing family.

Choose A Color Palette

Next up: choose a color palette! This is a really fun part. Do you know that you are having a girl? Maybe you will go with a blush pink color, or periwinkle blue with a hint of purple in it. If you are having a boy, consider a gorgeous light blue color, or maybe an emerald green accent wall. There are so many colors to choose from and this just makes the process very real and fun. When you do choose a color palette, consider the nursery furniture, your flooring, and any ‘unchangeable’ items first. Then, you can choose all of the colors for the walls and decor options. My friend, Alex, chose to go with all neutrals: white, cream, and light beige, with just a few pops of light blush. I think that is a beautiful color palette for her first baby girl. Plus, it is simple enough to last a while.

Know Your Needs vs. Wants

Any new mom or dad is going to go a little crazy and that is okay, but definitely take the time to consider what is a need and what is a want, or you will end up with a very cluttered room, which is not so great or practical and it will only make your life harder in the long run. Diapers? Obviously that is a need. Wipes? Same. A cute unicorn jumpy house? Uhhh… maybe that is not so practical, especially not for a newborn. You get the point! What is a need vs. a want is somewhat similar for everyone, but it is also based on what will make your life easier as a parent. There is no right or wrong way to parent and you just need to see what works best for you! 

Add Personalized Touches

Last but not least, add personalized touches. Have you picked out a name yet? Maybe consider adding it above her or his crib. Do you have a special blanket picked out? Maybe embroider his or her name on the blanket. This is not only a cute touch, but also a great keepsake to have in the future. There are so many ways to add personalized touches to a nursery and in my opinion, it is the best part, so have fun with it.
Doritos Casserole

(All posts may contain affiliate links or sponsored content. Please see my disclosure policy)

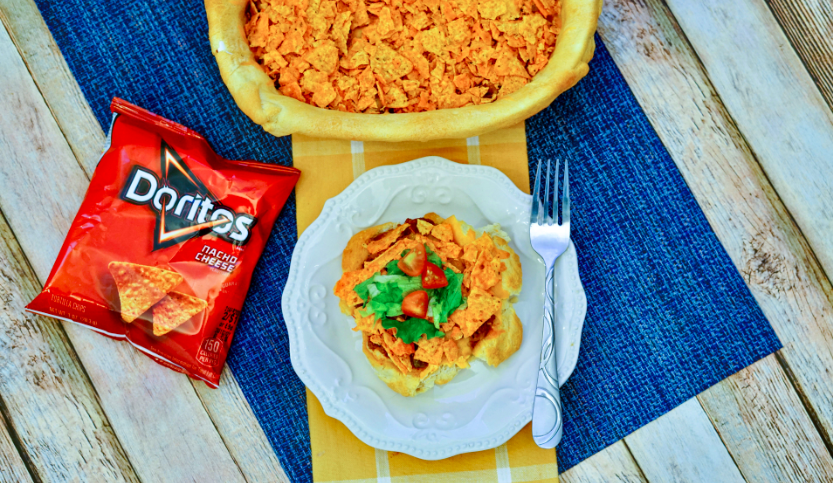
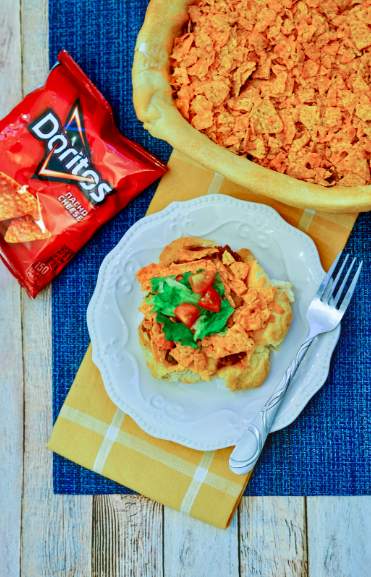
If you are like me and love both Doritos and Tacos, this recipe for Doritos Casserole is going to be your new fave! It couldn’t be easier to prepare, so if you are on a time crunch for Taco Tuesday night, this is sure to be a favorite go-to meal!

Ingredients 

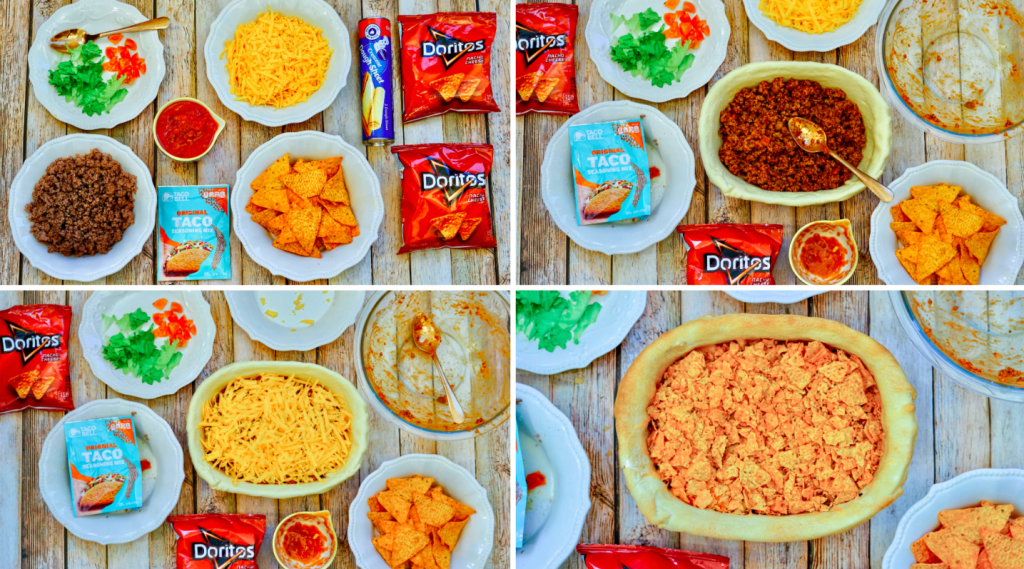
  • 1lb. Browned Ground Beef 
  • 1 Packet Taco Seasoning
  • 8oz. Shredded Cheddar Cheese
  • 1/2 Cup Salsa
  • 8oz. tube of Crescent Rolls 
  • Doritos 

Instructions:

  1. Preheat oven to 350 degrees.
  2. In a casserole dish, unroll and lay flat one package of crescent rolls, pinching any seams shut.
  3. In a mixing bowl, pour in ground beef, salsa and taco seasoning. Mix well.
  4. Spread ground beef mixture over the crescent roll crust.
  5. Sprinkle cheddar cheese on top and bake for 25-30 minutes or until crescent roll crust is fully cooked.
  6. Take casserole out of the oven. 
  7. Sprinkle with crush Doritos.
  8. Garnish with any of your favorite toppings. I especially love black olives, sour cream and cilantro for an extra touch! 
  9. Serve & enjoy. Your family is going to love this one I promise! 

Get $50 to Spend at Stitch Fix!

(All posts may contain affiliate links or sponsored content. Please see my disclosure policy)

Have you been wanting to give Stitch Fix a try? I have some exciting news! Right now when you sign up through the link HERE you will get $50 to spend at Stitch Fix! Typically you only receive $25 to sign up, so this is such a great offer! There really is nothing to lose with this awesome offer!

What is Stitch Fix?

Stitch Fix is a personalized shopping service that provides you with clothing and accessories all without leaving your house. You fill out an online profile with your detailed information. You are then provided with a stylist who will handpick 5 clothing/accessory items for you based on your profile. This will include budget, style, etc…. I love how each fix includes a detailed paper with your items and ways that you can style them. This really takes the guess work out of styling if you are not sure now to wear the items. Stitch Fix is for Women (including Maternity), Men and now Kids!

How Much is Stitch Fix?

The initial Styling Fee for Stitch Fix is $20. BUT, this $20 fee can be applied as a credit towards any items that you decide to keep in your shipment. If you decide to keep nothing, then you will lose the $20. The overall amount that you spend will depend on the items in your fix. The prices can vary on items as you can set a budget when you take your Style Profile. IF you decide to keep all 5 items in your shipment, you will save 25% off your entire order! I always set my budget to a low amount and the pieces that I have gotten have been amazing!

Pros & Cons of Stitch Fix:

I think that Stitch Fix would be a great idea for a busy working professional or mom that doesn’t have time to shop for herself. I also love that you can customize when you want to receive your fix. You don’t have to receive each month, but rather you can delay shipments if you choose to do so.

Stitch Fix currently carries women’s, men’s and kids sizes so there is something for every member of your family!

You have 3 days to return the items that you don’t want. You are sent a Pre paid mailer with your order so that you can just drop your items into the mail. Easy peasy!

One of the most important things to remember with Stitch Fix is to really show your stylist your personality and style. Filling out that Style Profie is crucial! One of my friends told me to share my Fashion Pinterest boards with my styist as that can help! Tell your stylist what you like, don’t like. I need to be even more detailed on my Style Profile for this next shipment! 

GO HERE to give Stitch Fix a try! Please leave a comment if you already use Stitch Fix and let me know your thoughts!

Valentine’s Day M&M Cake Mix Bars

(All posts may contain affiliate links or sponsored content. Please see my disclosure policy)

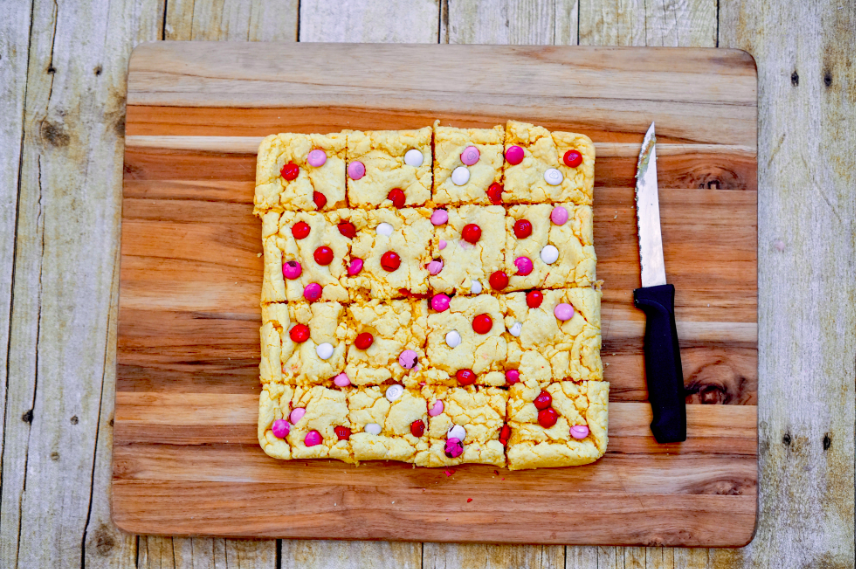
Valentine’s Day is this week! If you need an easy and fun dessert idea for your kids or sweetie, these Valentine’s Day M&M Cake Mix Bars couldn’t be quicker to whip up! This recipe can also be made Gluten Free by using a GF cake mix. 

Ingredients:

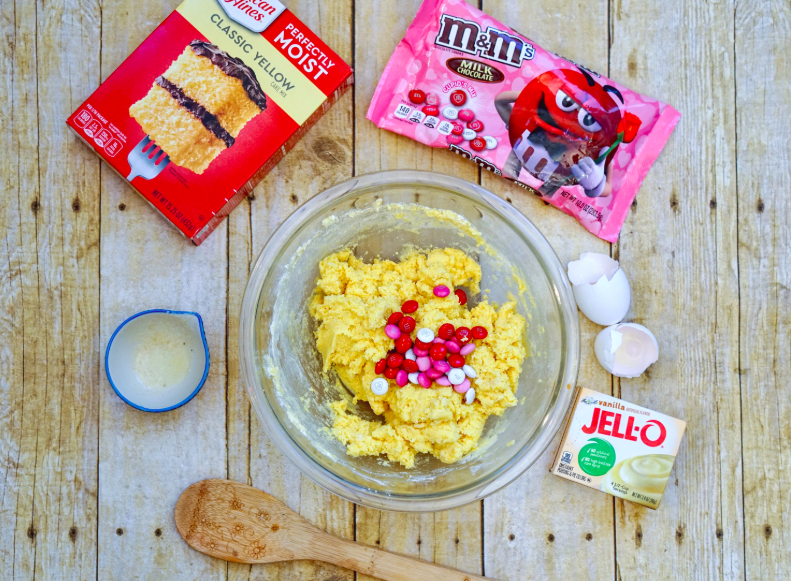
15oz Yellow Cake Mix

2 Eggs

1/2 Cup Valentine’s M&M

3.4oz Vanilla Pudding 

1/3 Cup Melted Butter

Instructions: 

  1. Preheat oven to 350 degrees.
  2. Pour yellow cake mix and pudding into a large mixing bowl.
  3. Crack two eggs.
  4. Add melted butter.
  5. Mix well. 
  6. Let sit for a minute to let the mixed butter cool down. 
  7. Add M&M’s. If you do not wait until the butter has cooled down, the chocolate will melt.
  8. Add to nonstick pan and cook for 12-15 minutes at 350 degrees.
  9. Serve & enjoy! 

Heart Shaped Cinnamon Rolls

(All posts may contain affiliate links and/or sponsored content. Please see my disclosure policy)

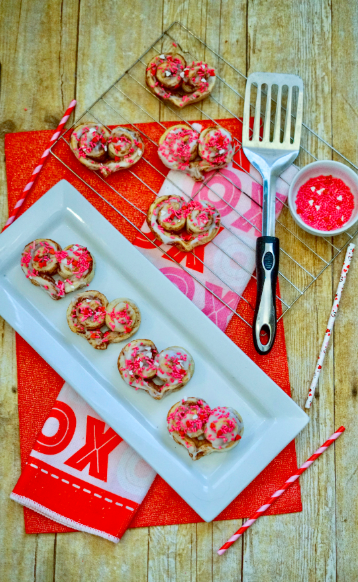
Valentine’s Day is almost here! I love this day as it is such a fun time to share our love for all of our family and friends. Who can resist sharing their love and affection with sweet treats and baked goods? You will especially be loved after you serve these adorable Heart Shaped Cinnamon Rolls! They are not only super easy to make, but you will be a rockstar with your kiddos if you serve these on Valentine’s Day morning!

Heart Shaped Cinnamon Rolls

Ingredients: 

2 Cans Cinnamon Rolls. (Be sure to buy the ones that can be rolled out. Most store brands and the large Pillsbury Grands should work)

​Valentine Sprinkles (there are some great options HERE)

Additional colored icings- this is optional

Instructions: 

Pre-Heat the oven to 400 degrees.

Unroll the Cinnamon Rolls.

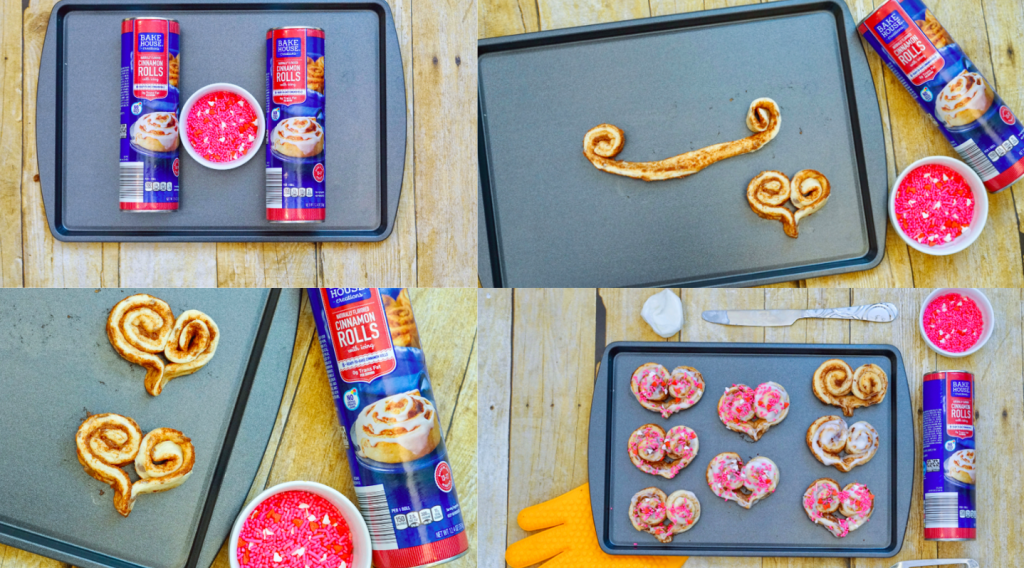
Take both corners of the Cinnamon Rolls and start rolling them to the middle. Once you reach the middle, pinch the bottom to make a point. Make sure to pinch together really good so that the dough will stay together when baking. 

Cook for 8-10 minutes. The Cinnamon Rolls cook rather quickly when rolled like a heart, so keep an eye out for them!

Once the Cinnamon Rolls have finished baking and have fully cooled, you can start frosting and decorating. Use various kinds of sprinkles and other colored frosting if wanted to decorate as you wish. 

Serve and Enjoy!